


Create a Custom Detection
Preview Feature
Cribl is still developing this Preview feature. We don’t recommend using it in a production environment, because the feature might not be fully tested or optimized for performance, and related documentation could be incomplete.
Access requires App Platform, the Cribl Detect feature, and a Role that grants
Apps.Readaccess to the Cribl Detect app.Please continue to submit feedback through normal Cribl support channels, but assistance might be limited while the feature remains in Preview.
You can create a detection when Templates doesn’t have the coverage you need and you don’t want Detection Lab to generate one from a CVE. A four-step wizard walks you through the rule’s metadata, logic, outcome, and final review.
As part of the creation process, you’ll select a detection type.
- A Single-Event Detection evaluates eligible events in the Cribl Search processing pipeline before storage.
- A Correlation Detection runs after storage in Cribl Search against lakehouse engine data.
For more details, see Detection Types.
Create the Detection
- In Cribl Detect, go to Detections.
- Select Add Detection.
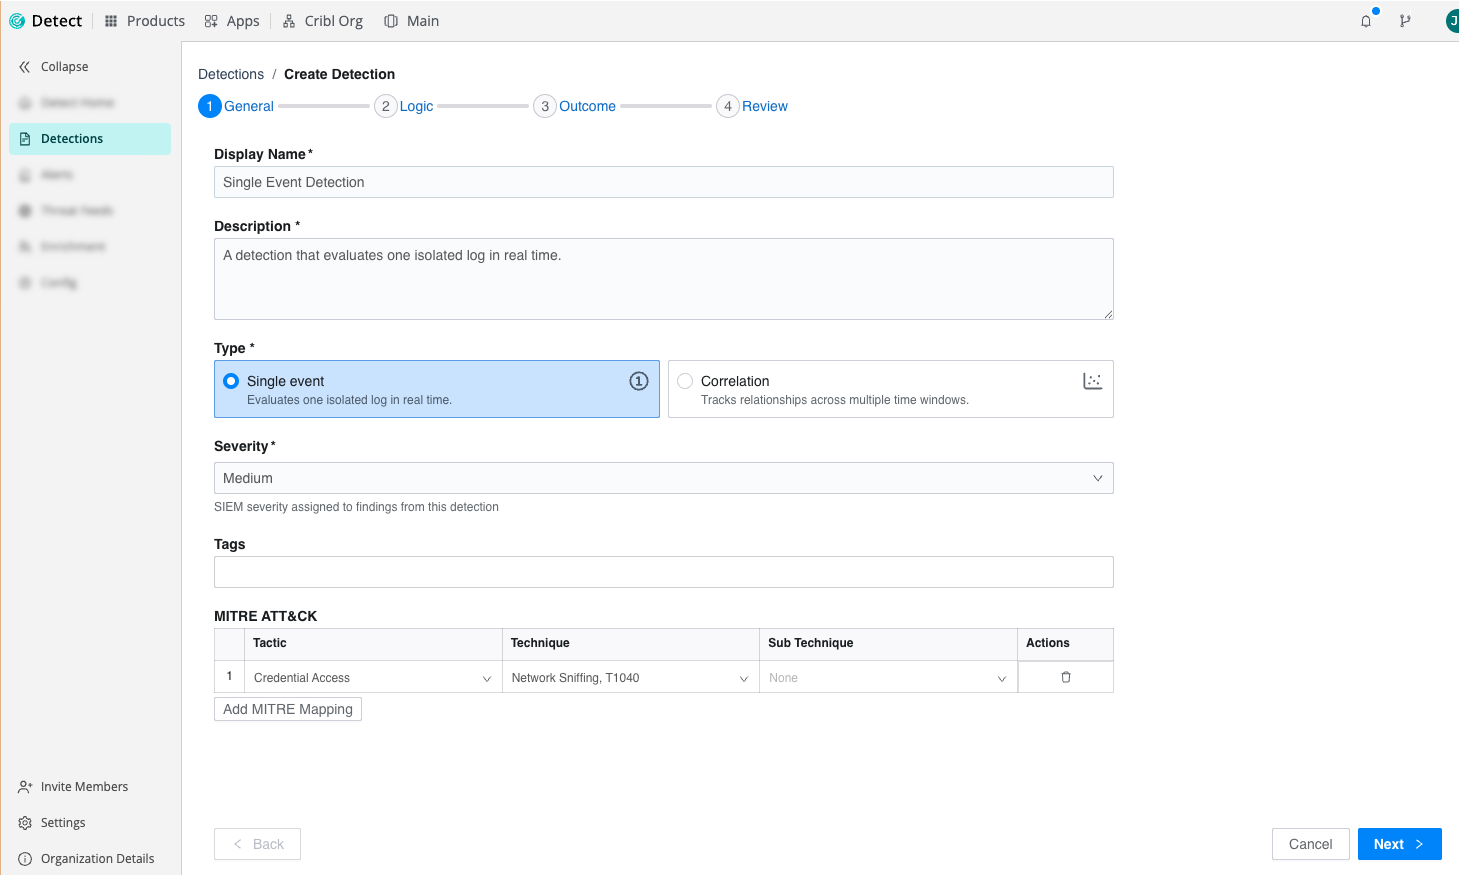
The create form tracks your progress through General, Logic, Outcome, and Review.
If you start from a template, the wizard opens with the template values filled in. See Create a Detection from a Template.
General Settings
Enter the metadata Cribl Detect uses to identify, group, and filter the detection:
| Field | Required | What to enter |
|---|---|---|
| Display Name | Yes | A unique name for the detection. |
| Description | Yes | A useful description of what the detection looks for. |
| Type | Yes | Single event (default) evaluates eligible events in the Cribl Search processing pipeline before storage. Correlation tracks relationships across multiple time windows. |
| Severity | Yes | The severity assigned to findings from this detection: Informational, Low, Medium (default), High, or Critical. |
| Tags | No | Labels you use to group and filter detections. |
| MITRE ATT&CK | No | ATT&CK mappings for the detection. |
To map the detection to ATT&CK, select Add MITRE Mapping, then choose a Tactic, Technique, and optional Sub Technique. Add a row for each mapping, and use the delete action to remove one.
If a required field is incomplete when you select Next, the wizard returns you to the first step with an incomplete required field.
Logic Settings
Write and test the rule:
- Enter the Query. Use Kusto Query Language (KQL).
- Run the query over a time range to preview matching events.
- For a correlation detection, set the Schedule: how often the detection runs, and the time window it evaluates. You can set the schedule in minutes, hours, or days.
Single-event detections evaluate each event as it arrives, so the Logic step doesn’t show the Schedule for them, and the Review step doesn’t show the schedule or time window.
Outcome Settings
Configure the outcome settings for a match. Every match creates a finding. Create Alert is off by default. Turn it on to create alerts from matching findings. When Create Alert is on, Alert Title and Alert Description are required.
| Field | What it sets |
|---|---|
| Alert Title | The alert title, mapped to the OCSF finding_title. |
| Alert Description | The alert description, mapped to the OCSF finding_desc. |
| OCSF Finding Type | The finding class: Vulnerability, Compliance, Detection, Incident, Data Security, Application Security Posture, or IAM Analysis. |
| Validation steps | How a responder should confirm the finding. |
Observables map fields from your query results to OCSF types. Defining observables is optional. Select Add Observable, then pick a Field from Query and its OCSF Type.
Alert Suppression
Use alert suppression to stop a noisy detection from opening a new alert for every match during an ongoing incident, such as a brute-force attempt or a burst of failed logins. While suppression is in effect, matches still create findings, but Cribl Detect creates one alert per suppression window instead of one alert per match.
To configure suppression for the detection:
- Leave Enable alert suppression on to suppress repeated alerts. Alert suppression is on by default.
- Set Duration in minutes or hours. The default is 15 minutes.
- Optionally, under Suppression Keys, select Add Key and select one or
more observables:
- With no keys selected, Cribl Detect uses all observables as suppression keys.
- With keys selected, Cribl Detect suppresses per combination of their values. For example, selecting a user field and a host field creates one alert per distinct user and host pair per window.
Suppression keys come from the observables you defined for the detection, so add observables first. If the detection has no observables, Cribl Detect suppresses at the rule level: one alert per detection per window.
Templates that define suppression open in the wizard with those settings filled in.
The Notification Policies panel lists the policies that route alerts from this detection. When no policies exist, the panel says so. Create and edit policies under Alerts > Notifications, not in the wizard. See Notifications.
Review and Save the Detection
Review the detection, then save it. Cribl Detect adds it to Inventory, where you enable it when you’re ready for it to run.
Next Steps
- View Detections in Inventory: Enable, disable, or edit the detection.
- Browse Detection Templates: Create from a template instead.
- Generate Detections in Detection Lab: Generate detections from a CVE.
- Findings and Alerts: Review what enabled detections catch.