


Pipelines
Data matched by a given Route is delivered to a Pipeline. Pipelines are the heart of Cribl Stream processing. A Pipeline contains a logical sequence of Functions, which process data events and perform various operations. Functions are pieces of JavaScript code that Cribl Stream invokes on each event that passes through a Pipeline. Each Function performs some sort of processing action on data events.

Data flows from a Source into a Pipeline, where each Function processes the events in the order they appear. Once processing is complete, the data flows out of the Pipeline to a Destination. See How Pipelines Work for more information.
As with Routes, the order in which you list the Functions in your Pipeline matters. Cribl Stream evaluates the Functions in a Pipeline in top-down order.
While you are building or editing a Pipeline, you can use the Data Preview pane to preview and test the impact of Functions on your data. The Data Preview gives you confidence that your Pipeline configurations result in the intended output. If your data has a lot of metrics events, you can use the Metrics view to visualize metrics events while building your Pipeline. See Data Preview for more information.
Consider using Cribl Copilot Editor for help building data Pipelines. Instead of building a Pipeline manually, you can describe what you want to do with your data and Copilot Editor will generate a working Pipeline for you. See Create Pipelines Using Cribl Copilot Editor for more information.
Access and View Pipelines
To access Pipelines:
In the sidebar, select Worker Groups, then select a Worker Group.
On the Worker Groups submenu, select Processing, then Pipelines.
On a Single-instance deployment, select Processing straight from the Home submenu.
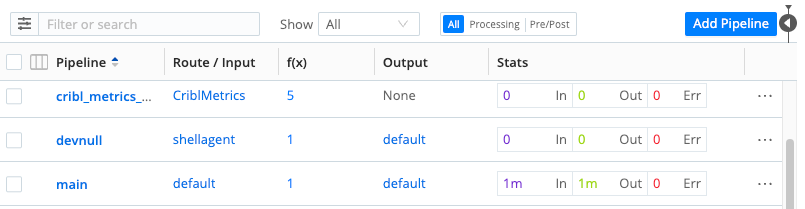
The Pipeline screen shows:
- A table listing your current Pipelines and provides information such as which Routes they are connected to. The Stats column of the table shows data for the last 15 minutes.
- The Data Preview pane. When you open a Pipeline, this pane adds a Pipeline Status tab, which you can select to see the Pipeline’s events throughput. See Data Preview for more information about using this pane to test and validate your Pipeline as you build it.
You can press the ] (right-bracket) shortcut key to toggle between the Preview pane and an expanded Pipelines display. (This shortcut works when no field has focus.)
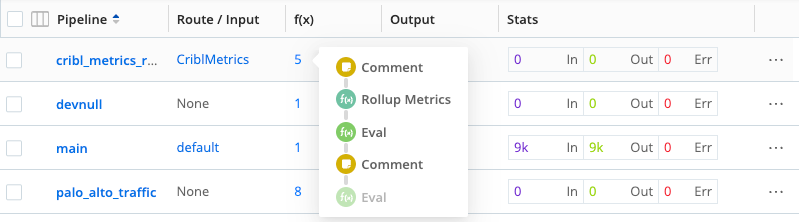
In the condensed Pipelines display, you can also hover over the Functions column for any Pipeline to see a vertical preview of the stack of Functions contained in the Pipeline:
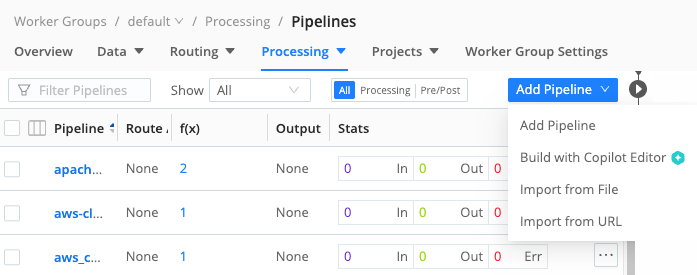
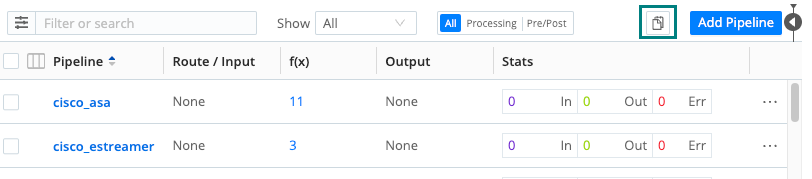
Add Pipelines
To create a new Pipeline, or to import an existing Pipeline to a different Cribl Stream instance, select Add Pipeline at the upper right. The resulting menu offers three options:
- Add Pipeline: Configure a new Pipeline from scratch, by adding Functions in Cribl Stream’s graphical UI.
- Add Pipeline with Cribl Copilot Editor: Use the Cribl Copilot Editor assistant to create a Pipeline using AI. See Create Pipelines Using Cribl Copilot Editor to learn more.
- Import from File: Import an existing Pipeline from a
.jsonfile on your local filesystem. - Import from URL: Import an existing Pipeline from
.jsonfile at a remote URL. This must be a public URL ending in.jsonbecause the import option doesn’t pass credentials to private URLs. Additionally, you must format the target file as a valid Pipeline configuration.
To export a Pipeline, see Advanced Mode (JSON Editor).
To import or export a Pipeline along with broader infrastructure (like Knowledge Objects and/or sample data files), see Packs.
Default Pipelines
Cribl Stream ships with a set of built-in default Pipelines that are created automatically in each Worker Group. These include:
devnullmainpassthruprometheus_metricscisco_asacisco_estreamerpalo_alto_trafficwineventlogscribl_metrics_rollup
These default Pipelines are managed by Cribl. Cribl Stream re-creates them from its default configuration when you create new Worker Groups, upgrade, or apply certain configuration bundles. As a result, they cannot be permanently deleted. Removing them in the UI only affects the current configuration copy, and they will reappear the next time defaults are re-applied.
For production, we recommend building your own custom Pipelines or using Pipelines provided by Packs, and simply not attaching the default Pipelines to any Routes or Destinations you don’t intend to use.
How Pipelines Work
Events are always delivered to the beginning of a Pipeline through a Route. The Stats column shows data for the last 15 minutes.
Within the Pipeline, events are processed by each Function, in order. A Pipeline will always move events in the direction that points outside of the system. This is on purpose, to keep the design simple and avoid potential loops.
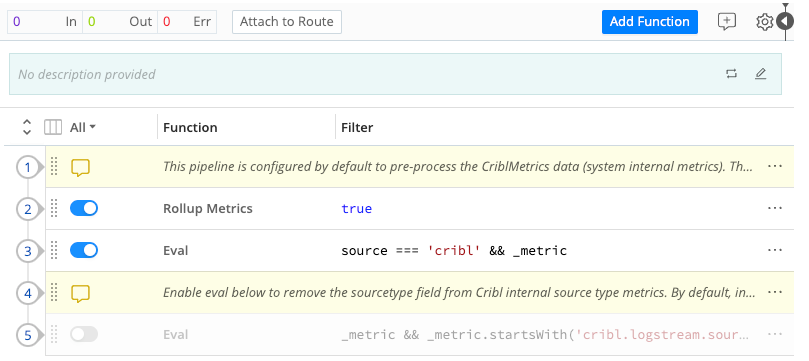
Use the Attach to Route link at the top to associate a new Pipeline with a Route.
You can streamline a complex Pipeline’s display by organizing related Functions into Function groups.
Pipeline Settings
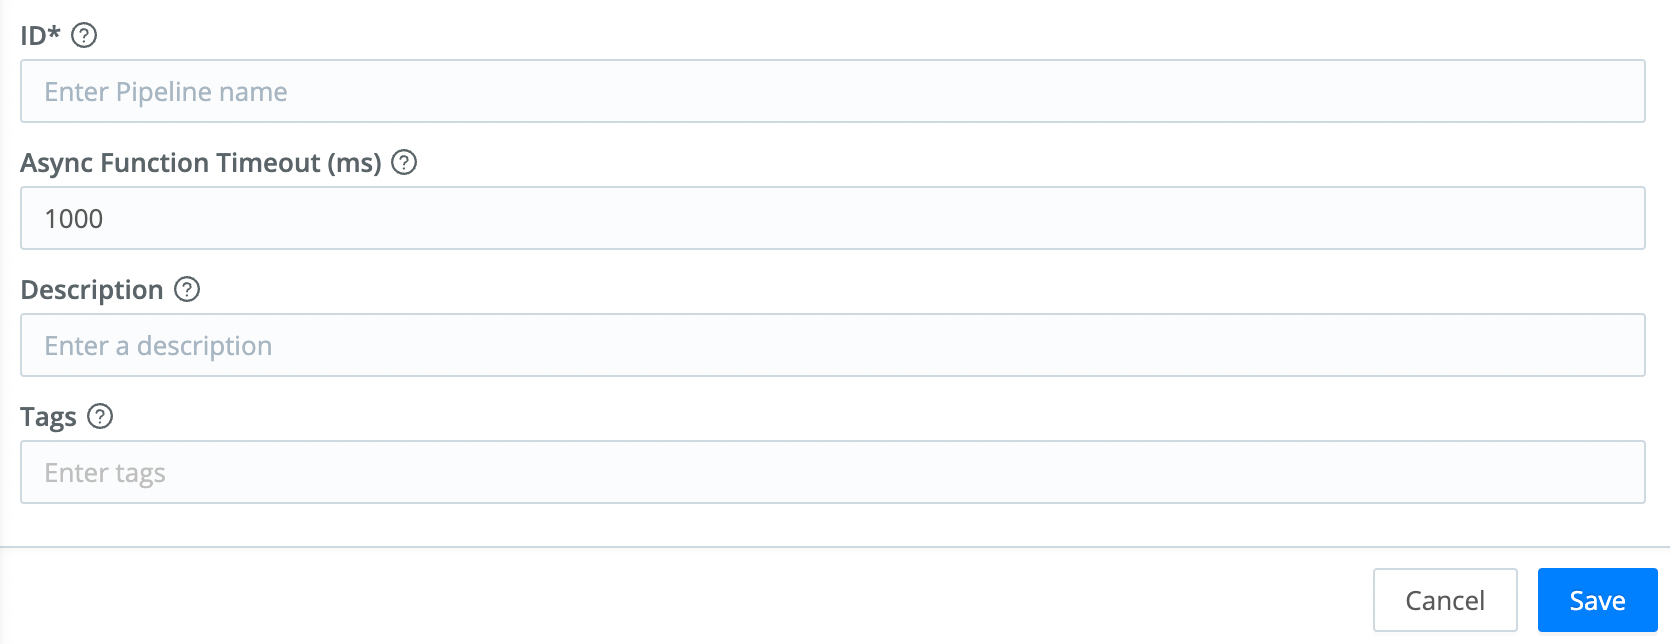
Select the gear button at the top right to open the Pipeline’s Settings. Here, you can:
Use the Async function timeout (ms) to set the maximum amount of processing time, in milliseconds, that a Function is allowed to take before it is terminated. This prevents a Function from causing undesirable delays in your Pipeline (for example, a Lookup Function taking too long to process a large lookup file).
Use the Tags field to attach arbitrary labels to the Pipeline. Once attached, you can use these tags to filter/search and group Pipelines.
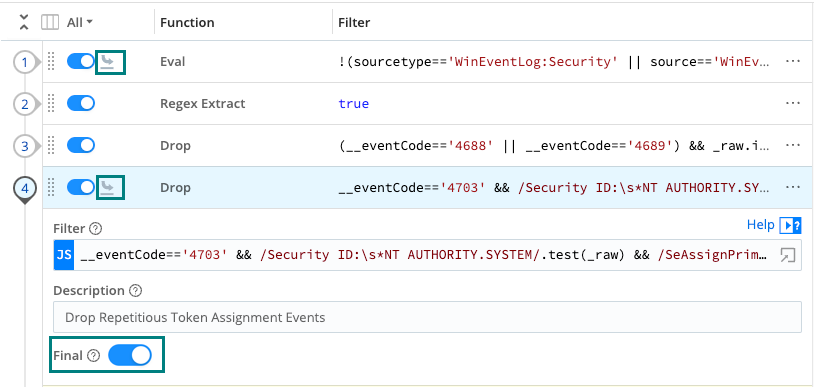
The Final Toggle
The Final toggle in Function settings controls what happens to the results of a Function.
When Final is toggled off (default), events will be processed by this Function, and then passed on to the next Function below.
When Final is toggled on, the Function “consumes” the results, meaning they will not pass down to any other Function below.
An icon in Pipeline view indicates that a Function is Final.
Advanced Mode (JSON Editor)
Once you’ve selected the gear button to enter Pipeline Settings, you can select Manage as JSON at the upper right to edit the Pipeline’s definition in a JSON text editor. In this mode’s editor, you can directly edit multiple values. You can also use the Import and Export buttons here to copy and modify existing Pipeline configurations, as .json files.
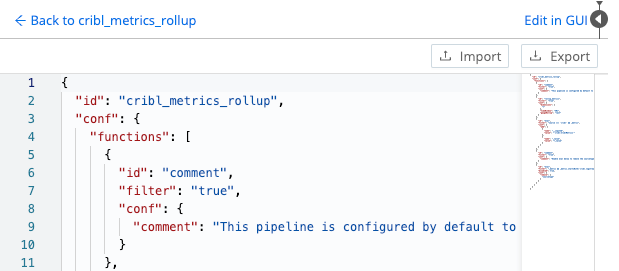
Select Edit in GUI at upper right to return to the graphical Pipeline Settings page; then select Back to <pipeline-name> to restore the graphical Pipeline editor.
Pipeline Actions
Select a Pipeline’s Actions (…) menu to display options for copying or deleting the Pipeline.
Copying a Pipeline displays a confirmation message and the (highlighted) Paste button shown below.
Pasting prompts you to confirm, or change, a modified name for the new Pipeline. The result will be an exact duplicate of the original Pipeline in all but name.
Chain Pipelines
You can use the Chain Function to send the output of a Pipeline to another Pipeline or Pack. There are scope restrictions within Packs, and general guardrails against circular references.
Types of Pipelines
You can apply various Pipeline types at different stages of data flow. All Pipelines have the same basic internal structure (a series of Functions) - the types below differ only in their position in the system.
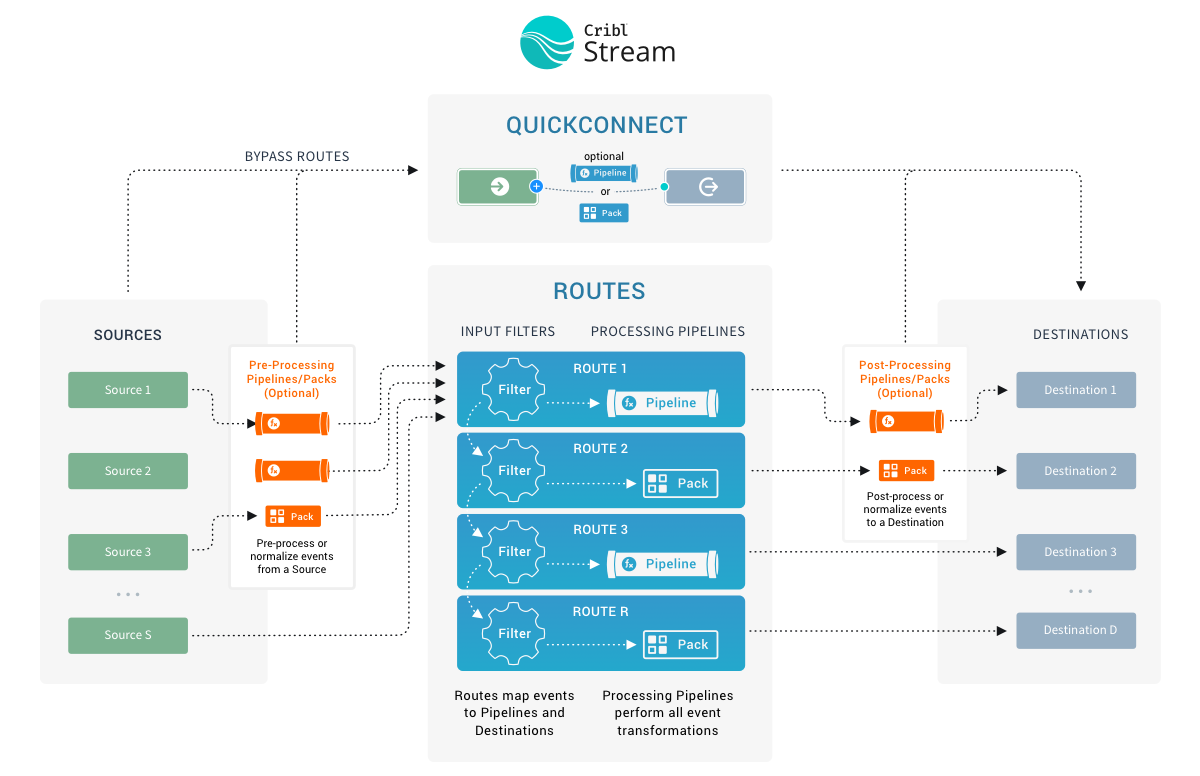
Pre-Processing Pipelines
These are Pipelines that are attached to a Source to condition (normalize) the events before they’re delivered to a processing Pipeline. They’re optional.
Typical use cases are event formatting, or applying Functions to all events of an input. (For example, to extract a message field before pushing events to various processing Pipelines.)
You configure these Pipelines just like any other Pipeline, by selecting Processing > Pipelines from the Worker Group submenu. You then attach your configured Pipeline to individual Sources, using the Source’s Pre-Processing > Pipeline drop-down.
Fields extracted using pre-processing Pipelines are made available to Routes.
Processing Pipelines
These are “normal” event processing Pipelines, attached directly to Routes.
Post-Processing Pipelines
These Pipelines are attached to a Destination to normalize the events before they’re sent out. A post-processing Pipeline’s Functions apply to all events exiting to the attached Destination.
Typical use cases are applying Functions that transform or shape events per receiver requirements. (For example, to ensure that a _time field exists for all events bound to a Splunk receiver.)
You configure these Pipelines as normal, by selecting Processing > Pipelines from the Worker Group submenu. You then attach your configured Pipeline to individual Destinations, using the Destination’s Post-Processing > Pipeline drop-down.
You can also use a Destination’s Post-Processing options to add System Fields like cribl_input, identifying the Cribl Stream Source that processed the events.
Best Practices for Pipelines
Functions in a Pipeline are equipped with their own filters. Even though filters are not required, we recommend using them as often as possible. See Build Custom Logic to Route and Process Your Data for more information.
As with Routes, the general goal is to minimize extra work that a Function will do. The fewer events a Function has to operate on, the better the overall performance. For example, if a Pipeline has two Functions, f1 and f2, and if f1 operates on source 'foo' and f2 operates on source 'bar', it might make sense to apply source=='foo' versus source=='bar' filters on these two Functions, respectively.
Don’t overload Pipelines. Do not use the same Pipeline for both pre-processing and post-processing. This makes isolation and troubleshooting extremely difficult.
Extract or parse by desired yield. If you need to extract one or just a few fields, use the Regex Extract Function. If you need to extract all or most of an event’s fields, use the Parser Function.
Use comments to preserve legibility. A lot of contextual information can become lost over time as users continue to advance and add Routes and Pipelines to Cribl Stream. A good principle is to keep the design decisions as simple and easy to understand as possible, and to document the assumptions around each Route and Pipeline in comments as clearly as possible.
Consider avoiding the use of _raw as a temporary location for data. Instead, split out explicitly separate fields/variables.
Consider using a smaller maximum file size in Persistent Queues settings, for better buffering.