


These docs are for Cribl Edge 4.1 and are no longer actively maintained.
See the latest version (4.17).
OIDC/Okta Setup Example
This page expands on the overview for OIDC, offering a detailed walkthrough with Okta as the example IDP.
Cribl.Cloud supports only OIDC backchannel authentication, not front-channel.
Create OIDC App Integration
To create your app integration within Okta, start here:
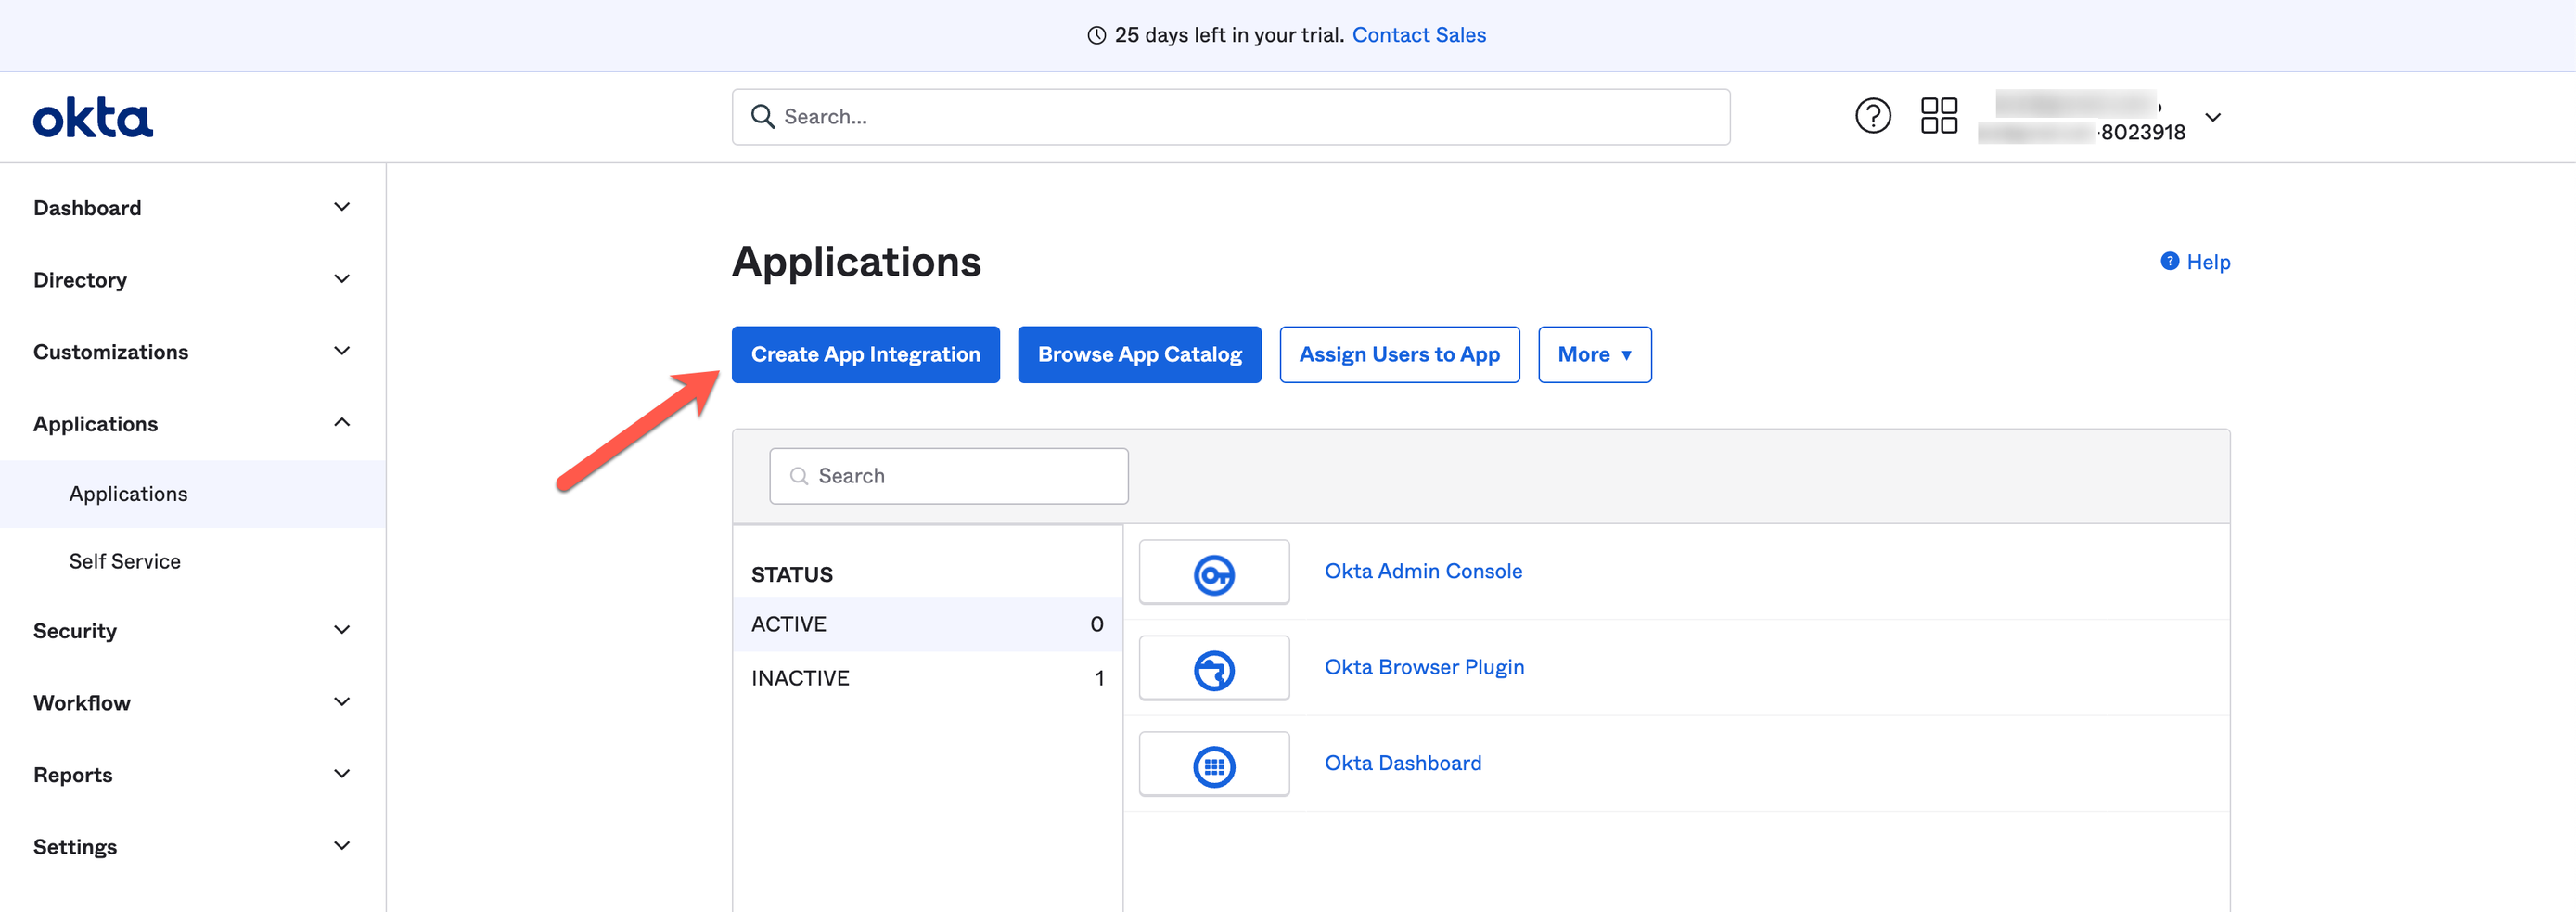
Next, configure the app integration with the options below.
- Sign-in method:
OIDC - OpenID Connect - Application type:
Web Application

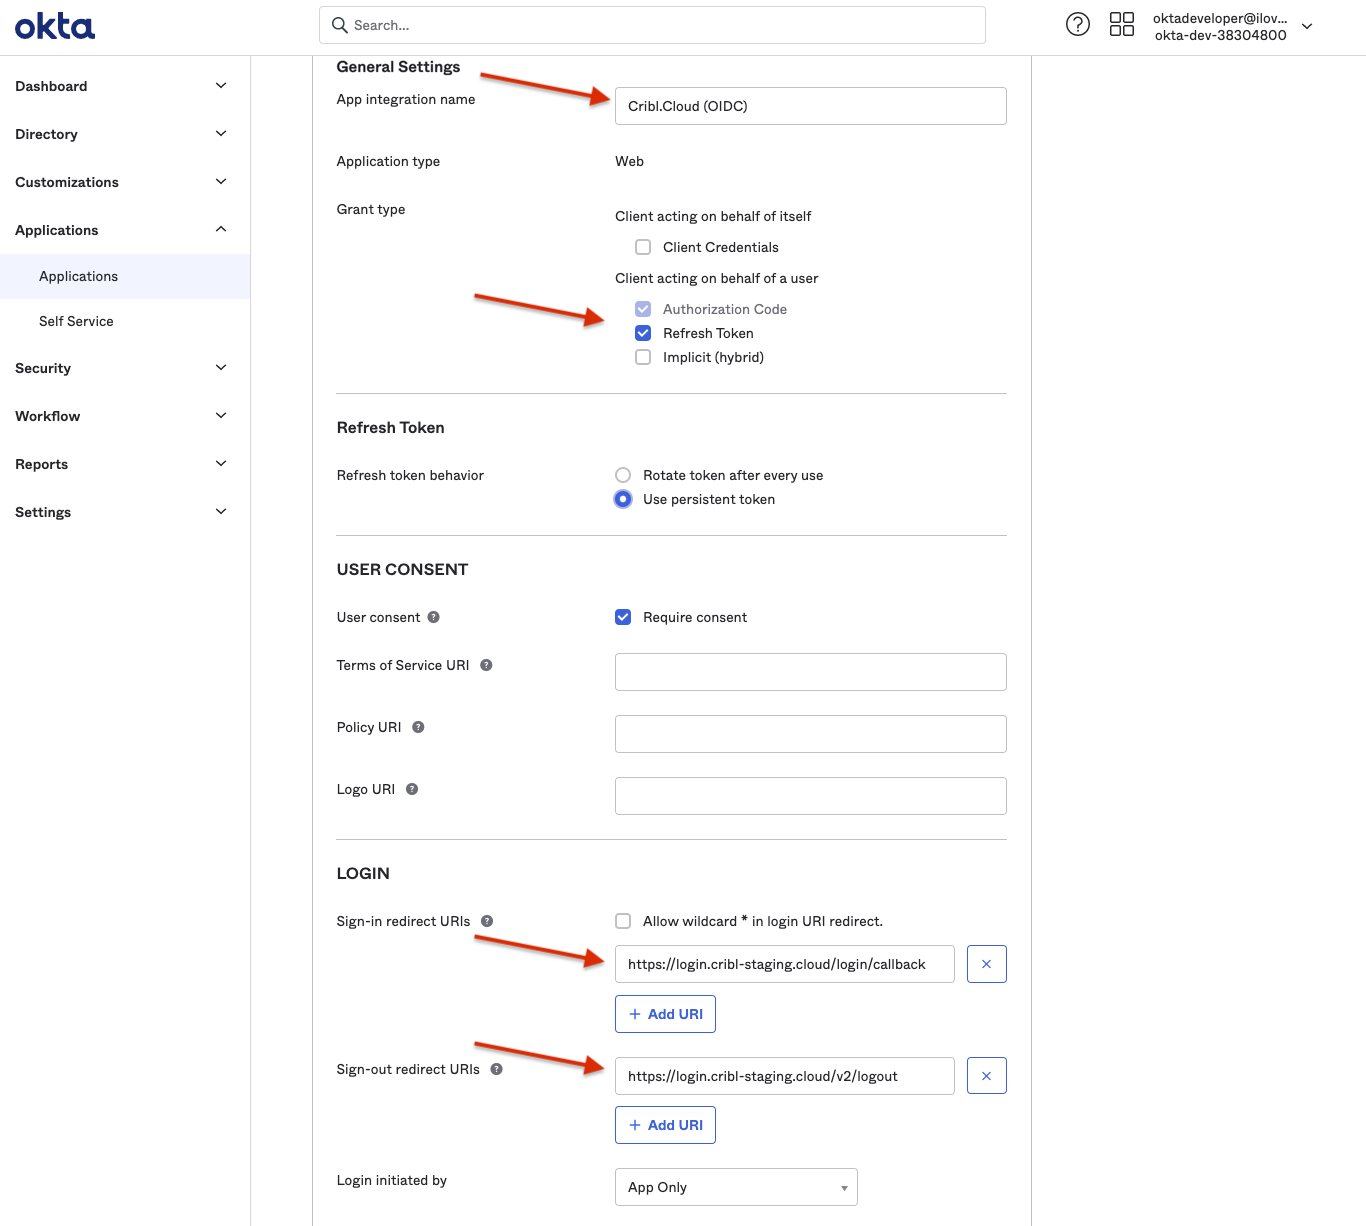
General Settings
Configure the app integration’s General Settings with the options below.
- App Integration Name:
Cribl.Cloud - Sign-In Redirect URIs: https://login.cribl.cloud/login/callback
- Sign-Out Redirect URIs: https://login.cribl.cloud/v2/logout
- Grant Type:
Authorization Code,Refresh Token - Scopes:
openid profile email groups
If your IDP is PingOne, you must also configure this (non-Okta) option:
- Authentication Options:
Allow Client Secret
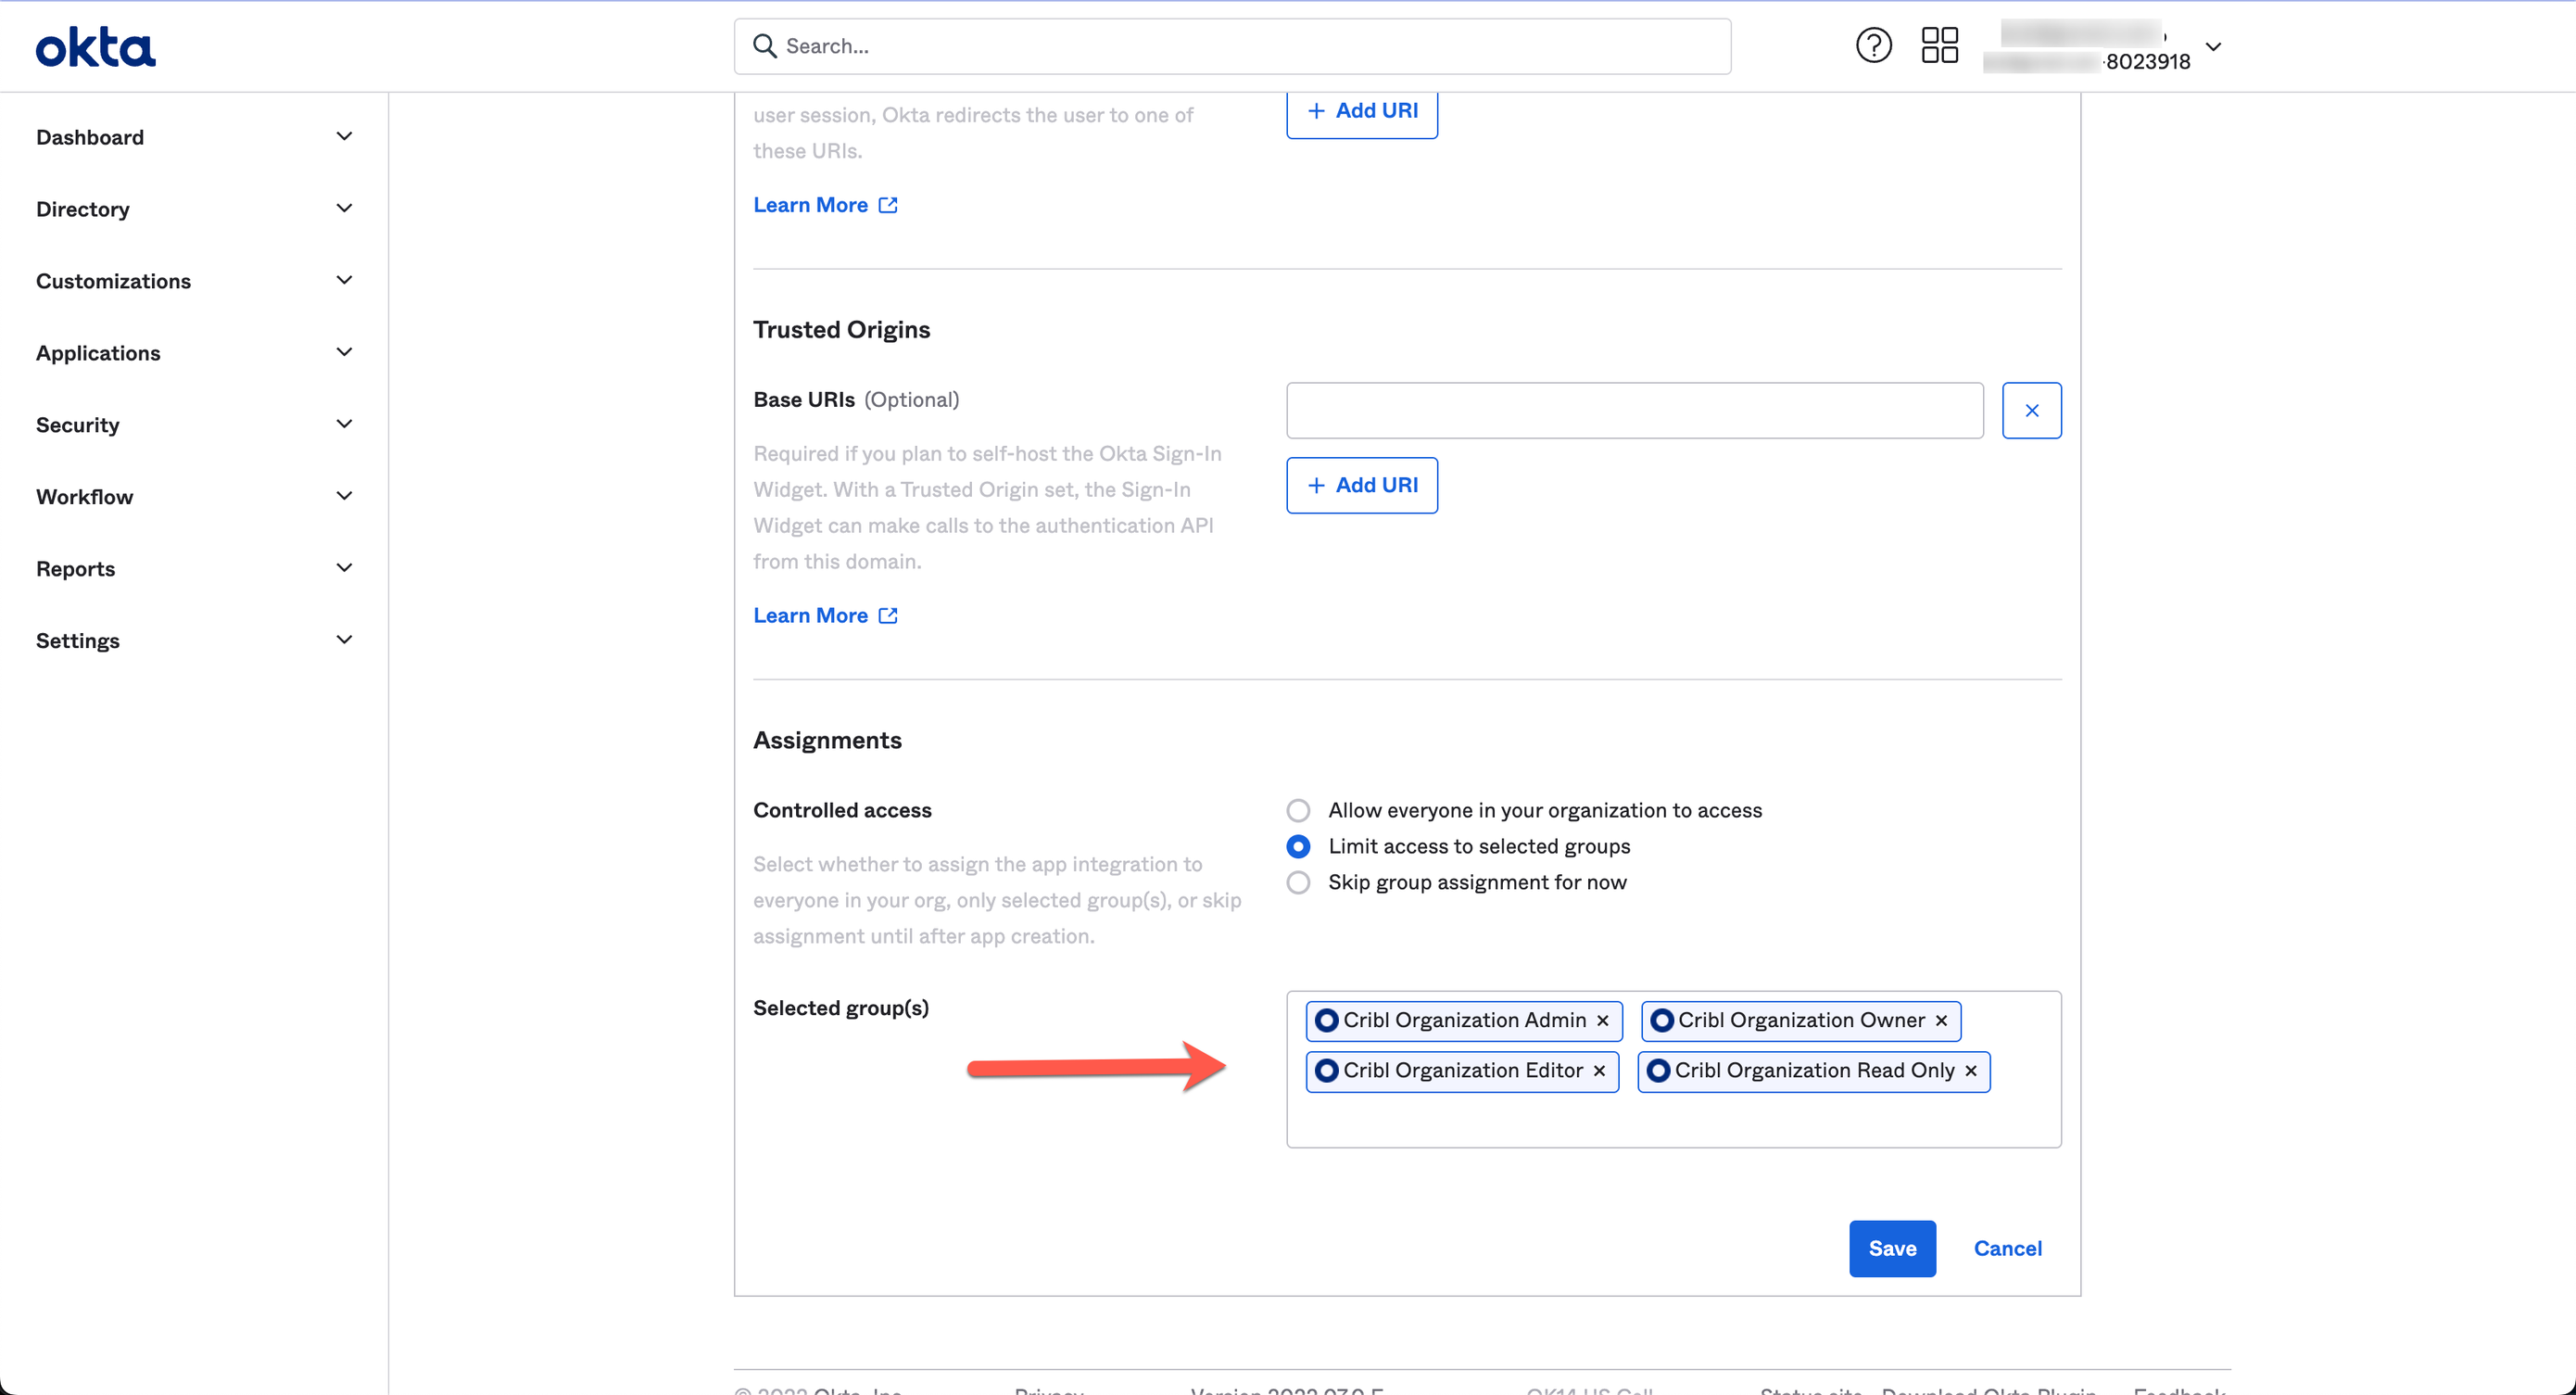
Assignments
Configure the Assignments pane with the options below.
- Controlled access:
Limited access to selected groups - Selected groups: <The groups you mapped in Configuring Groups>
Sign-On Tab
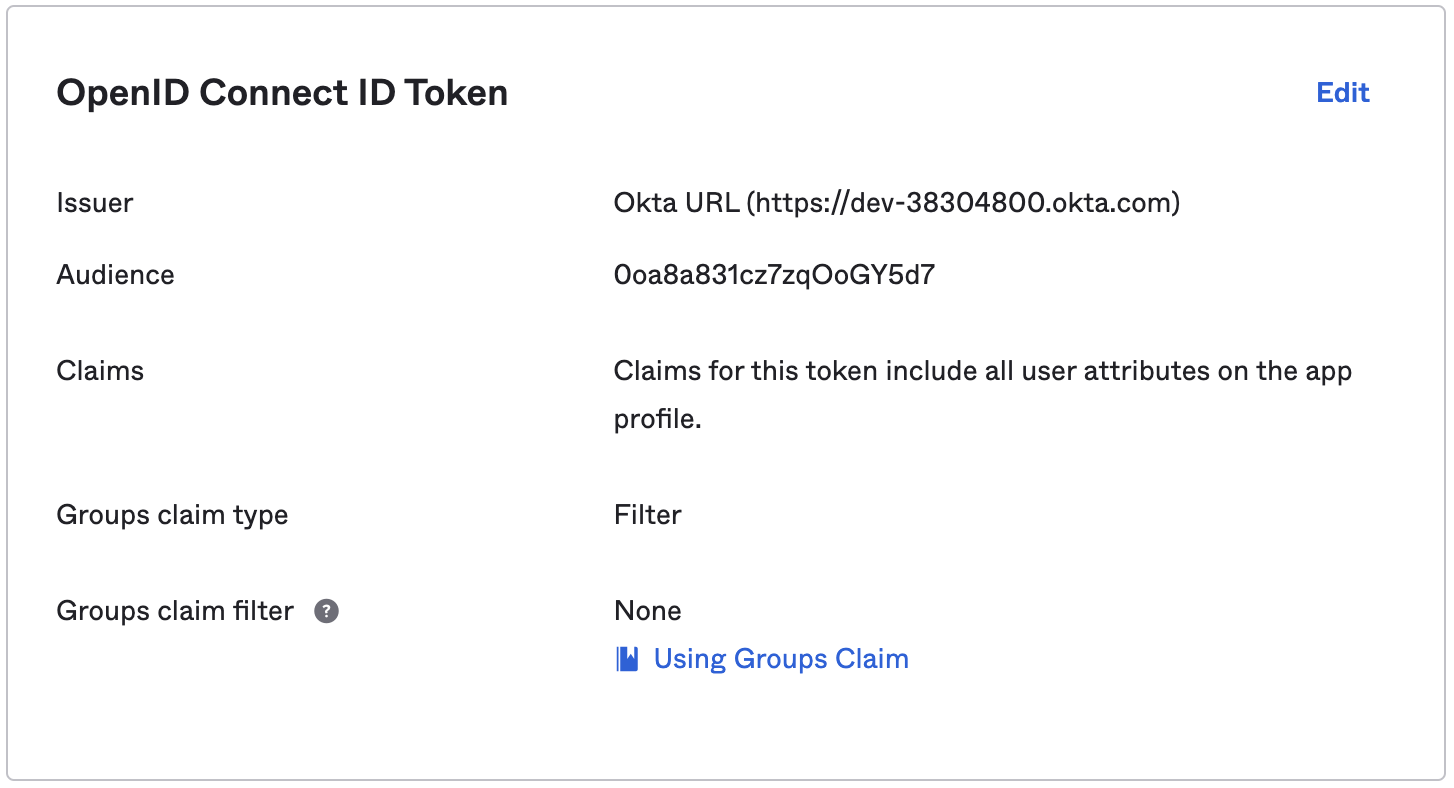
Edit the OpenID Connect ID Token section, as shown here:

Set the Groups claim filter to: groups : Starts with : Cribl, as shown below:
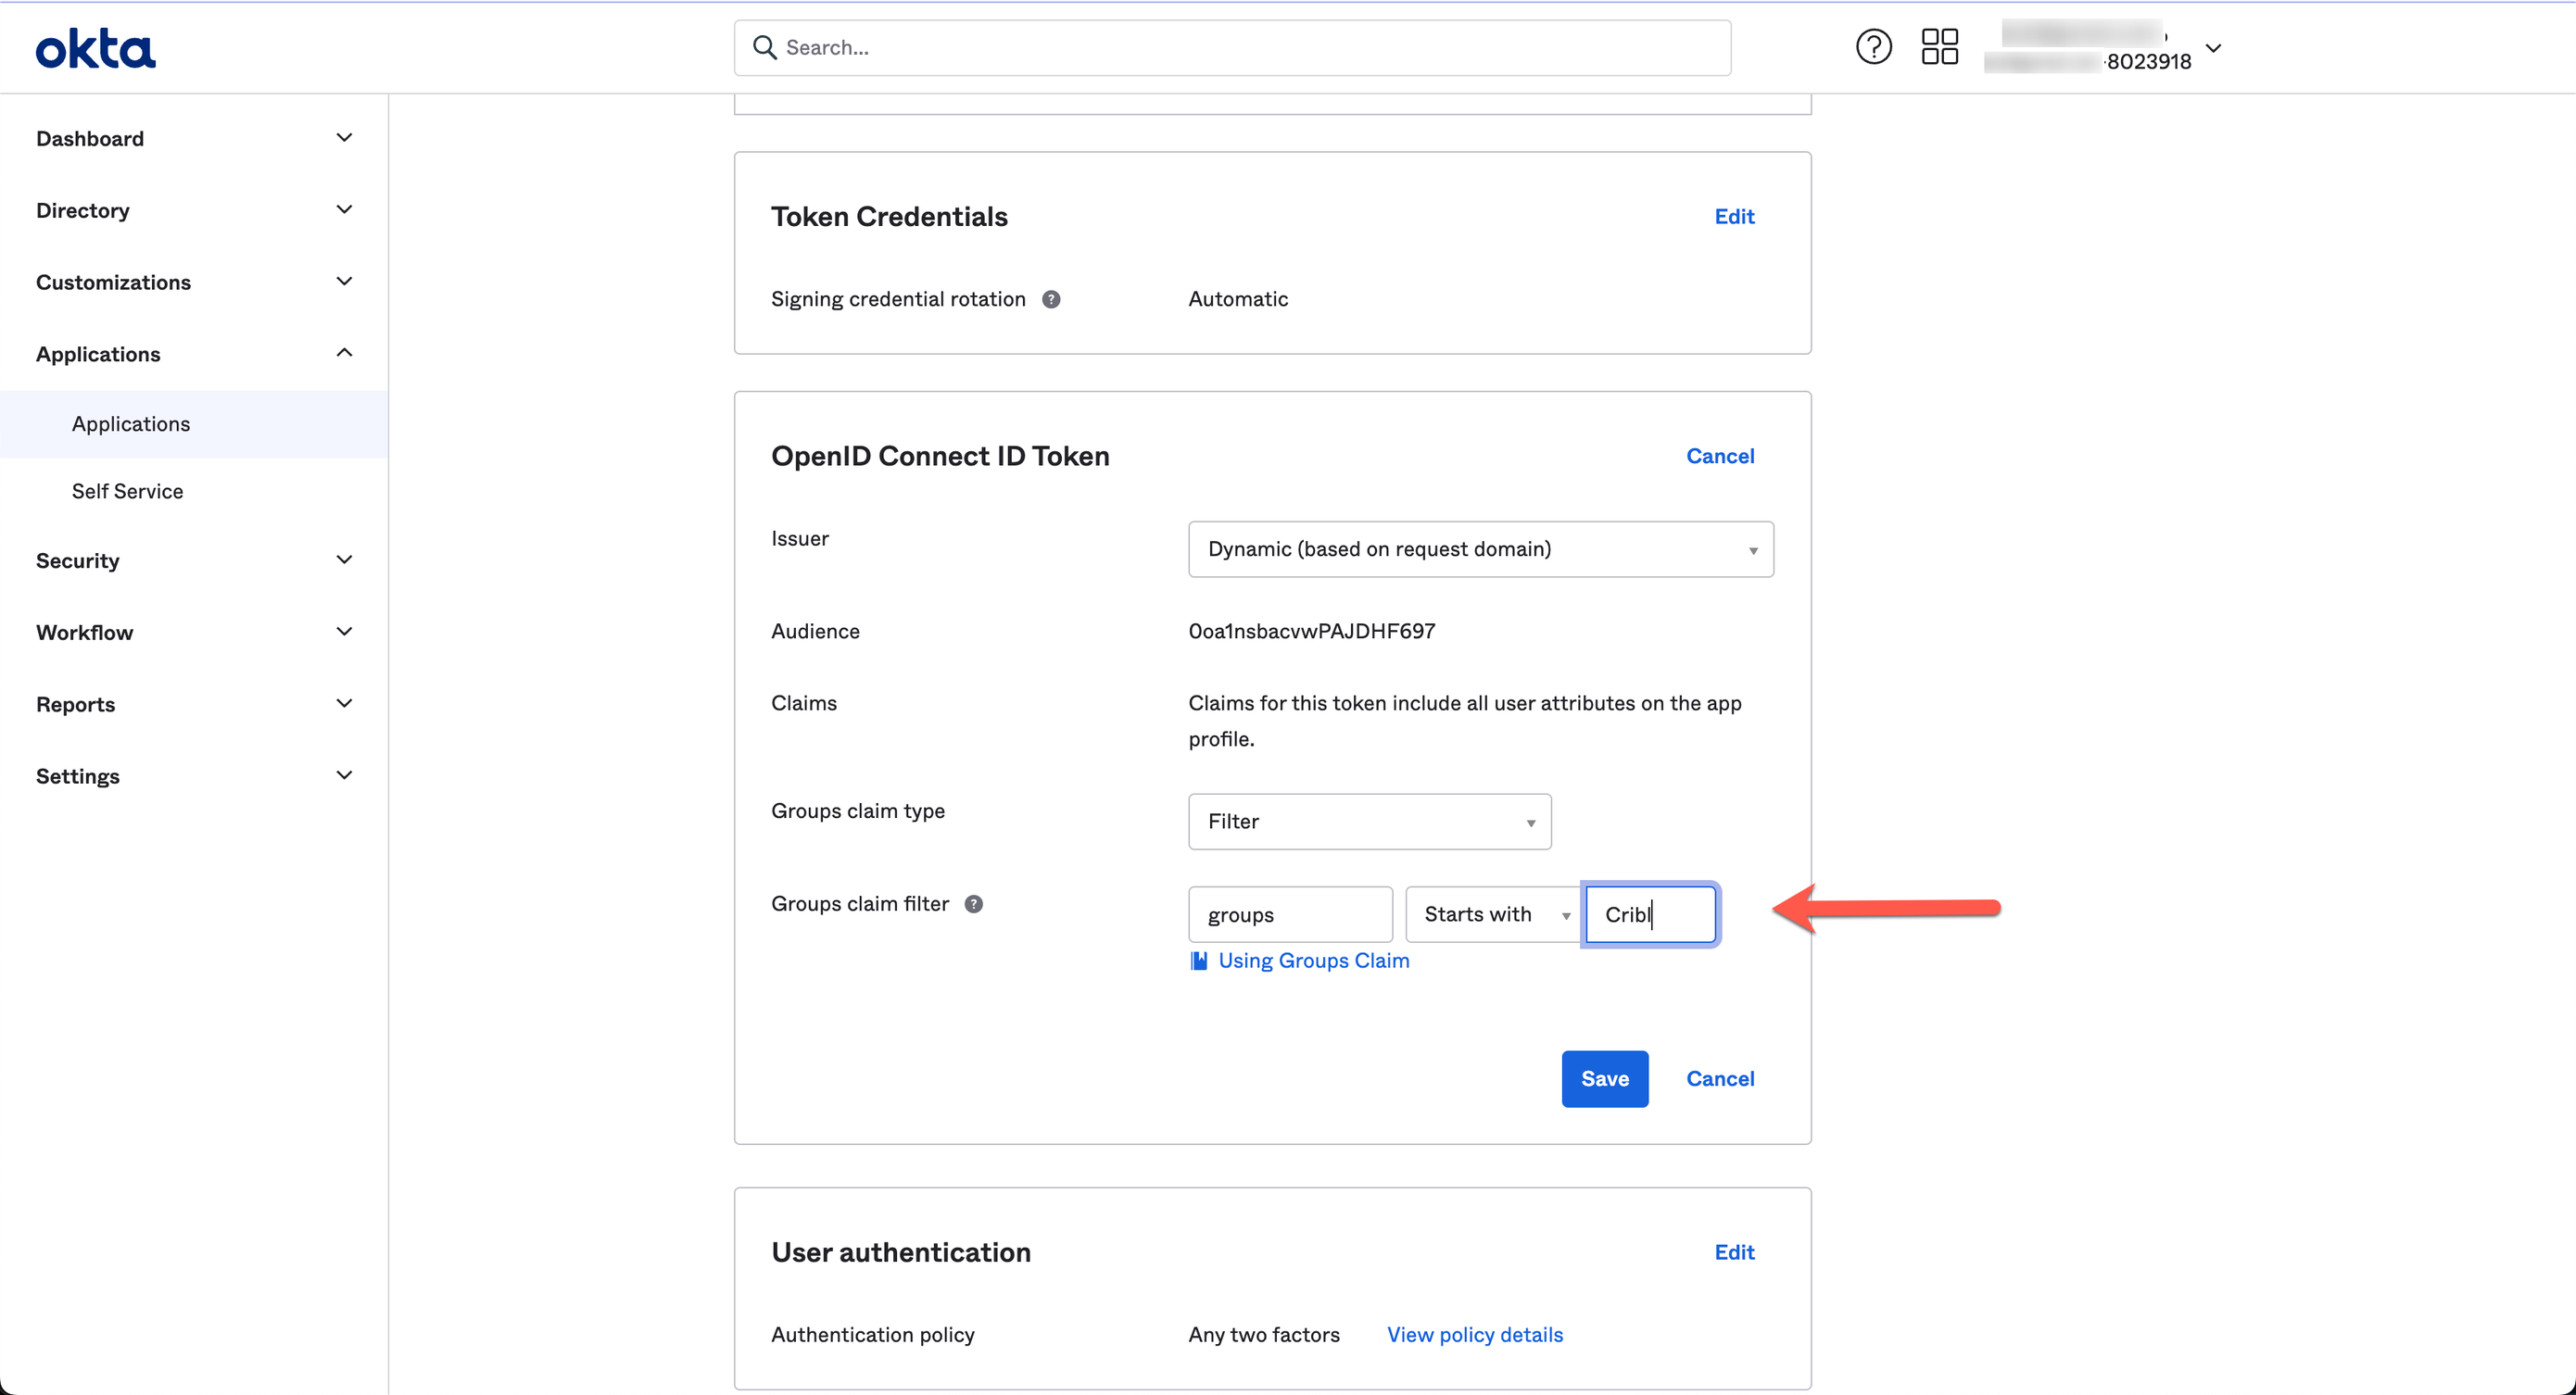
Change the Issuer from Dynamic to Okta URL, to get the Issuer URL to provide to Cribl in the next section:
Submit Your App Info to Cribl
This concludes the setup you need to do in Okta (or other IDP). Next, provide Cribl essential details about your application, to implement SSO setup on the Cribl side.
On your Cribl.Cloud portal’s Organization page > SSO tab, select the OIDC lower tab.
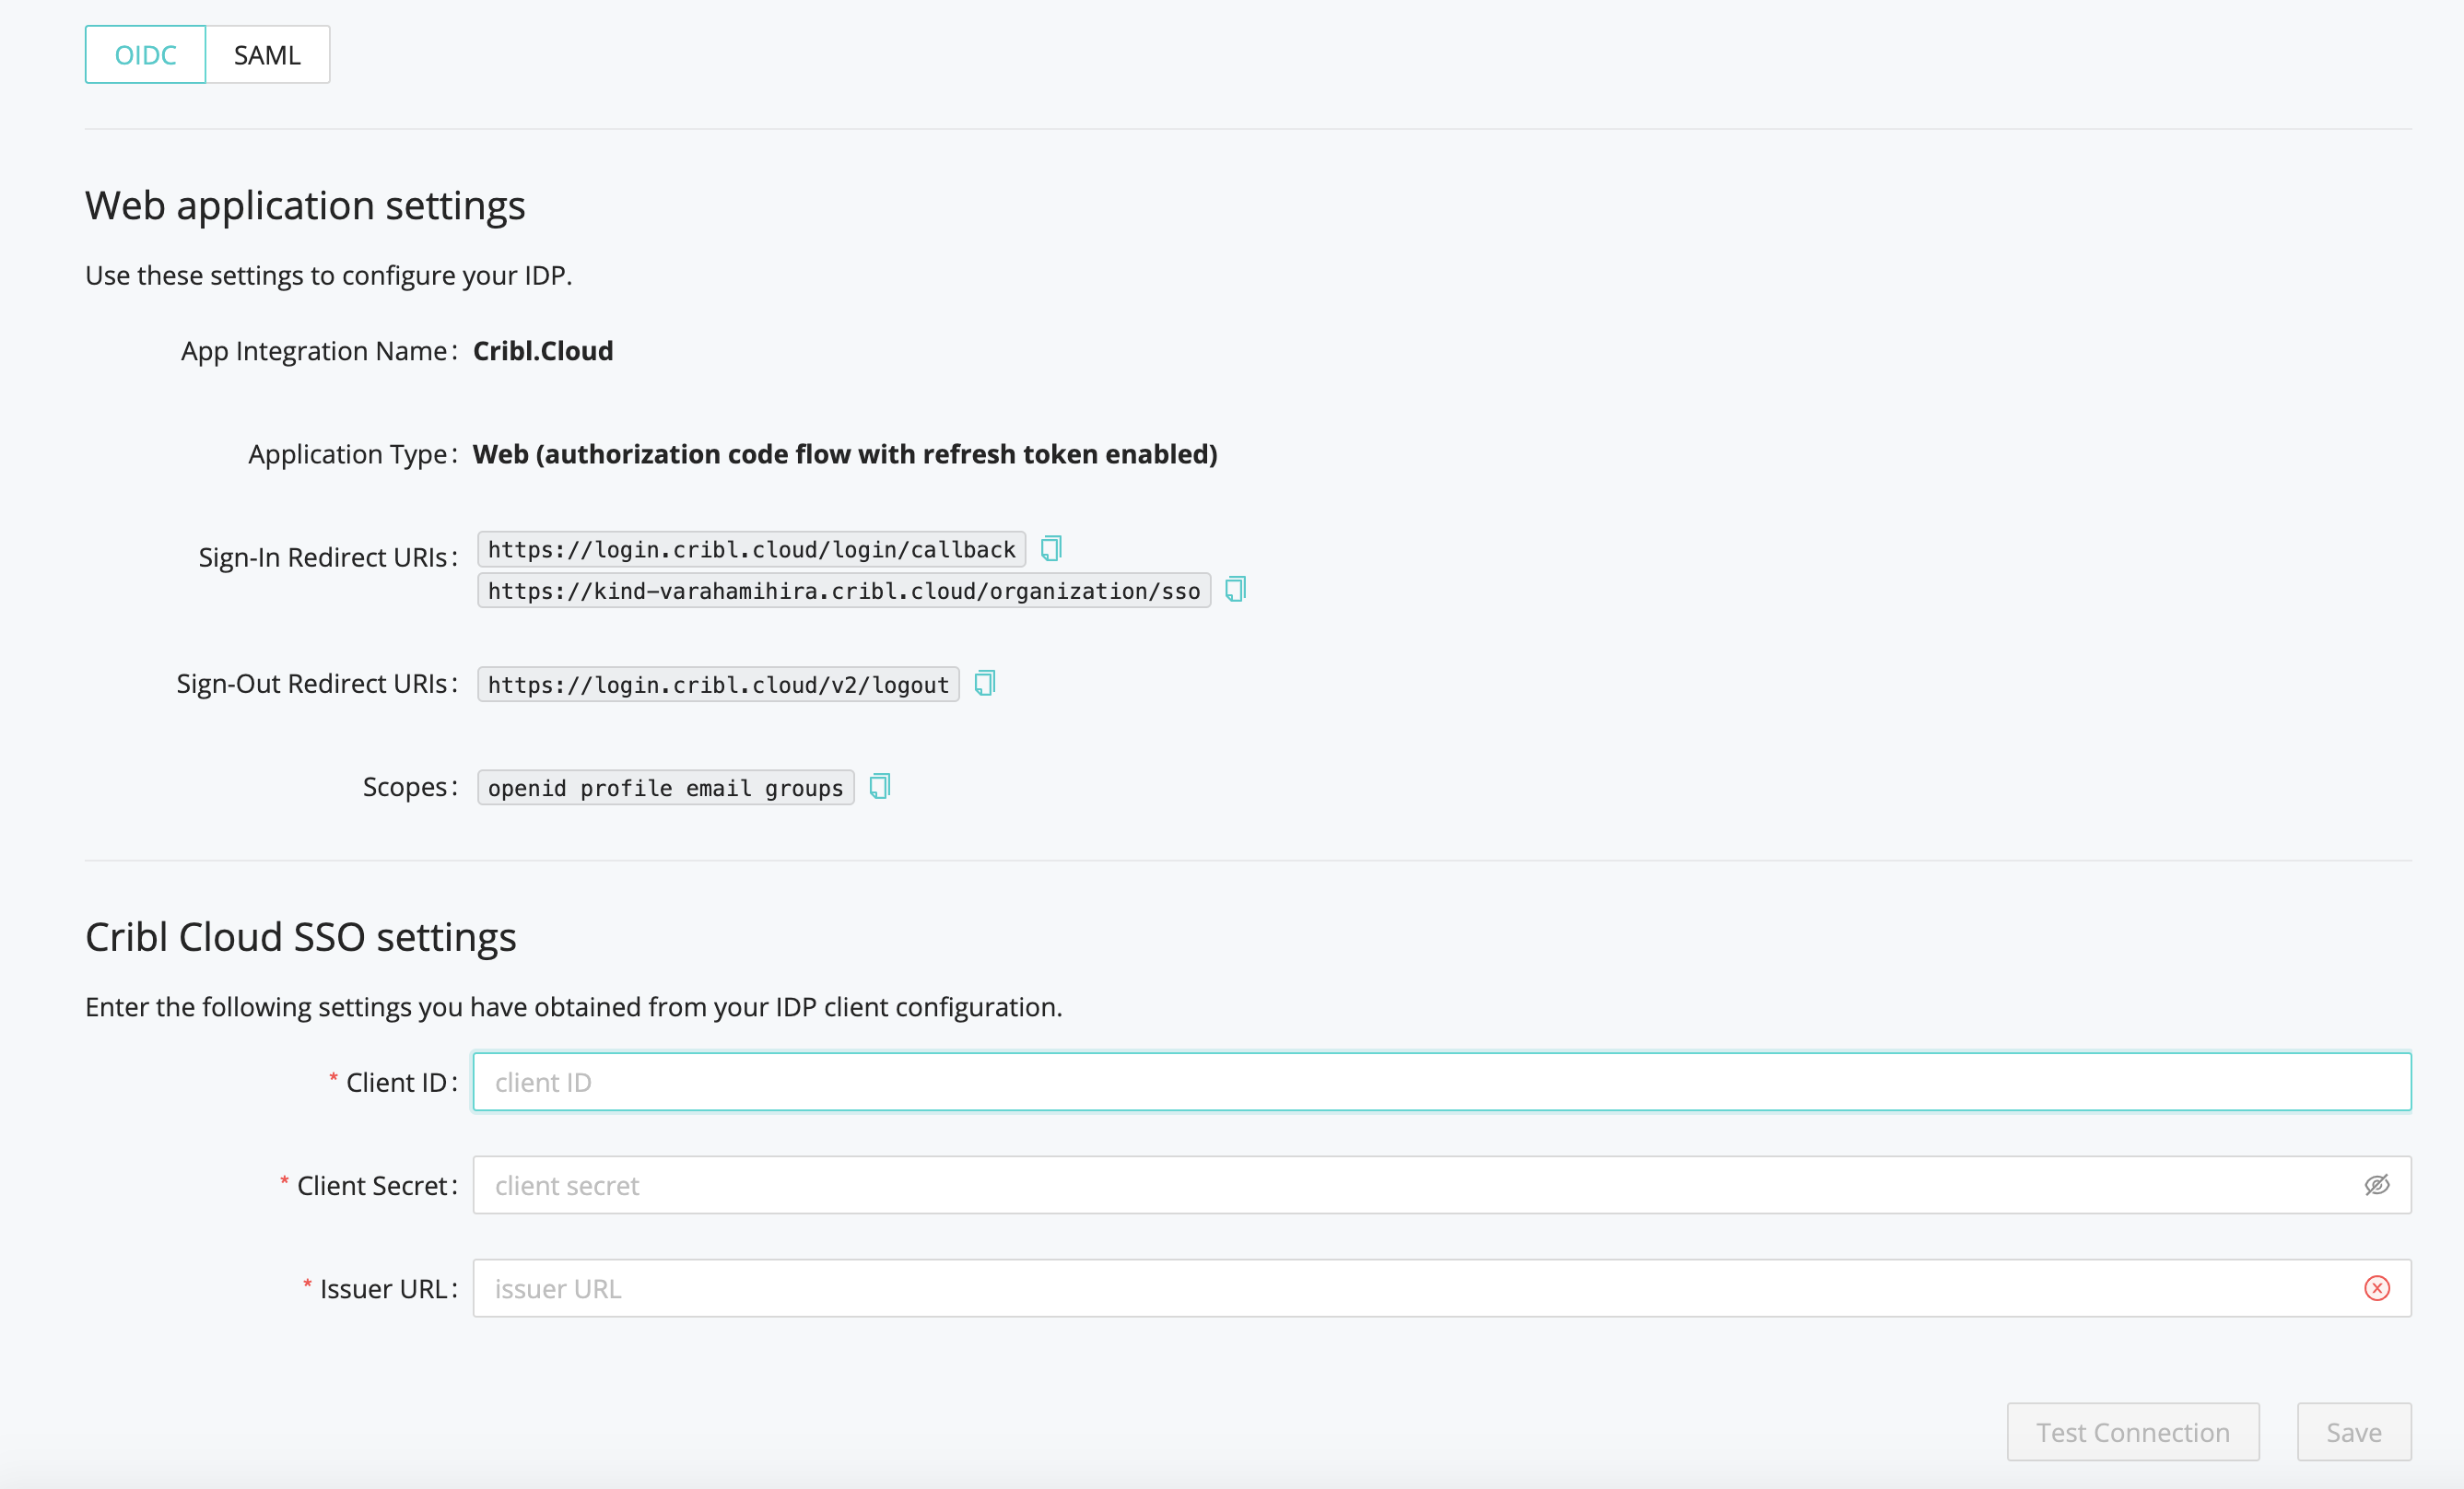
The Web Application Settings are prefilled for you, so you only need to fill in the Cribl Cloud SSO Settings section with the following details from your IDP client configuration:
- Client ID
- Client Secret
- Issuer URL. Make sure Issuer URL does not contain a trailing space.
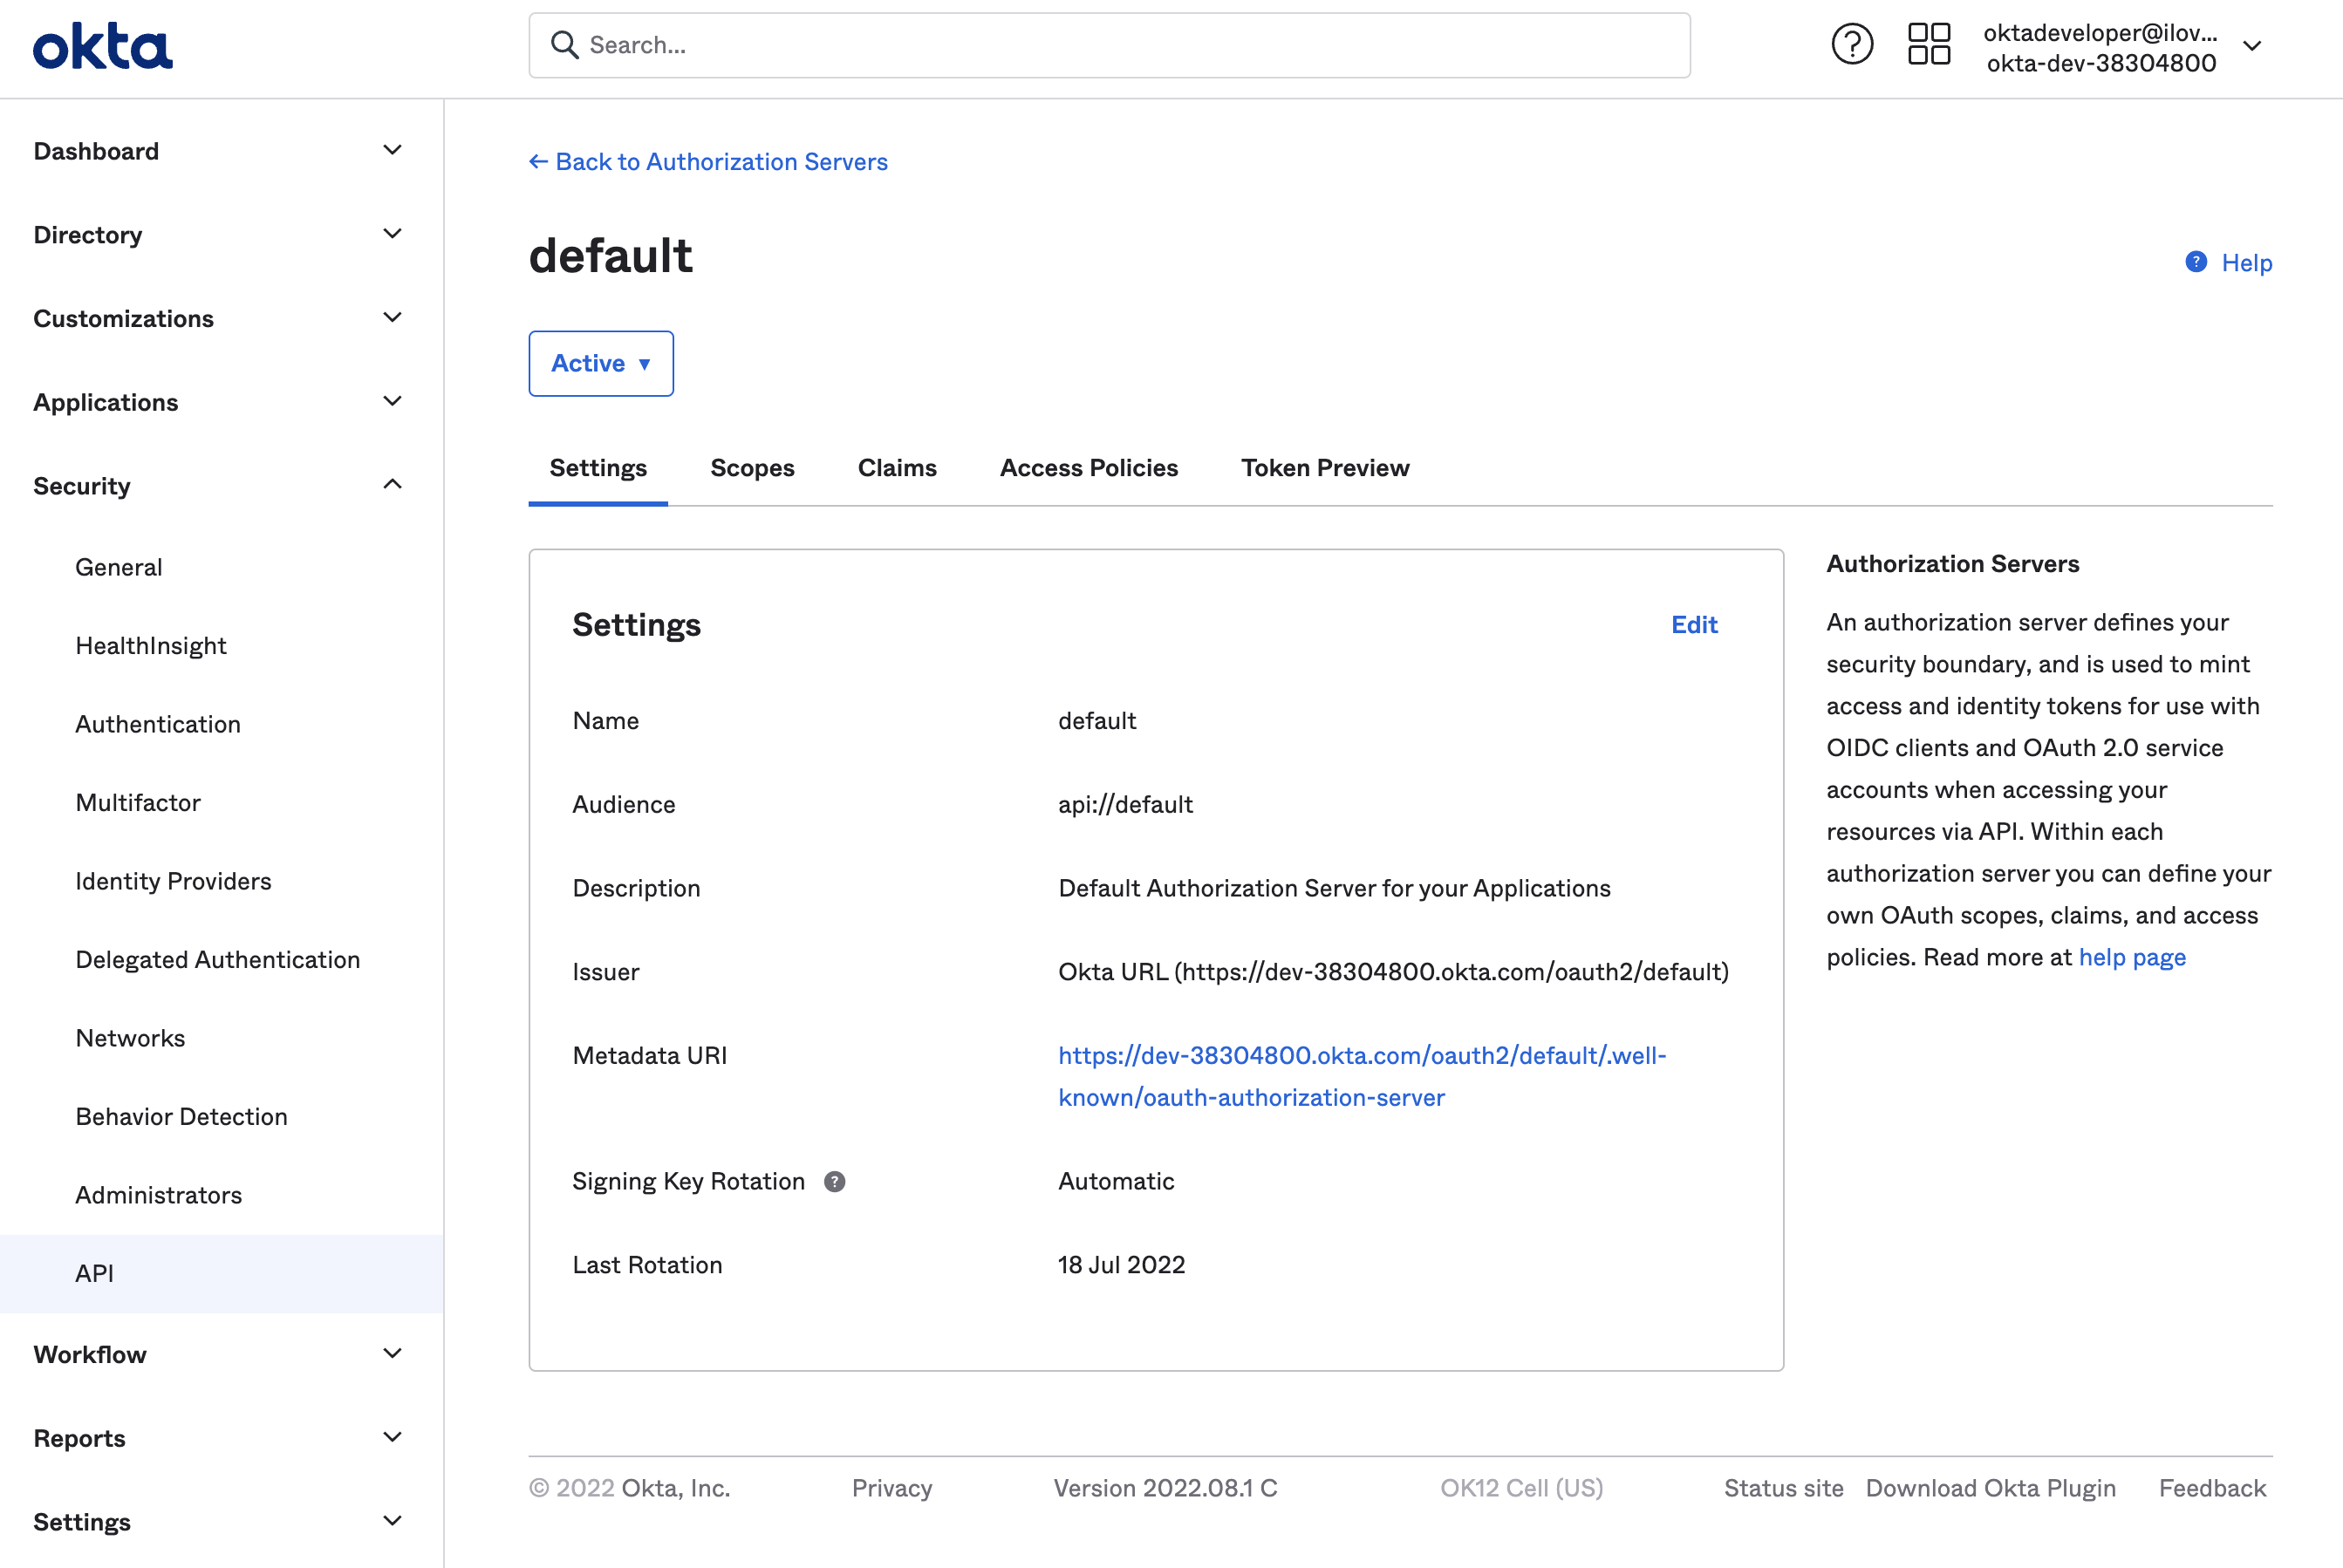
Continuing with our Okta example, here’s where you’d copy the Issuer URL from your Okta app:
OIDC/Okta Chiclet Setup (Optional)
If you want to initiate login from your Okta instance with OIDC authentication configured, an Okta admin can configure an app integration as follows:
From Okta’s left nav, select the Applications page.
Find the OIDC application created earlier in the OIDC/Okta Setup Example.
Click that application, and select General Settings > Edit.
In the Initiate login URI field, enter
https://portal.cribl.cloud/login?connection=<organizationID>(where<organizationID>is your Cribl.Cloud Organization’s ID).
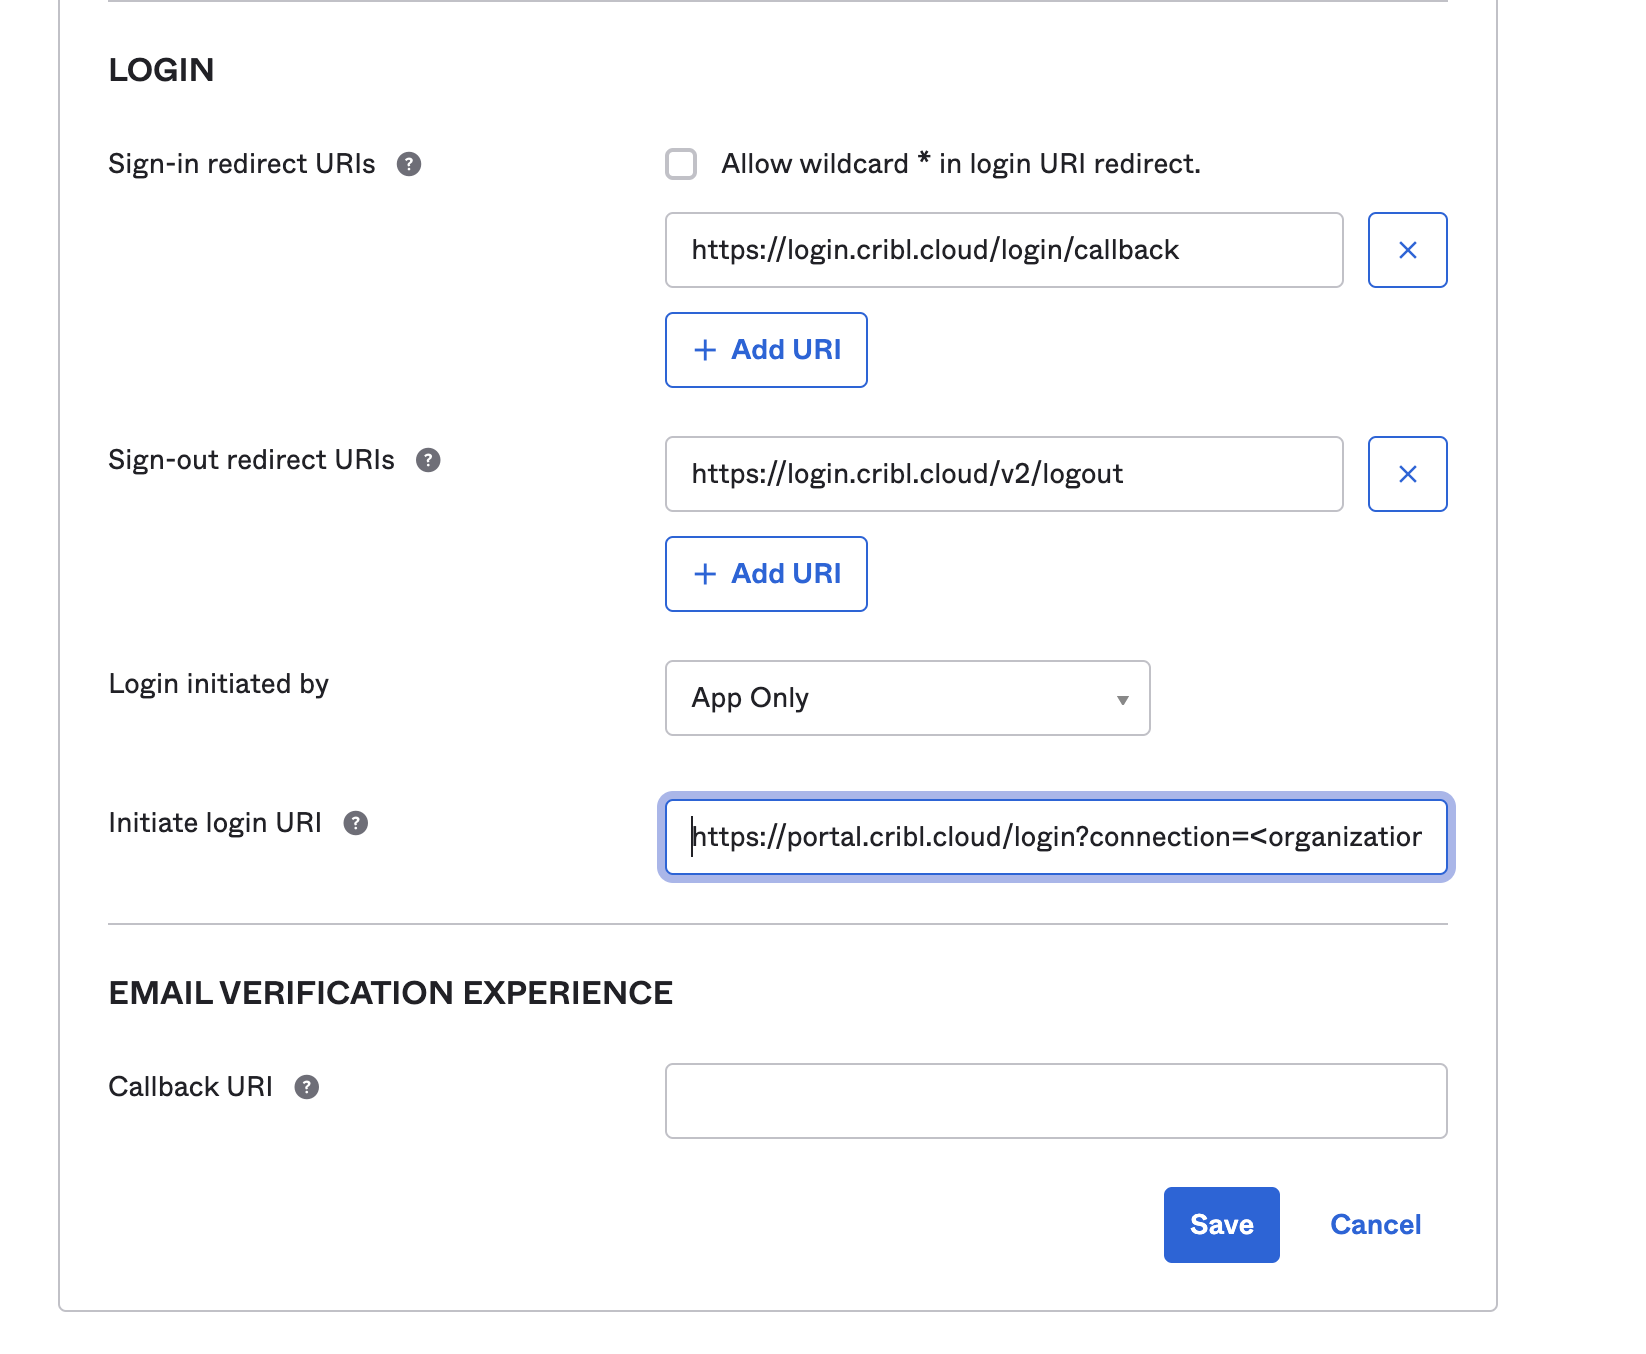
- Click Save to complete the chiclet.
Link Existing Users
To ensure that your Cribl.Cloud Organization’s local users have a smooth transition to SSO, see Final SSO Steps & Troubleshooting.