


These docs are for Cribl Edge 4.1 and are no longer actively maintained.
See the latest version (4.18).
Setting Up Leader and Edge Nodes
This page covers:
Configuring a Leader Node
You can configure a Leader Node either through the UI or through the instance.yml config file.
Using the UI
In Settings (top nav) > Global Settings > Distributed Settings > Distributed Management > General Settings, select Mode: Leader.
Next, on the Leader Settings left tab, confirm or enter the required Leader settings (Address and Port). Customize the optional settings if desired. Then click Save to restart.
Edge Node UI Access
This useful option enables you to click through from the Leader’s Manage Edge Nodes page to an authenticated view of each Node’s UI. The instructions below correspond to enabling the groups.yml file’s workerRemoteAccess configuration key.
To enable Node UI access from the Leader’s UI:
From Cribl Edge’s top nav, select Manage.
On the Manage Fleets page: For each desired Fleet, toggle UI Access to
On.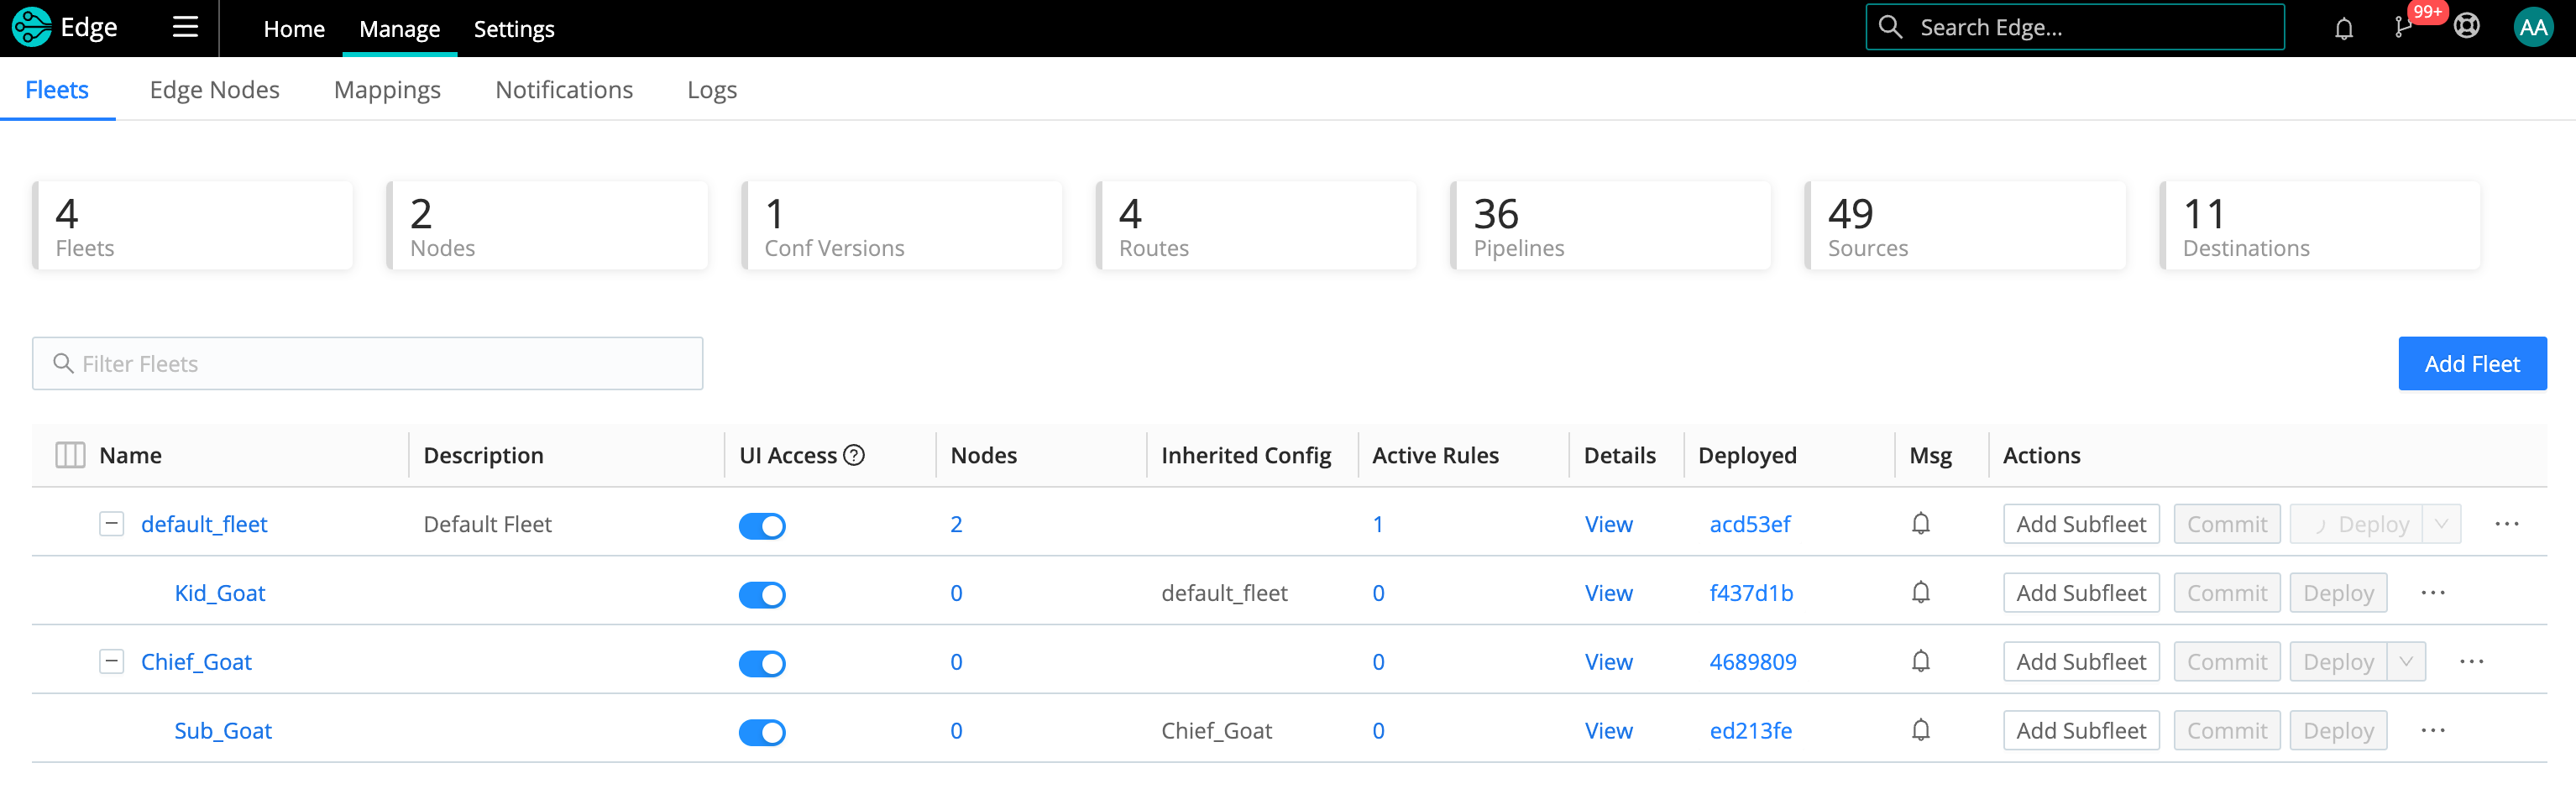
Manage Fleets From the top nav, select Edge Nodes.
On the Manage Edge Nodes page, click the link for any Node you want to inspect.
To confirm that you are remotely viewing a Edge Node’s UI, Cribl Edge displays a purple border, with a badge labeled Viewing host:
<host/GUID>.
Authenticated view of an Edge Node The Leader will override any changes that you make directly to this Edge Node.
Using YAML Config File
In $CRIBL_HOME/local/_system/instance.yml (C:\ProgramData\Cribl\local\_system.yml on Windows), under the distributed section, set mode to master:
distributed:
mode: master
master:
host: <IP or 0.0.0.0>
port: 4200
tls:
disabled: true
ipWhitelistRegex: /.*/
authToken: <auth token>
enabledWorkerRemoteAccess: false
compression: none
connectionTimeout: 5000
writeTimeout: 10000Persisting Socket Connections
A distributed deployment creates socket files for inter-process communication (IPC) between the Leader and distributed processes and services. These sockets are essential for ensuring that Edge Nodes successfully connect to the Leader, and for certain metrics services. On the Leader’s host, the default location for these files is the operating system’s temp directory (e.g., /tmp).
Many Linux distros maintain a system cleaner service (e.g., systemd-tmpfiles) that removes files from this directory periodically, such as every 10 days. If Cribl’s sockets are removed, this breaks certain UI pages, such as those for Fleets and Monitoring. You can protect the sockets in either of two ways.
Block the Cleaner
Stop the host OS from cleaning socket files out of /tmp/cribl-* subdirectories. For example, on Amazon Linux 2 instances, add a new tmp.conf file to /etc/tmpfiles.d with the line: X /tmp/cribl-*.
To restart the system cleaner here and reload its configuration, use this command:systemctl restart systemd-tmpfiles-clean.service
Move the Sockets
Alternatively, you can move Cribl’s socket files to a different directory. This directory must be outside your operating system’s temp directory, and the user that owns the cribl process must have the necessary permissions to write to it.
In Unix-like operating systems, the maximum length for Unix domain socket paths is 108 bytes. To minimize the path length, use a directory that is close to the root, such as /var/tmp.
In the UI, you specify the directory at Settings > Global Settings > System > Distributed Settings > Leader Settings > Helper processes socket dir.
Configuring an Edge Node
On each endpoint, you can configure Cribl Edge variously through the UI, the instance.yml config file, environment variables, or the command line.
Using the UI
In Settings (top nav) > Global Settings > Distributed Settings > Distributed Management > General Settings, select Mode: Managed Edge.
Next, on the Leader Settings left tab, confirm or enter the required Address (e.g., criblleader.mycompany.com).
Customize the optional settings if desired. Then click Save to restart.
Using YAML Config File
In $CRIBL_HOME/local/_system/instance.yml (C:\ProgramData\Cribl\local\_system.yml on Windows), under the distributed section, set mode to managed-edge:
distributed:
  mode: managed-edge
  envRegex: /^CRIBL_/
  master:
    host: <master address>
    port: 4200
    authToken: <token here>
    compression: none
    tls:
      disabled: true
    connectionTimeout: 5000
    writeTimeout: 10000
  tags:
       - tag1
       - tag2
       - tag42
group: teamstersUsing Environment Variables
You can configure Edge Nodes via environment variables, as in this example:
CRIBL_DIST_LEADER_URL=tcp://criblmaster@masterHostname:4200 ./cribl start
For additional details, see Environment Variables.
Using the Command Line
You can configure an Edge Node using CLI commands of this form:
./cribl mode-managed-edge -H <master-hostname-or-IP> -p <port> [options] [args]The -H and -p parameters are required. For other options, see the CLI Reference for mode-managed-edge. Here is an example command:
./cribl mode-managed-edge -H <host> -p <port> <options> <args> && ./cribl restartEdge will need to restart after this command is issued.