These docs are for Cribl Edge 4.12 and are no longer actively maintained.
See the latest version (4.16).
SSO with Okta and OIDC (Cribl.Cloud)
This page presents a walkthrough of setting up an OIDC SSO, using Okta as the example.
Cribl.Cloud supports only OIDC backchannel authentication, not front-channel.
This page is a guide for configuring SSO for a Cribl.Cloud deployment. For information about an on-prem installation, see SSO with Okta and OIDC (on-prem).
Limitations
Cribl offers an SP-initiated (Cribl-initiated) flow, but does not support an IDP-initiated SSO flow. As an alternative, you can allow users to initiate login from your IDP instance by creating a chiclet.
Set Up Fallback Access
Before you configure SSO, create a fallback user so that you aren’t locked out of your Organization if you have issues with SSO. In your Cribl.Cloud Organization, invite a new Member using an email domain that’s different from the corporate domain on which you’re configuring SSO. Assign the Owner Permission for the Member. You can use this account to log in with a username and password and fix SSO issues if needed.
After you confirm that your SSO integration is working, you can remove the fallback user. If you do so, do not disable the SSO integration without first re-creating a fallback user. Otherwise, you might get locked out of your Organization.
Create OIDC App Integration
To create your app integration:
In Okta, navigate to the Applications section and select Create App Integration.
Configure the app integration with the options below:
- Sign-in method:
OIDC - OpenID Connect - Application type:
Web Application
- Sign-in method:
General Settings
Configure the app integration’s General Settings with the options below:
- App integration name:
Cribl.Cloud (OIDC) - Grant type: Select
Authorization CodeandRefresh Token. - Sign-in redirect URIs:
https://login.cribl.cloud/login/callbackis the URL you will use for the connection.https://manage.cribl.cloud/organizations/<organizationId>/ssois used during setup to test the connection. After you have successfully tested the connection, save the configuration and replace the second URL with the first one.
- Sign-out redirect URIs: https://login.cribl.cloud/v2/logout
- App integration name:
If your IDP is PingOne, you must also configure this (non-Okta) option:
- Authentication options:
Allow Client Secret
Assignments
Configure the Assignments pane with the following options:
- Controlled access:
Limited access to selected groups - Selected groups: The groups you mapped in Configure Groups.
- Controlled access:
Save your application.
Now return to the General tab’s General Settings section and in Refresh token behavior, select
Use persistent token.
Sign On Tab
If you are not mapping Teams to IDP groups, you need to specify a groups claim filter. In the OpenID Connect ID Token section, select Edit, and set the Groups claim filter to:
groups:Starts with:Cribl.To obtain the Issuer URL that you’ll need to provide to Cribl in the next section, change the value in the Issuer field from
DynamictoOkta URL.
This step concludes the setup procedure for Okta (or other IDP).
Submit Your App Info to Cribl
Next, provide Cribl with essential details about your application to implement the SSO setup on the Cribl side.
- In Cribl Edge, on the top bar, select Products, and then select Cribl.
- In the sidebar, select Organization, then SSO Management.
- Above Web Application Settings, select OIDC.
- The Web Application Settings are prefilled for you, so you only need to fill in the Cribl Cloud SSO Settings section with the following details from your IDP client configuration:
- Client ID
- Client Secret
- Issuer URL. Copy the Issuer URL from the Sign On > OpenID Connect ID Token section of your Okta environment.
OIDC/Okta Chiclet Setup (Optional)
If you want to initiate login from your Okta instance with OIDC authentication configured, an Okta admin can configure an app integration as follows:
- From Okta’s left nav, select the Applications page.
- Find the OIDC application created earlier in the OIDC/Okta Setup Example.
- Select that application, and in the General tab’s General Settings section, select Edit.
- In the Initiate login URI field, enter
https://manage.cribl.cloud/login?connection=<organizationId>(where<organizationId>is your Cribl.Cloud Organization’s ID). - Confirm with Save to complete the chiclet.
Link Existing Users
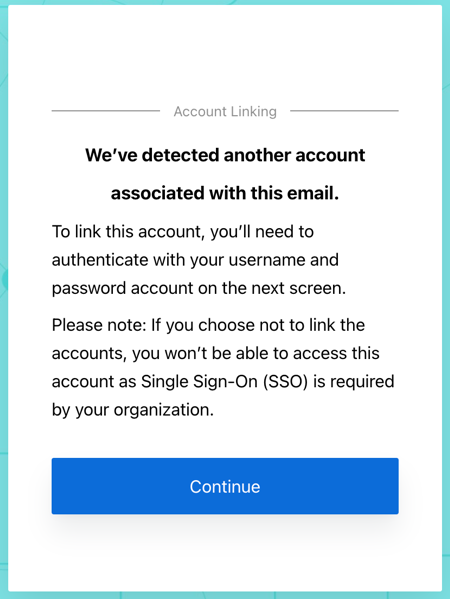
If your Cribl.Cloud Organization has existing users who have been using a username and password to log in, upon first login with SSO, these users will see a prompt to link their identities. They should accept this prompt to ensure that their existing profile is linked with their SSO profile.

Troubleshooting
If you encounter issues when setting up SSO integration, refer to SSO Troubleshooting.


