


These docs are for Cribl Edge 4.4 and are no longer actively maintained.
See the latest version (4.17).
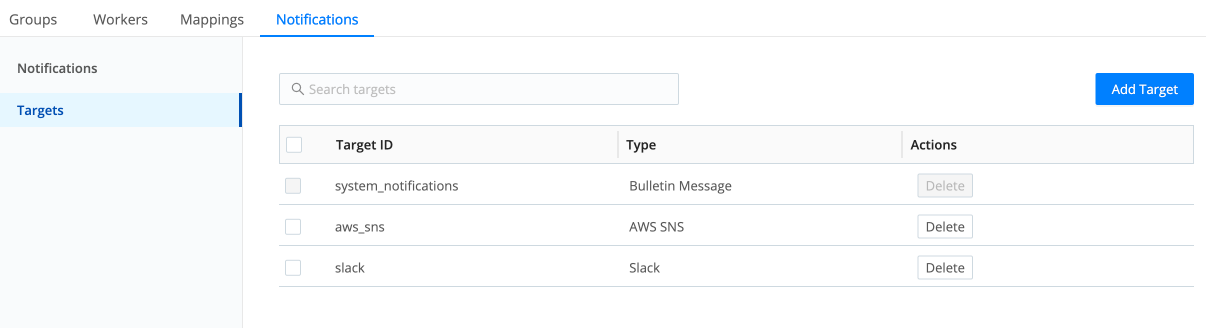
Configuring Targets
To add a new Notification target from the Manage Notifications page’s Targets tab:
- Click Add Target to open the New Target modal shown below.
- Give this target a unique Target ID.
- Set the Target type to either Webhook, PagerDuty, Slack, or AWS SNS. Then configure the target according to the corresponding section below.
Notifications require an Enterprise or Standard license, without which all the target configuration options described on this page will be hidden or disabled in Cribl Edge’s UI.
Amazon SNS
You can send notifications to an Amazon Simple Notification Service (SNS) topic. This gives you access to a broad array of notification destinations, such as various AWS services, mobile push notifications, or text messages.
To add an Amazon SNS notification target in Cribl Edge, go to Manage > Notifications > Targets > Add Target.
General Settings
Target ID: Enter a unique ID used to identify the target. This will show in the Target ID column of the Targets tab. It can’t be changed later, so make sure you like it.
Target type: Select AWS SNS.
Region: Select the region associated with the Amazon S3 bucket.
Destination type: Defaults to Topic ARN. The SMS section below explains the Phone number option.
Default Topic ARN: The default Amazon Resource Name (ARN) of the Amazon SNS topic to which you want to send notifications. Cribl Edge expects the ARN in a format like this:
arn:aws:sns:region:account-id:MyTopic.
If you use a non-AWS URL, the format must be:
{url}/myQueueName - for example, https://host:port/myQueueName.
Must be a JavaScript expression (which can evaluate to a constant value),
enclosed in quotes or backticks. Can be evaluated only at initialization time.
For example, if you’re referencing a Global Variable:
https://host:port/myQueue-${C.vars.myVar}. This value can be overridden by the
notification event __topicArn field.
Phone number allowlist: A wildcard list of phone numbers that are allowed to receive SMS notifications. This is used when Destination type is set to Phone number.
Authentication
Auto: This default option uses the AWS instance’s metadata service to
automatically obtain short-lived credentials from the IAM role attached to an
EC2 instance, local credentials, sidecar, or other source. The attached IAM role
grants Cribl access to authorized AWS resources. Can also use the environment
variables AWS_ACCESS_KEY_ID and AWS_SECRET_ACCESS_KEY. Works only when
running on AWS.
Manual: If not running on AWS, you can select this option to enter a static set of user-associated IAM credentials (your access key and secret key) directly or by reference. This is useful for Edge Nodes not in an AWS VPC, like those running a private cloud.
The Manual option exposes these additional fields:
Access key: Enter your AWS access key. If not present, will fall back to the
env.AWS_ACCESS_KEY_IDenvironment variable, or to the metadata endpoint for IAM role credentials.Secret key: Enter your AWS secret key. If not present, will fall back to the
env.AWS_SECRET_ACCESS_KEYenvironment variable, or to the metadata endpoint for IAM credentials.
The values for Access key and Secret key can be a constant, or a
JavaScript expression (such as ${C.env.MY_VAR}) enclosed in quotes or
backticks, which allows configuration with environment variables.
Secret: If not running on AWS, you can select this option to supply a stored secret that references an AWS access key and secret key. The Secret option exposes this additional field:
- Secret key pair: Use the drop-down to select an API key/secret key pair that you’ve configured in Cribl Edge’s secrets manager. To store a new, reusable secret, click Create.
Now, you can select the new Amazon SNS target when configuring notifications.
Assume Role
Enable for SNS: Toggle to Yes to define an IAM Role to use, instead of automatically detecting one locally.
AssumeRole ARN: Enter the Amazon Resource Name (ARN) of the role to assume.
External ID: Enter the External ID to use when assuming role. This is required only when assuming a role that requires this ID in order to delegate third-party access. For details, see AWS’ documentation.
Duration (seconds): Duration of the Assumed Role’s session, in seconds. Minimum is 900 (15 minutes). Maximum is 43200 (12 hours). Defaults to 3600 (1 hour).
Processing Settings
Post-Processing
System fields: The default field is cribl_host, with a value of the Cribl
node that processed the event.
Advanced Settings
Maximum number of retries: The maximum number of retries before the output returns an error. Errors are retriable. The retries use an exponential backoff policy.
Endpoint: The SNS service endpoint. If empty, defaults to AWS' Region-specific endpoint. Otherwise, it must point to an SNS-compatible endpoint.
Signature version: Signature version to use for signing SNS requests.
Defaults to v4.
Reuse connections: Whether to reuse connections between requests. The
default setting (Yes) can improve performance.
Reject unauthorized certificates: Whether to accept certificates that cannot
be verified against a valid Certificate Authority (e.g., self-signed
certificates). Defaults to Yes.
PagerDuty Targets
This option sends Cribl Edge Notifications to PagerDuty, a real-time incident response platform, using Cribl Edge’s native integration with the PagerDuty API. Select Target type: PagerDuty to expose the following additional options on the modal’s (single) General Settings left tab:
Routing key: Enter your 32-character Integration key on a PagerDuty service or global ruleset.
Group: Optionally, specify a PagerDuty default group to assign to Cribl Edge Notifications.
Class: Optionally, specify a PagerDuty default class to assign to Cribl Edge Notifications.
Component: Optionally, a PagerDuty default component value to assign to Cribl Edge Notification. (This field is prefilled with logstream.)
Severity: Set the default message severity for events sent to PagerDuty. Defaults to info; you can instead select error, warning, or critical. (Will be overridden by the __severity value, if set.)
Slack
You can send notifications to a Slack channel, using Slack’s Incoming Webhooks.
First, in your Slack workspace, use the Incoming Webhooks app to create a URL for the channel you want to send notifications to.
Then, in Cribl Edge, add a Slack notification target:
- Go to Manage > Notifications > Targets > Add Target.
- Enter a unique Target ID.
- Set the Target type to Slack.
- In Webhook URL, add the full URL of your Slack Incoming Webhook.
For example:https://hooks.slack.com/services/T00000000/B00000000/XXXXXXXXXXXXXXXXXXXXXXXX. - Select Save.
Now, you can select the new Slack target when configuring notifications.
You can also use a Webhook Destination to send specific event data to Slack for a team’s attention. For more information, see our Slack/Webhook integration topic.
SMS Notifications
You can use an Amazon SNS notification target to send text messages (SMS) to a list of phone numbers. To do this, you’ll need to set up a allowlist of phone numbers that are permitted to receive notifications.
- Go to Manage > Notifications > Targets > Add Target.
- Enter a unique Target ID.
- Set the Target type to AWS SNS.
- Set Region to the region of the Amazon S3 bucket.
- Set Destination type to Phone number.
- In Default Phone number, enter a comma-separated list of phone numbers
that are allowed to receive notifications. This value can be overridden by
the notification event
__phoneNumberfield. You can use*as the wildcard character.
For example:+15555550123, +15555551***. - Phone number allowlist is a wildcard list of allowed phone numbers.
- See the Amazon SNS section for details on configuring the Authentication, Processing, and Advanced tabs.
- Select Save.
Now, when you set up notifications, you can select the new Amazon SNS target and specify any phone number that matches the configured allowlist.
Webhook Targets
With this option, you can send Cribl Edge Notifications to an arbitrary webhook. Select Target type: Webhook to expose multiple left tabs, with the following configuration options:
General Settings
The added options that appear on this first left tab are:
URL: The endpoint that should receive Cribl Edge Notification events.
To proxy outbound HTTP/S requests, see System Proxy Configuration.
Method: Select the appropriate HTTP verb for requests: POST (the default), PUT, or PATCH.
Format: Specifies how to format Notification events before sending them to the endpoint. Select one of the following:
NDJSON(newline-delimited JSON, the default).JSON Array.Custom, which exposes these additional fields:- Source expression: JavaScript expression whose evaluation shapes the event that Cribl Edge sends to the endpoint. E.g.:
notification=${_raw}. For other fields you can use, see Expression Fields. If empty, Cribl Edge will send the full notification event as stringified JSON. - Drop when null: Toggle to
Yesif you want to drop events where the above Source expression evaluates tonull. - Content type: Defaults to
application/x-ndjson. You can substitute a different content type for requests sent to the endpoint. This entry will be overridden by any content types set in this modal’s Advanced Settings tab > Extra HTTP Headers section.
- Source expression: JavaScript expression whose evaluation shapes the event that Cribl Edge sends to the endpoint. E.g.:
Authentication
Select one of the following options for authentication:
- None: Don’t use authentication.
- Auth token: Use HTTP token authentication. In the resulting Token field, enter the bearer token that must be included in the HTTP authorization header.
- Basic: In the resulting Username and Password fields, enter HTTP Basic authentication credentials.
Processing Settings
The options on this left tab are identical to those on the Webhook Destination’s Processing Settings tab, with two exceptions:
- The default System fields entry here is
cribl_host. - You cannot specify a post-processing Pipeline here.
Advanced Settings
The options on this left tab are identical to those on the Webhook Destination’s Advanced Settings tab.
Expression Fields
When building the Source expression, you can use the following fields:
Fields Common to All Notification Types
starttime: Beginning of the time bucket where this condition was reported. All Notifications have this.endtime: End of the time bucket where this condition was reported. All Notifications have this._time: Timestamp when this Notification was created. All Notifications have this.cribl_host: Hostname of the (physical or virtual) machine on which this Notification was created. All Destination and Source Notifications have this.cribl_notification: Configured name/ID of this Notification. All Destination and Source Notifications have this.origin_metadata: Object containing metadata about the Notification’s origin, with the following fields for all Destination Notifications:type: “output”.id: ID of the affected Destination.subType: Destination’s type (where applicable).
origin_metadata: Object containing metadata about the Notification’s origin, with the following fields for all Source Notifications:type: “input”.id: ID of the affected Source.subType: Source’s type (where applicable).
Unhealthy Destination
health: Numeric value where0=green,1=yellow,2=red.output: Output ID of the affected Destination._raw: “Destination${output}[in group${__worker_group}] is unhealthy”._metric: “health.outputs”.
Destination Backpresssure Activated
backpressure_type:1for Block,2for Drop.output: Output ID of the affected Destination._raw: “Backpressure ([dropping|blocking]) is engaged for destination${output}[in group${__worker_group}]”._metric: “backpressure.outputs”.
Source High Data Volume
health: Numeric value where0=green,1=yellow,2=red.bytes: Number of bytes received in the time bucket.input: Input ID of the affected Source._raw: “Source${input}[in group${__worker_group}] traffic volume greater than${dataVolume}in${timeWindow}”._metric: “total.in_bytes”.
Source Low Data Volume
health: Numeric value where0=green,1=yellow,2=red.bytes: Number of bytes received in the time bucket.input: Input ID of the affected Source._raw: “Source${input}[in group${__worker_group}] traffic volume less than${dataVolume}in${timeWindow}”._metric: “total.in_bytes”.
Source No Data Received
health: Numeric value where0=green,1=yellow,2=red._time: Timestamp when this Notification was created.input: Input ID of the affected Source._raw: “Source ${input} [in group ${__worker_group}] had no data for ${timeWindow}”._metric: “total.in_bytes”
License Expiration
severity: One of “warn” or “fatal”.title: One of: “License expiring soon, data will stop flowing.” Or: “License has expired. Data flow has been stopped.”.text: One of: “License will expire on${expirationDate}, no external inputs will be read after that time. Please contact sales@cribl.io to renew your license.” Or: “License has expired.”