


These docs are for Cribl Edge 4.8 and are no longer actively maintained.
See the latest version (4.17).
Creating and Managing Fleets and Subfleets
Learn about Fleets and Subfleets in Cribl Edge.
Fleets and their corresponding Subfleets allow you to author and manage configuration settings for a particular set of Edge Nodes, so you can flexibly group Edge Nodes into logical Fleets and Subfleets. These Fleets and Subfleets can share and reuse configurations.
With Cribl Edge v.4.2.x and later, you can assign Fleet-level permissions to users. For details, see Members and Permissions.
Access the Fleets Page
You can access the Fleets page if you have an Enterprise or Standard license.
In Cribl Edge, click the Manage tab. Fleets is the landing page, which provides you a list of all configured Fleets and Subfleets in the instance.
This page contains five upper tabs:
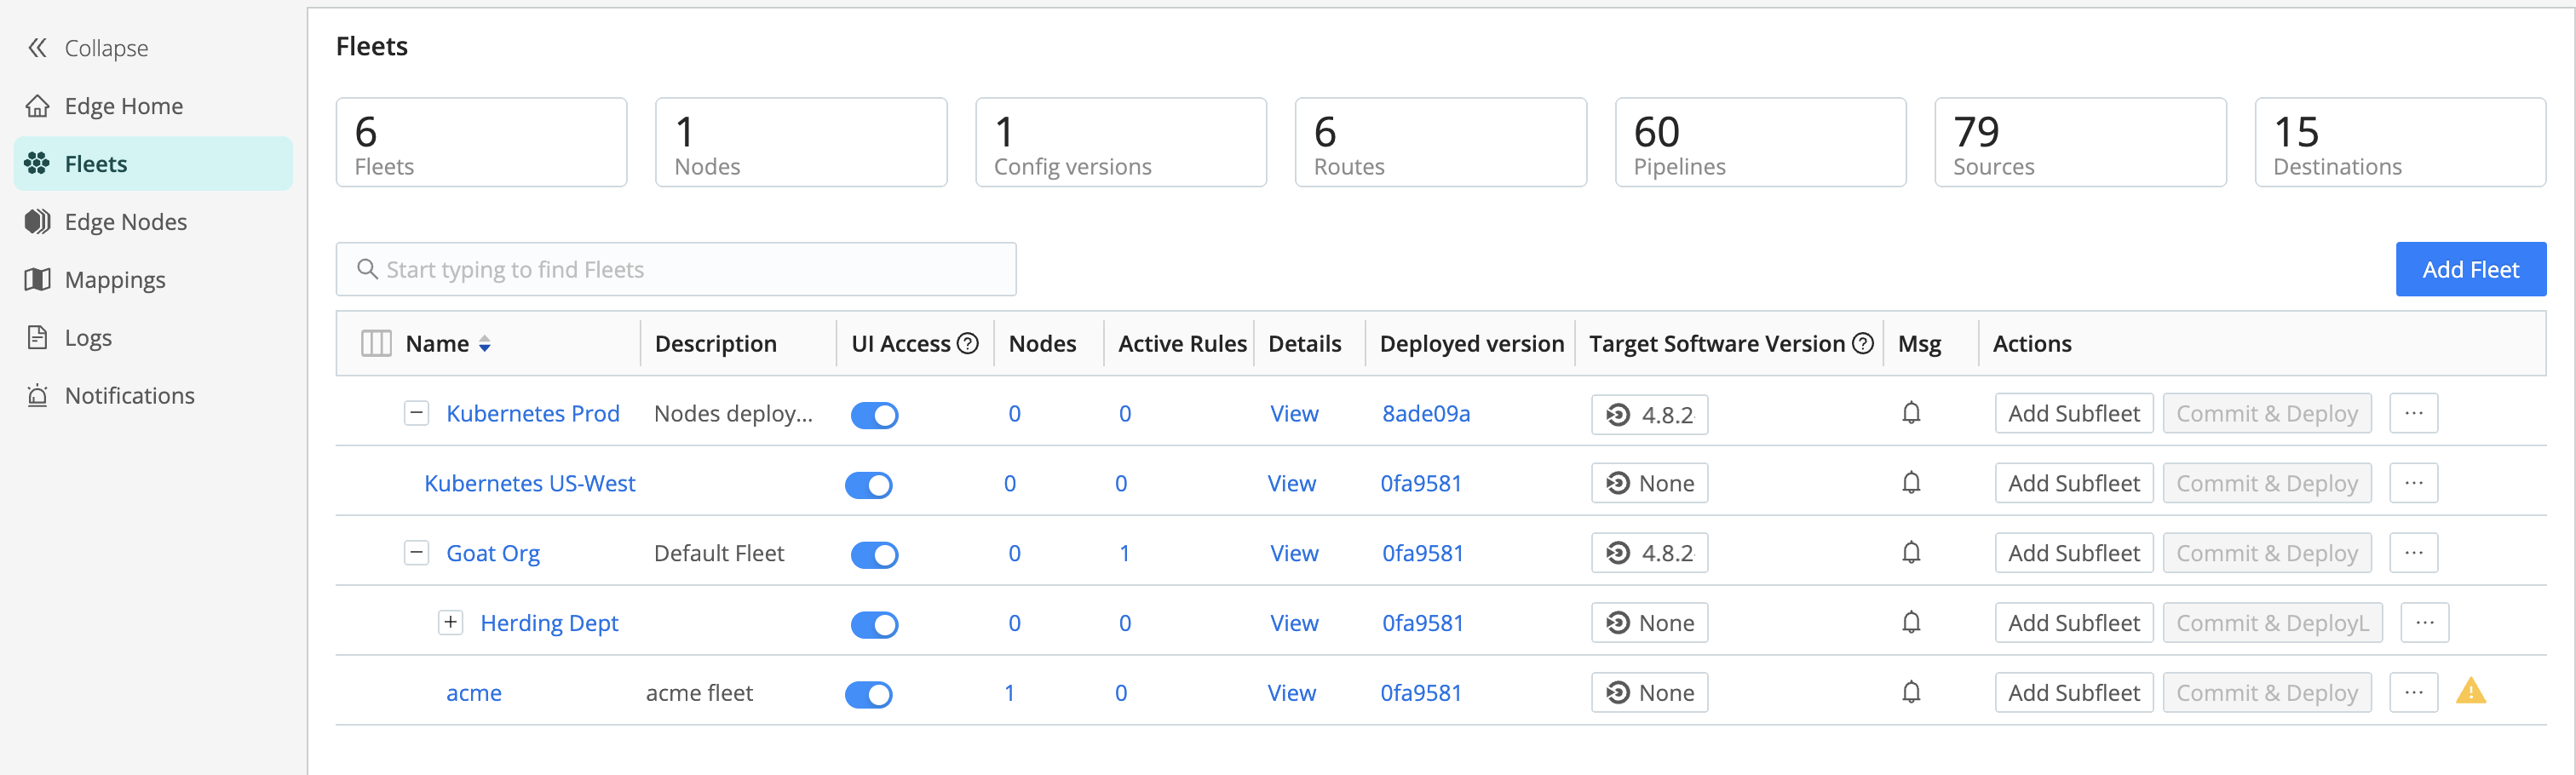
The top header shows you the number of configured Fleets, along with other statistics. Clicking on the Fleet’s Name redirects you to its Fleet Landing Page where you can explore more information for each of your configured Edge Nodes.
Creating a Fleet
To create a new Fleet:
- Click the Manage tab in the top nav.
- In the Fleets lower tab, click New Fleet.
- Enter a descriptive Fleet name, and optionally, a relevant Description and Tags.
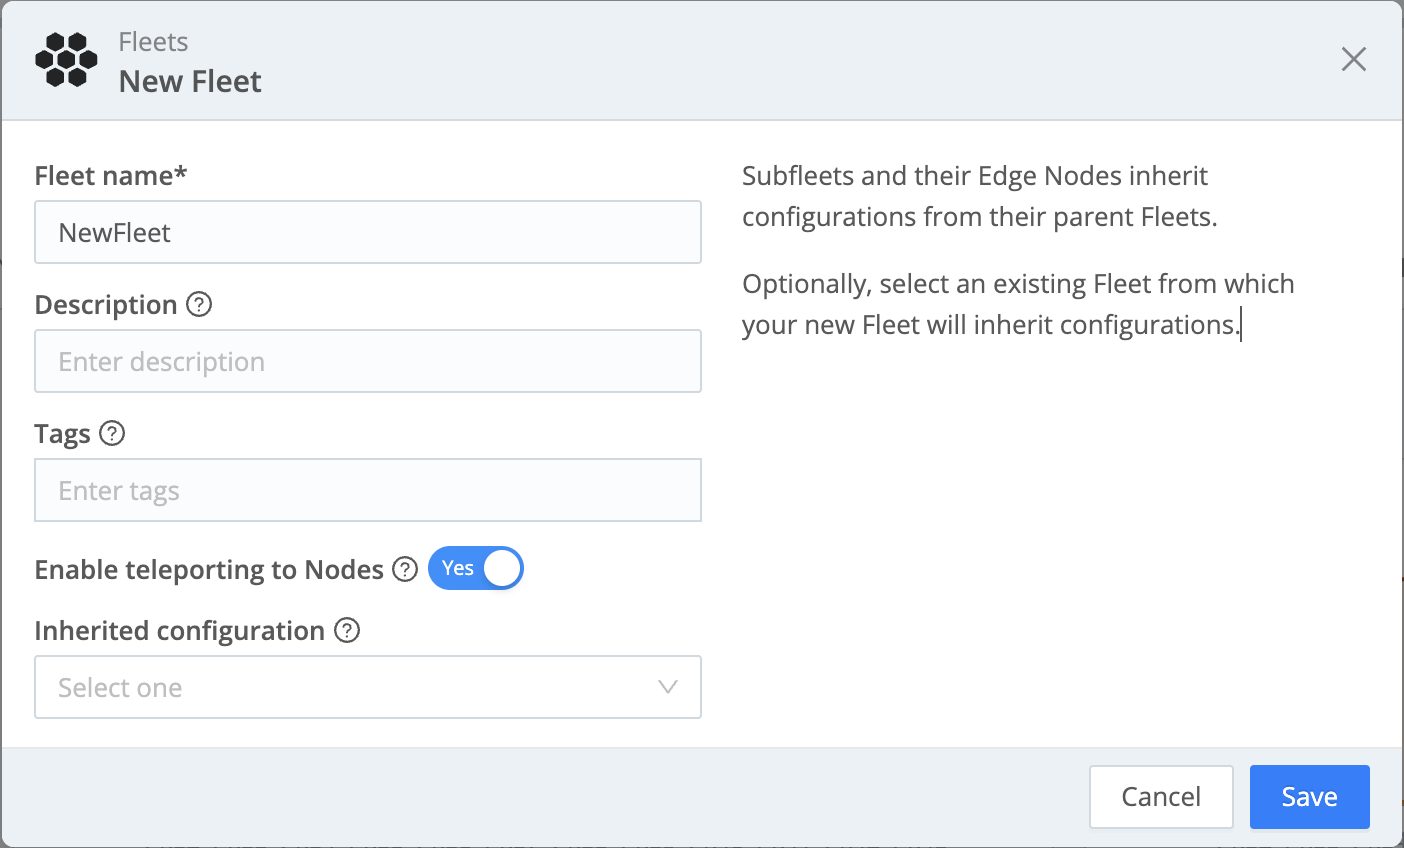
To enable teleporting to the Edge Nodes via the Leader’s UI, toggle Enable teleporting to Nodes to Yes, then click Save.
Subfleets and Inheritance Configurations
You can organize your Fleets and Subfleets into a hierarchy of configuration layers from the top level down. At the Fleet level, this might include grouping Edge Nodes with basic configurations like common logging locations, metrics, as well as common Sources and Destinations. At the Subfleet level, you can group Edge Nodes to pick up configurations specific to the applications and services that are running on the Nodes.
There are several ways you can build the hierarchy:
- Organizationally.
- Geographically (if your organization collects different data categories in different regions).
- Data center-based.
- OS-based.
Layering the configurations allows you to manage a large number of Edge Nodes
that share common yet differentiated configurations. For example, as an
administrator, you might need multiple layers of configurations to manage the
following Org > Department > OS > Application. In this case, the Edge Nodes at
the Application level can inherit and share configurations from the Org
level. You can update a parent-level configuration (Fleet) and have it applied
to all Subfleets and their respective Edge Nodes, reducing the time and effort
needed to manage them. For guidance, see our better practices doc: Fleets
Hierarchy and Design.
Adding a Subfleet
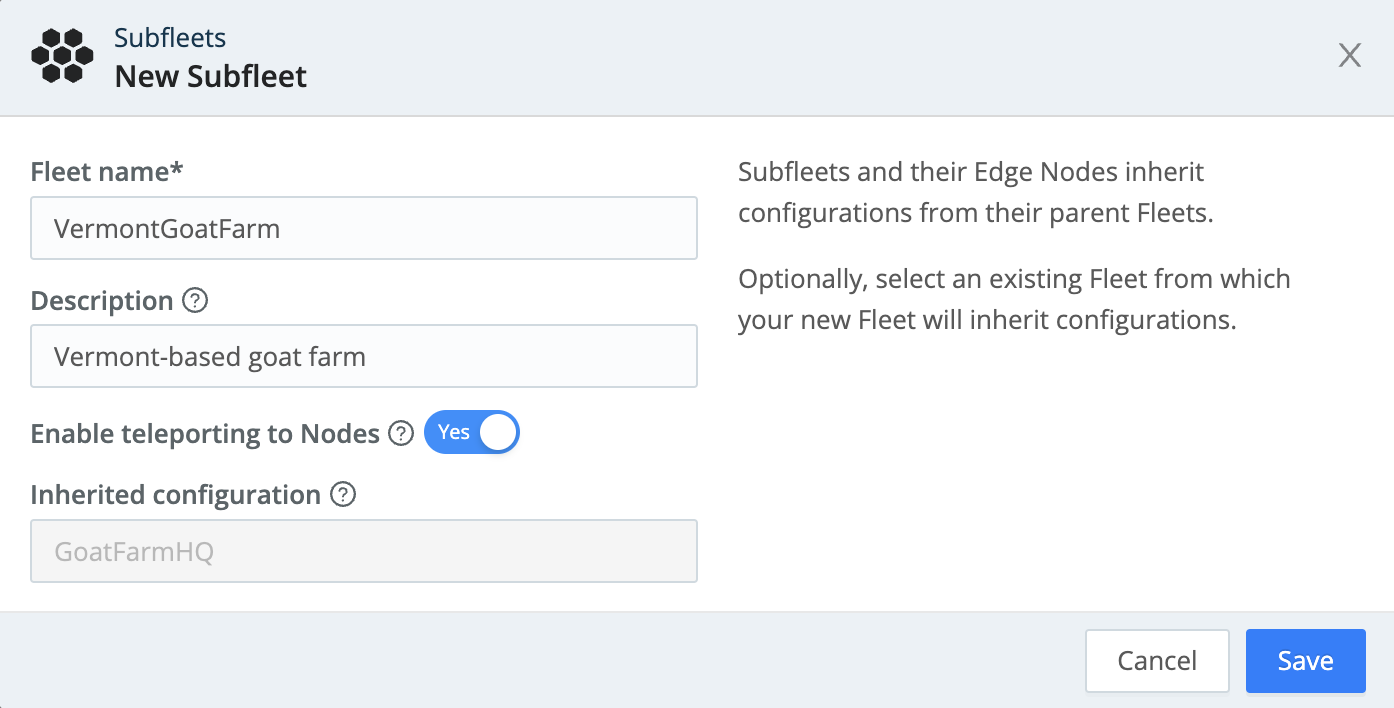
To add a Subfleet:
- In the row of your desired Fleet, click Add Subfleet in the Actions column.
- Enter a descriptive Fleet name and optional Description and Tags.
- Select an existing Fleet from the Inherited configuration drop-down. The Subfleet will inherit its configuration from the selected Fleet.
- Click Save.
You can also add a new Subfleet from a parent Fleet by clicking the Add Subfleet button in the Actions column.
Similarly, you can create a Subfleet in a selected Subfleet. You can add up to four levels of Subfleets underneath the parent Fleet, and each Subfleet will inherit the configurations of every parent Subfleet before it.

Viewing Subfleet Details and Options
To display the number of Routes, Pipelines, Sources, and Destinations in a Fleet, click View in the Details column of a Fleet or Subfleet.

On Cribl.Cloud, you’ll also see a Group Type column, showing whether the deployment is Hybrid or Cloud.
To display the Edit Fleet, Configure, Clone, and Delete options, click the ••• (Options) menu.

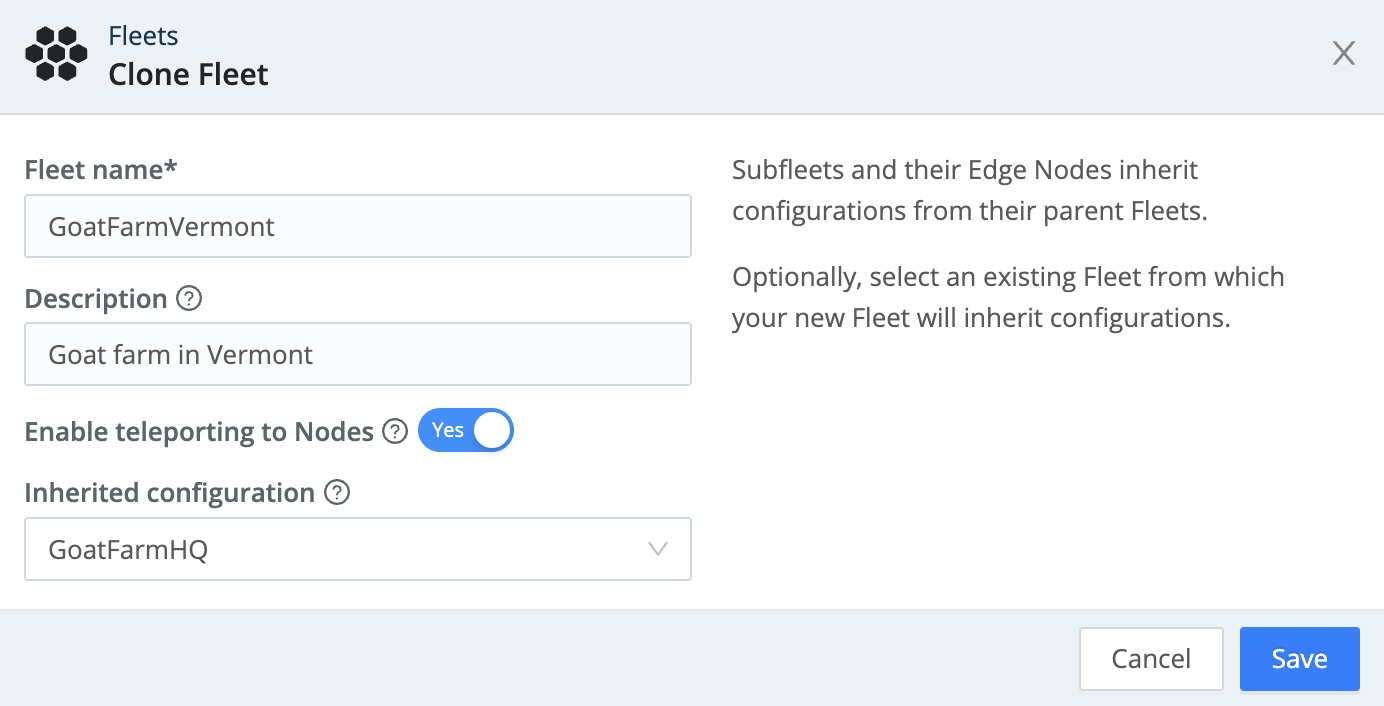
Cloning and Deleting a Subfleet
Cloning a Fleet copies the Fleet’s settings, while cloning a Subfleet inherits the parent’s configurations.
To clone a Subfleet, click its Options (•••) menu and select Clone.
To delete a Fleet or Subfleet, click Delete in the Options (•••) menu. You will be prompted to confirm your decision to delete the Fleet/Subfleet, click Yes to confirm.
You can also commit and deploy changes to Fleets and Subfleets on this page. For details, see Committing and Deploying Fleet Configurations.
Configuring multiple Fleets requires an Edge Enterprise or Standard license.
Accessing Inherited Packs, Lookups, and Samples
Fleets with inherited configurations can also inherit Packs, Lookups, and Samples. Here’s how to access them:
- Access inherited Packs in More > Data Routes, then open the Pipeline drop-down in a Route. Inherited Packs don’t appear in the Packs list.
- You can teleport into a Node and view Lookups and Samples in their respective lists when you deploy configuration changes to the Edge Nodes.
Saving and Managing Certificates
Configure certificates at the Fleet level to securely connect your Cribl Edge to Sources and Destinations. For details, see Setting Authentication on Sources/Destinations.
Subfleets automatically inherit these certificates from their Parent Fleet, streamlining your deployment process. These certificates are then distributed to individual Edge Nodes. Certificates are stored locally on each Edge Node in the local/edge/auth/certs/ directory.
To view and manage certificates, navigate to Fleet Settings > Security > Certificates.
All certificates from both the parent Fleet and Subfleet are visible in the Subfleet’s certificate list.
Configuring a Fleet
Navigate to a Fleet/Subfleet, click the Options (•••) menu to display the Configure option. Click Configure to display an interface for authoring and validating its configuration. You can configure everything for this Fleet as if it were a single Edge instance - using a similar visual interface.
Can’t Log into the Edge Node as Admin User?
To explicitly set passwords for Fleets, see User Authentication.
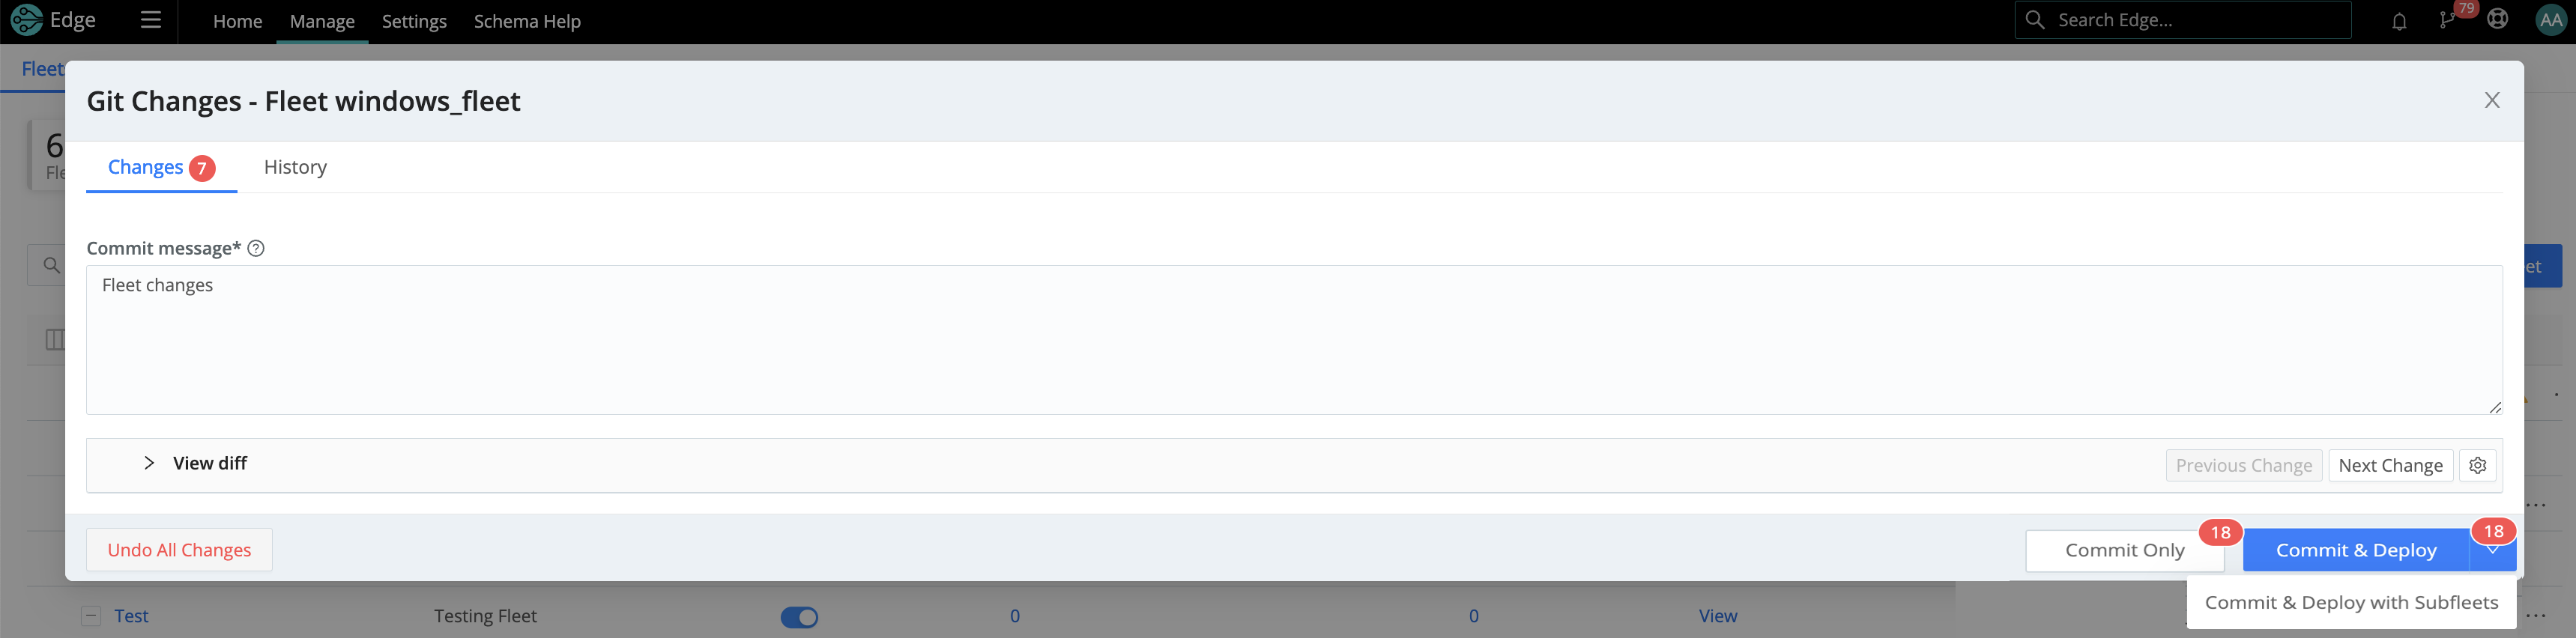
Committing and Deploying Fleet Configurations
To make new configurations visible and available to Subfleets, you must first Commit the changes within parent Fleets’ configurations.
On Cribl Edge v.4.1.x and later, when you commit changes to a parent Fleet, you have the option to Commit & Deploy with Subfleets. When you Deploy with Subfleets, the Subfleets will receive the new inherited configuration. For guidelines on deploying to a large number of Edge Nodes, see Leader Scalability.
Recovering a Fleet
If you delete a Fleet, you can no longer access its Version Control menu. As a result, you also lose the option to directly recover the Fleet.
You can, however, still recover a deleted Fleet, using one of the following two methods:
Creating a New Fleet with the Same Name
When you create a new Fleet with the same name as a deleted one, it will restore that Fleet with all of its configuration.
- Select the top nav’s Manage tab, select Fleets, then select Add Fleet.
- Set Fleet name to be exactly the same as the deleted Fleet. Fill in the remaining information and Save.
- If you previously committed the deletion of the original Fleet, open the Version Control menu.
- Select a previous version of the deleted Fleet and confirm with Done.
Reverting Commit via Command Line
You can restore a deleted Fleet by reverting the deletion commit in version control via command line.
- Stop the Cribl server.
- Using command line, look at the version control history for the Leader Node and identify the commit which deleted the Fleet.
- Revert to the last commit before the Fleet was deleted.
- Restart the Cribl server.
Deploying Configurations
A typical workflow for deploying Edge configurations looks like this:
- Work on configs.
- Save your changes.
- Commit (and optionally push).
- Locate your desired Fleet and click Deploy.
Once you save and commit your configuration changes, you can deploy the updated configs to the Edge Nodes. You deploy new configurations at the Fleet level.
Deploying with Subfleets
On Cribl Edge v.4.1.x and later, when you commit changes to a parent Fleet, you have the option to Deploy with Subfleets.
When you Deploy with Subfleets, the Subfleets will receive the new inherited configuration.
Edge Nodes that belong to the Fleet/Subfleet will start pulling updated configurations on their next check-in with the Leader.
Can’t log in to the Edge Node as Admin User? When an Edge Node pulls its first configs, the admin password will be randomized, unless specifically changed. This means that users won’t be able to log in on the Edge Node with default credentials. For details, see User Authentication.
Configuration Files
On the Leader, a Fleet’s configuration resides under:
$CRIBL_HOME/groups/<FleetName>/local/edge.
On the managed Edge Node, after configs have been pulled, they are extracted under:
$CRIBL_HOME/local/edge/.
Some configuration changes will require restarts, while many others will require only reloads. For details, see Configurations and Restart. Upon restart, individual Edge Nodes might temporarily disappear from the Leader’s Nodes tab, before reappearing.
Environment Variables
CRIBL_DIST_LEADER_URL- URL of the Leader Node. Format:<tls|tcp>://<authToken>@host:port?group=default_fleet&tag=tag1&tag=tag2&tls.<tls-settings below>.Example:
CRIBL_DIST_LEADER_URL=tls://<authToken>@leader:4200Parameters:
group- The preferred Fleet assignment.resiliency- The preferred Leader failover mode.volume- The location of the NFS directory to support Leader failover.tag- A list of tags that you can use to assign the Edge Node to a Fleet.tls.privKeyPath- Private Key Path.tls.passphrase- Key Passphrase.tls.caPath- CA Certificate Path.tls.certPath- Certificate Path.tls.rejectUnauthorized- Validate Client Certs. Boolean, defaults tofalse.tls.requestCert- Authenticate Client (mutual auth). Boolean, defaults tofalse.tls.commonNameRegex- Regex matching peer certificate > subject > common names allowed to connect. Used only iftls.requestCertis set totrue.
CRIBL_DIST_MODE- Set to one of:managed-edge(managed Node),master(Leader instance), oredge(single instance).CRIBL_HOME- Auto setup on startup. Defaults to parent ofbindirectory.CRIBL_CONF_DIR- Auto setup on startup. Defaults to parent ofbindirectory.CRIBL_DIST_LEADER_BUNDLE_URL- AWS S3 bucket (format:s3://${bucket}) for remote bundle storage.CRIBL_TMP_DIR- Defines the root of a temporary directory.Sources use this directory to stage downloaded Parquet data. The format of derived temporary directories is:
$CRIBL_TMP_DIR || os.tmpdir())/cribl_temp[/<componentPath>/<PID>]
… where:<componentPath>=<inputId>;<PID>= Worker Process ID; andos.tmpdir()defaults to/tmpon Linux. Override that default using thisCRIBL_TMP_DIRenvironment variable.CRIBL_VOLUME_DIR- Sets a directory that persists modified data between different containers or ephemeral instances.CRIBL_DIST_WORKER_PROXY- Communicate to the Leader Node via a SOCKS proxy. Format:<socks4|socks5>://<username>:<password>@<host>:<port>. Only<host>:<port>are required.The default protocol is
socks5://, but you can specifysocks4://proxyhost:portif needed.To authenticate on a SOCKS4 proxy with username and password, use this format:
username:password@proxyhost:port. Theproxyhostcan be ahostname,ip4, orip6.
Edge Node GUID
When you install and first run the software, a GUID is generated and stored in a .dat file located in CRIBL_HOME/local/cribl/auth/.
For example:
# cat CRIBL_HOME/local/cribl/auth/676f6174733432.dat
{"it":1570724418,"phf":0,"guid":"48f7b21a-0c03-45e0-a699-01e0b7a1e061"}
When deploying Cribl Edge as part of a host image or VM, be sure to remove this file, so that you don’t end up with duplicate GUIDs. The file will be regenerated on the next run.