


Add and Update Edge Nodes
Learn how to add and update Edge Nodes in Cribl Edge
Cribl Edge provides you with the ability to add and update Edge Nodes from the UI. To access this function, select Edge Nodes in the sidebar. On the Edge Nodes page, select Add/Update Edge Node.

Here, you can update an existing Node with new configurations or add a new Node using the bootstrap script.
Add a New Edge Node with a Bootstrap Script
Using the Cribl Edge UI, you can add Edge Nodes to your existing deployment. To do this, change the environment-specific fields, then copy and paste the resulting bootstrap script into a CLI. The script updates in real-time as you change the fields. The result is a new Edge Node configured with the options you chose.
You can also copy the bootstrap script and modify it instead of manually editing the fields in the UI, as well as concatenate multiple scripts for different use cases.
Host Communication Prerequisites
To enable the Leader to manage the Edge Nodes, you must enable ongoing outbound communication to the Leader’s port 4200 on all Edge Nodes hosts.
While the bootstrap script runs, firewalls on each Nodes’s host must also allow outbound communication on the following ports:
- Port 443 to
https://cdn.cribl.io, when Install package location is set toCribl CDN. - Port 443 to a Cribl.Cloud Leader.
- Port 9000 to an on-prem Leader.
Add an Edge Node
From the Cribl Edge sidebar, select Edge Nodes.
On the Edge Nodes page, select Add/Update Edge Node.
Select your OS, then select Add.
Fill and modify the deployment option fields:
- The Install package location defaults to
Cribl CDN. If desired, change this toDownload URL. - As needed, correct the target Fleet, as well as the Leader or Outpost hostname/IP (URI).
- As needed, correct the User and User Group to run Cribl as.
- As needed, correct the Installation directory.
- The Install package location defaults to
Optionally, add Tags that you can use for filtering and grouping in Cribl Edge. Use a tab or hard return between (arbitrary) tag names.
Copy the resulting script to your clipboard.
Fill and modify the deployment option fields:
- As needed, correct the target Fleet, as well as the Leader or Outpost hostname/IP (URI).
- As needed, correct the Username and Password to run Cribl as.
- As needed, correct the Installation directory.
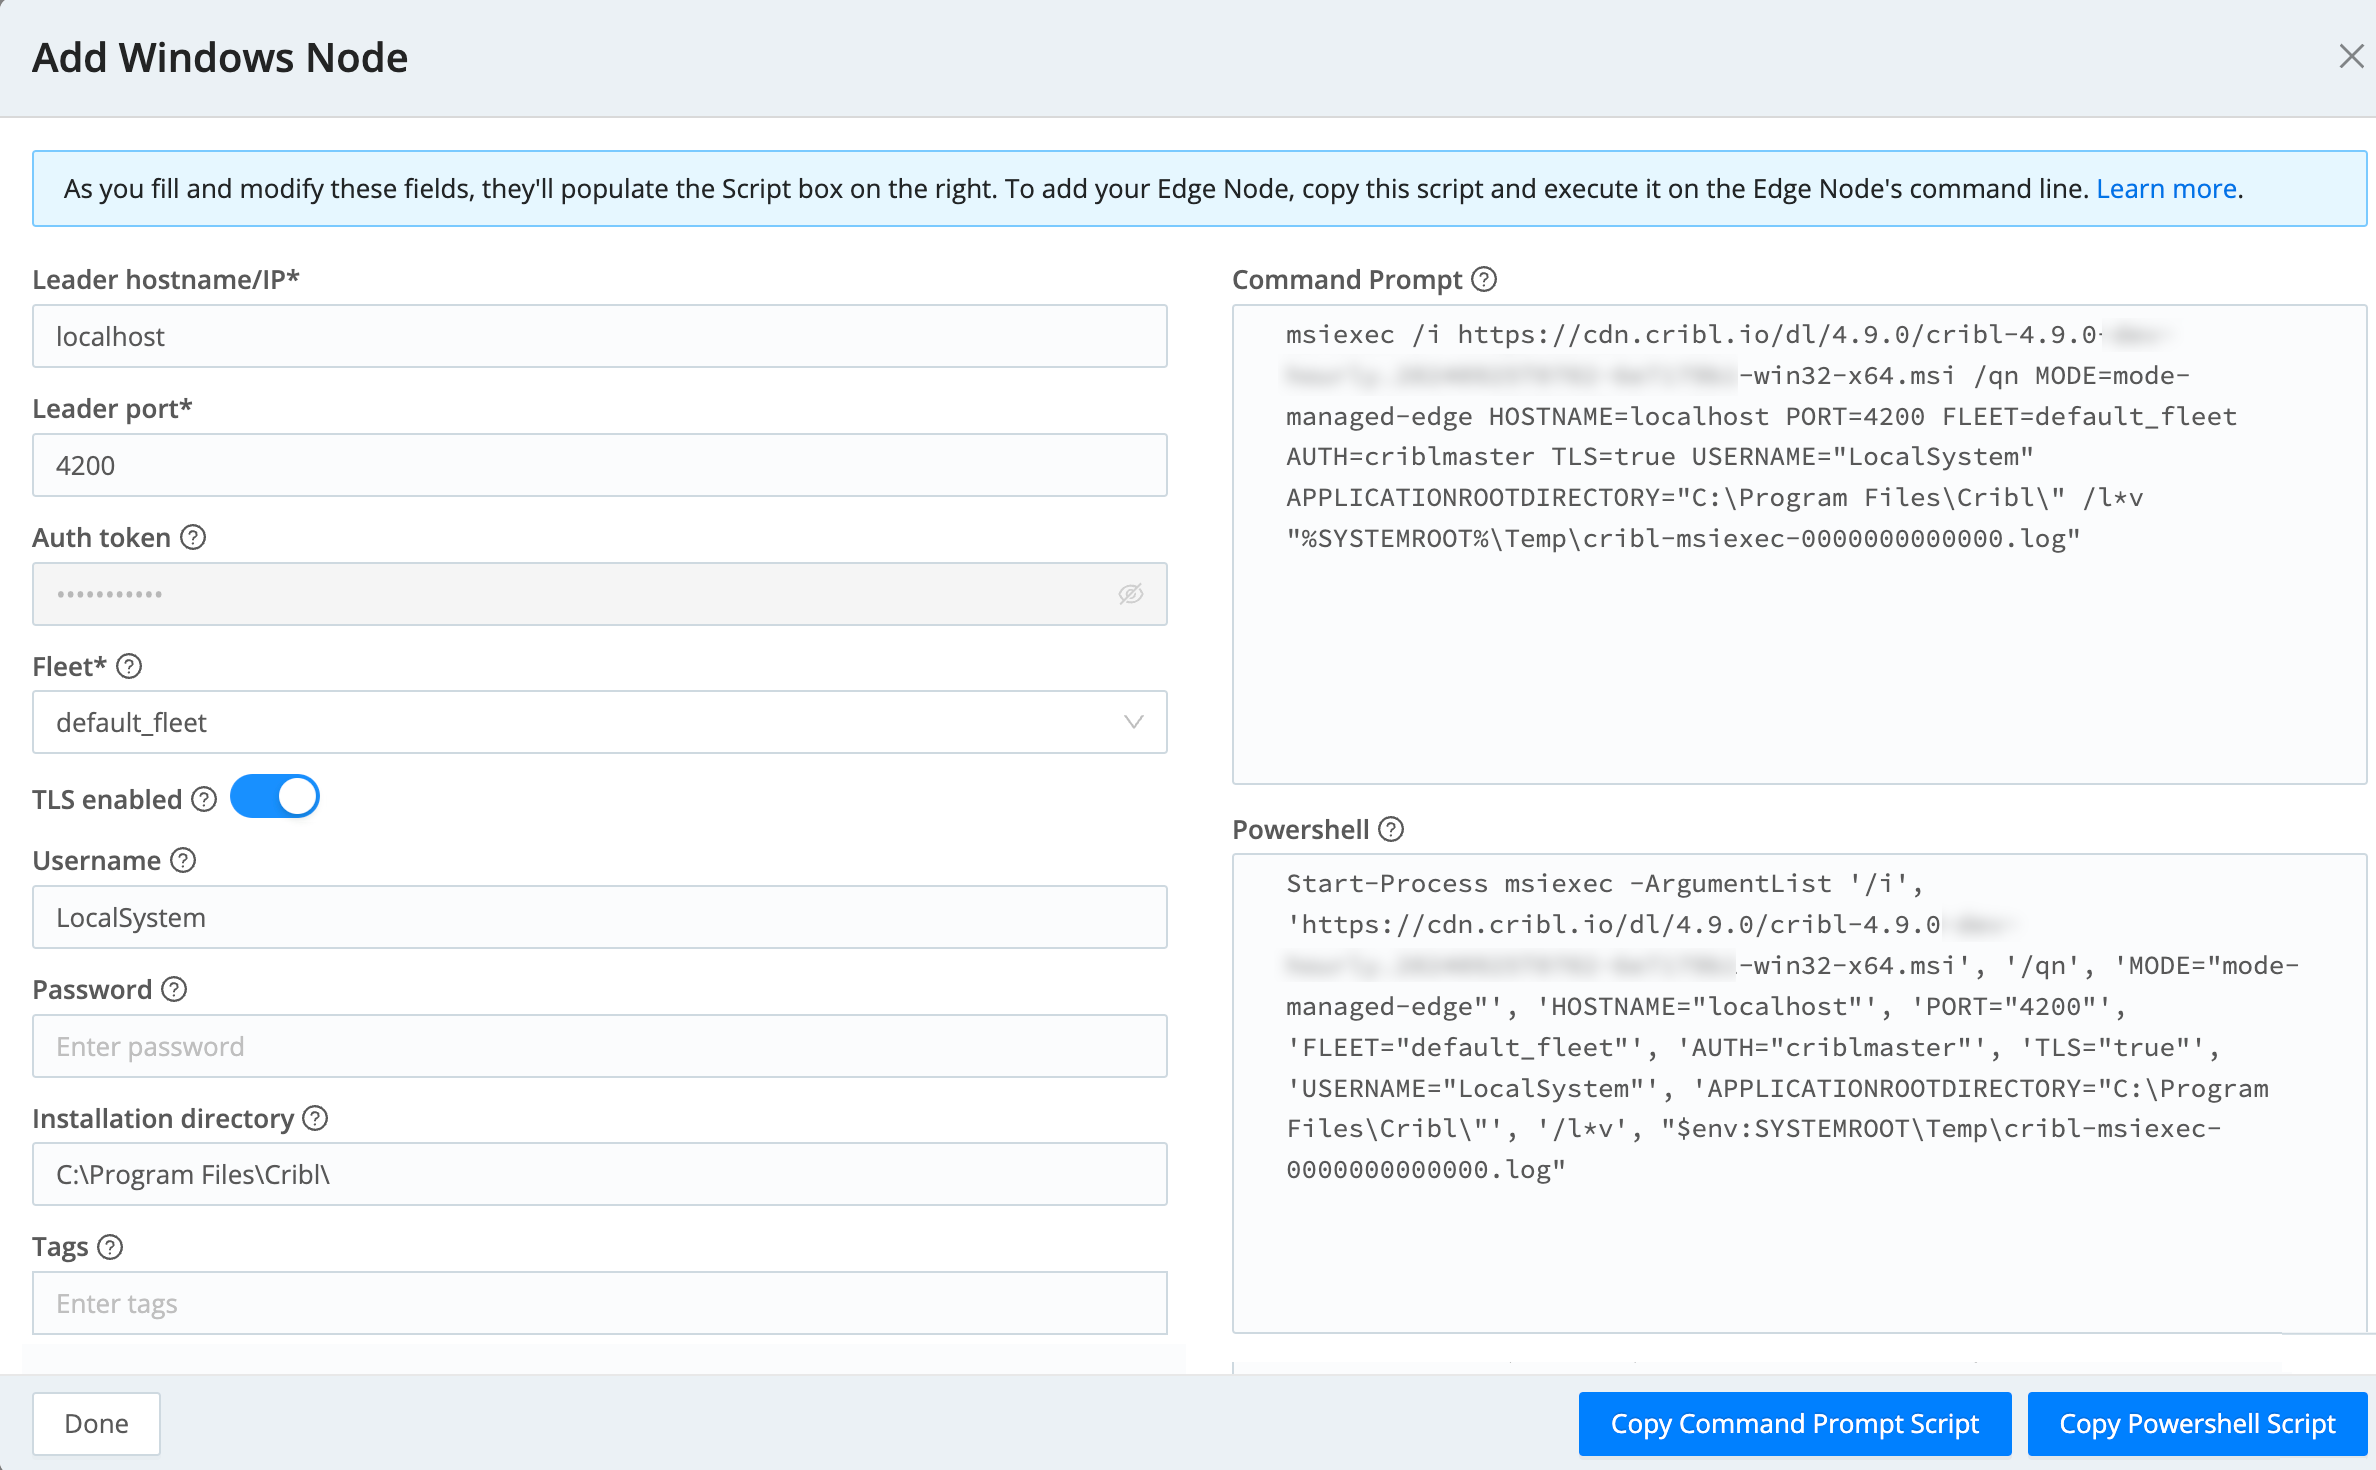
Add or update a Windows Edge Node Optionally, add Tags that you can use for filtering and grouping in Cribl Edge. Use a tab or hard return between (arbitrary) tag names.
Copy the resulting script, either for the command prompt, or Powershell, to your clipboard.
Fill and modify the deployment option fields:
- The Install package location defaults to
Cribl CDN. If desired, change this toDownload URL. - As needed, correct the target Fleet, as well as the Leader or Outpost hostname/IP (URI).
- As needed, correct the User and User Group to run Cribl as.
- The Install package location defaults to
Optionally, add Tags that you can use for filtering and grouping in Cribl Edge. Use a tab or hard return between (arbitrary) tag names.
Copy the resulting script to your clipboard. Run the script with
sudo.
Finally, to add the Edge Node, paste the script onto the command line of your Edge Node and execute it.
If your script successfully added the Edge Node, you will see it in the Edge Nodes list.
Update an Edge Node with a Bootstrap Script
You can use bootstrap scripts to update the configuration of your Edge Node.
Updating adjusts the Leader connection details for the Node, retaining its version. To upgrade the Edge Node - that is, install a newer version of the software - see Upgrading.
Select Update Script Type
When you update a Linux or macOS Node, you must select a Script type from the drop-down. Choose between environment variable or CLI to add/update an Edge Node.
With Environment variable selected:
- Hover over the Script field and select the copy icon.
- To allow Edge to update or add Edge Nodes, configure the environment variable with a restart command.
You can add the restart command to the environment variable in the Linux systemd service unit file, so you don’t have to insert the environment variable each time you restart the server:
- In the CLI, enter
sudo systemctl edit cribl-edgeon the Edge Node. - Add
ENVIRONMENT="CRIBL_DIST_LEADER_URL=tcp://criblmaster@masterHostname:4200"to the opened file and save it. - Reload the service with
sudo systemctl restart cribl-edge.
- In the CLI, enter
Or, you can use use
./cribl restart, but you will have to insert the environment variable each time you restart the server:CRIBL_DIST_LEADER_URL=tcp://criblmaster@masterHostname:4200 ./cribl restart
With CLI selected:
- Hover over the Script field and select the copy icon.
- Paste the copied script into a CLI and run it.
Edge Node Updates Using Fleet Version Settings
The script you generate using the Add/Update Edge Node window ensures accurate updates by using the specified Target Software Version for your Fleet, enhancing the reliability and consistency of updates across all supported environments: Docker, Kubernetes, Linux, macOS, and Windows.
For Docker and Kubernetes:
If you don’t specify a target version, the command uses the Leader version’s image and version flag respectively, by default.
If you specify a target version, the command parses the Fleet version and maps it to the appropriate CDN URL or version flag.
For Linux and macOS environments:
- The existing script behavior from the Leader manages the updates unless you specify a target version, in which case the script uses that version.
For Windows:
- The default behavior uses the Leader Version from the CDN, while specifying a target version directs the command to parse the Fleet version and map it for MSI download via the CDN.
This mechanism ensures a more consistent and reliable deployment process, maintaining version control and improving update accuracy across all environments.