


Splunk Cloud Self Storage (DDSS) Direct Access
Bring your Splunk data straight into Cribl Lake, bypassing Cribl Stream processing.
You can use the Splunk Cloud Self Storage option to archive one or more Splunk Cloud indexes directly to Cribl Lake. This option bypasses routing or processing it through Cribl Stream. Once your data is integrated with Cribl Lake, Cribl Stream and Cribl Search can access it as a Lake Dataset.
Requirements for Splunk Cloud Direct Access
To set up this integration, you need a Splunk index (new or existing).
You can configure one Splunk Cloud Direct Access Source per Workspace.
See other Limitations later in this topic.
Configure Splunk Cloud Direct Access
To configure this integration, you’ll work back and forth between Splunk Cloud and Cribl Lake to share linking identifiers. The major steps are:
- In Splunk Cloud, get your Splunk Cloud ID.
- In Cribl Lake, create a Cribl Lake Source.
- In Splunk Cloud, connect your Cribl Lake bucket.
- In Cribl Lake, provision your Lake.
- In Splunk Cloud, test and submit the connection.
- In Cribl Lake, create a Cribl Lake Dataset.
Get Your Splunk Cloud ID
Locate and copy your Splunk Cloud ID (the first part of your Splunk Cloud URL).
For more information on finding the ID, or creating a new Splunk index, see the Splunk Cloud docs.
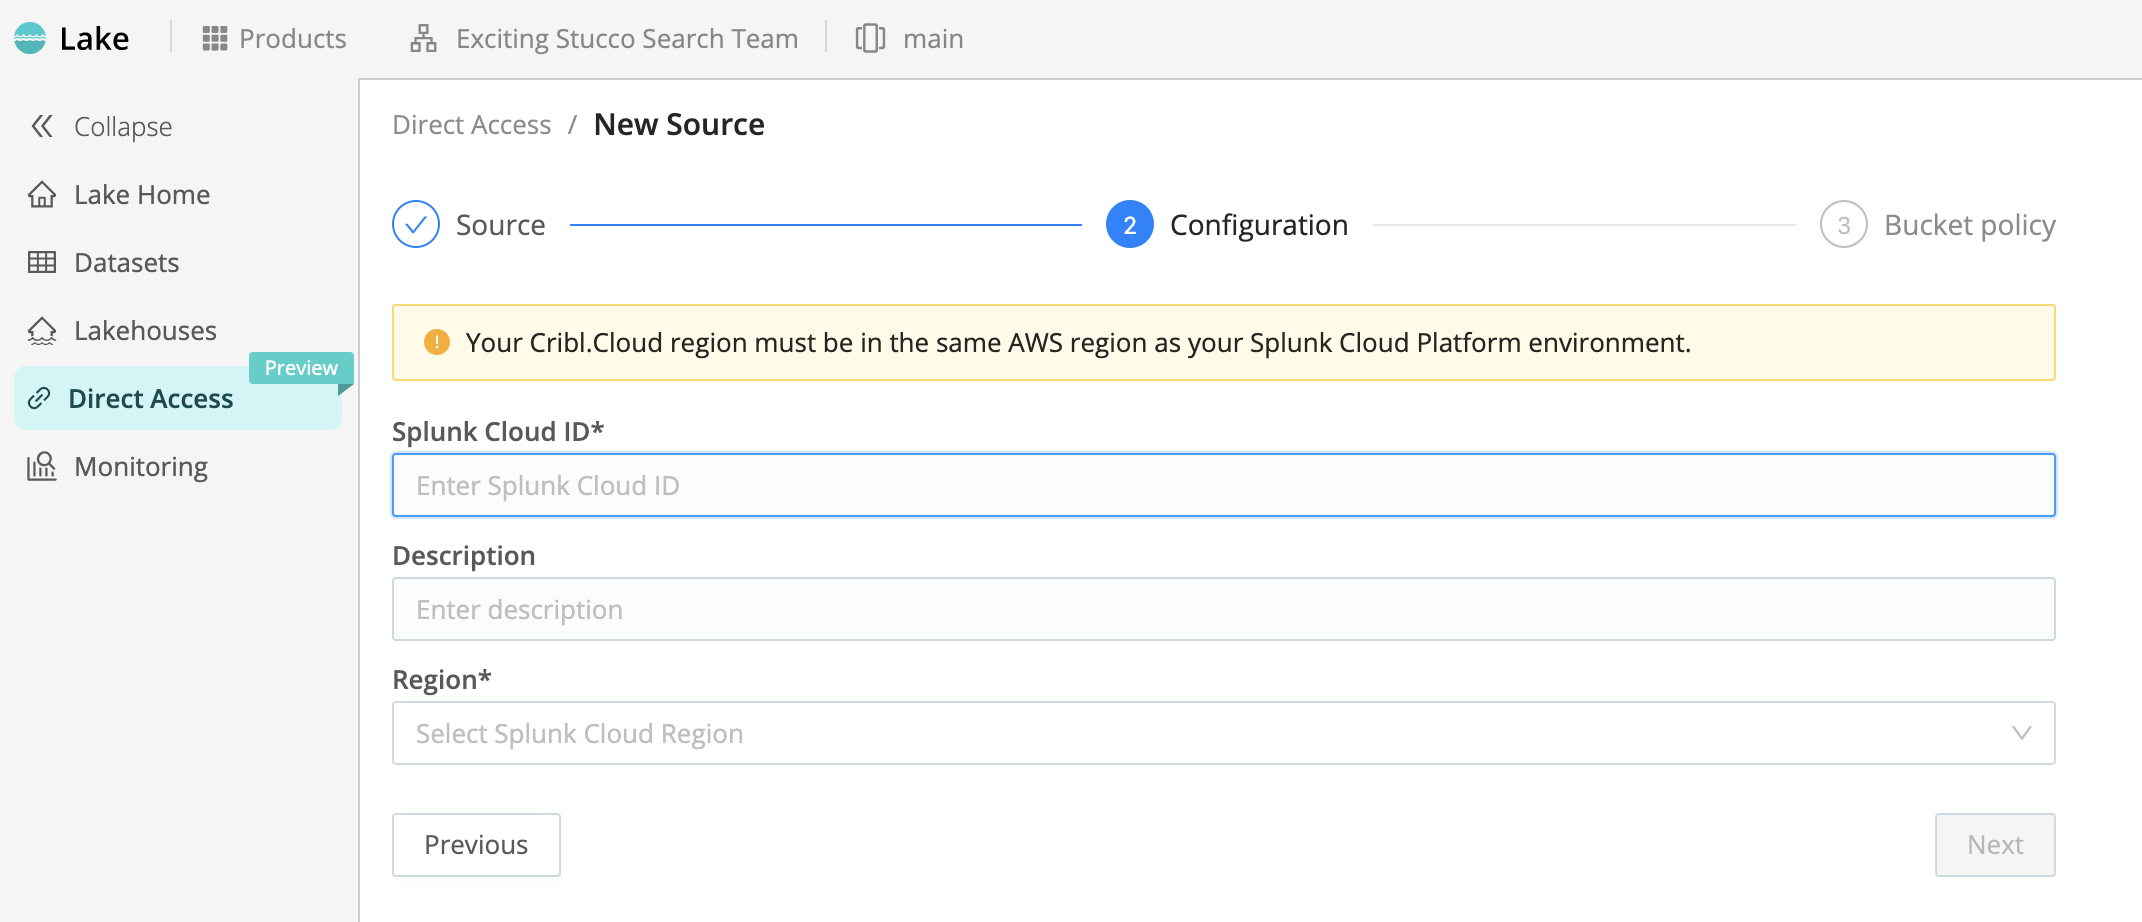
Create Cribl Lake Source
In Cribl Lake, create the integration with your Splunk Cloud instance:
- From the sidebar, select Direct Access.
- Select the Splunk Cloud Self Storage Source, and select Next.
- In the Splunk Cloud ID field, paste your ID that you copied from Splunk Cloud in the previous section.
- Optionally, enter a Description of this Lake integration’s purpose.
- From the Region drop-down, select the AWS Region of your Splunk Cloud Platform.
- Select Next.
- Copy the Cribl Lake bucket name to your clipboard for the next section.
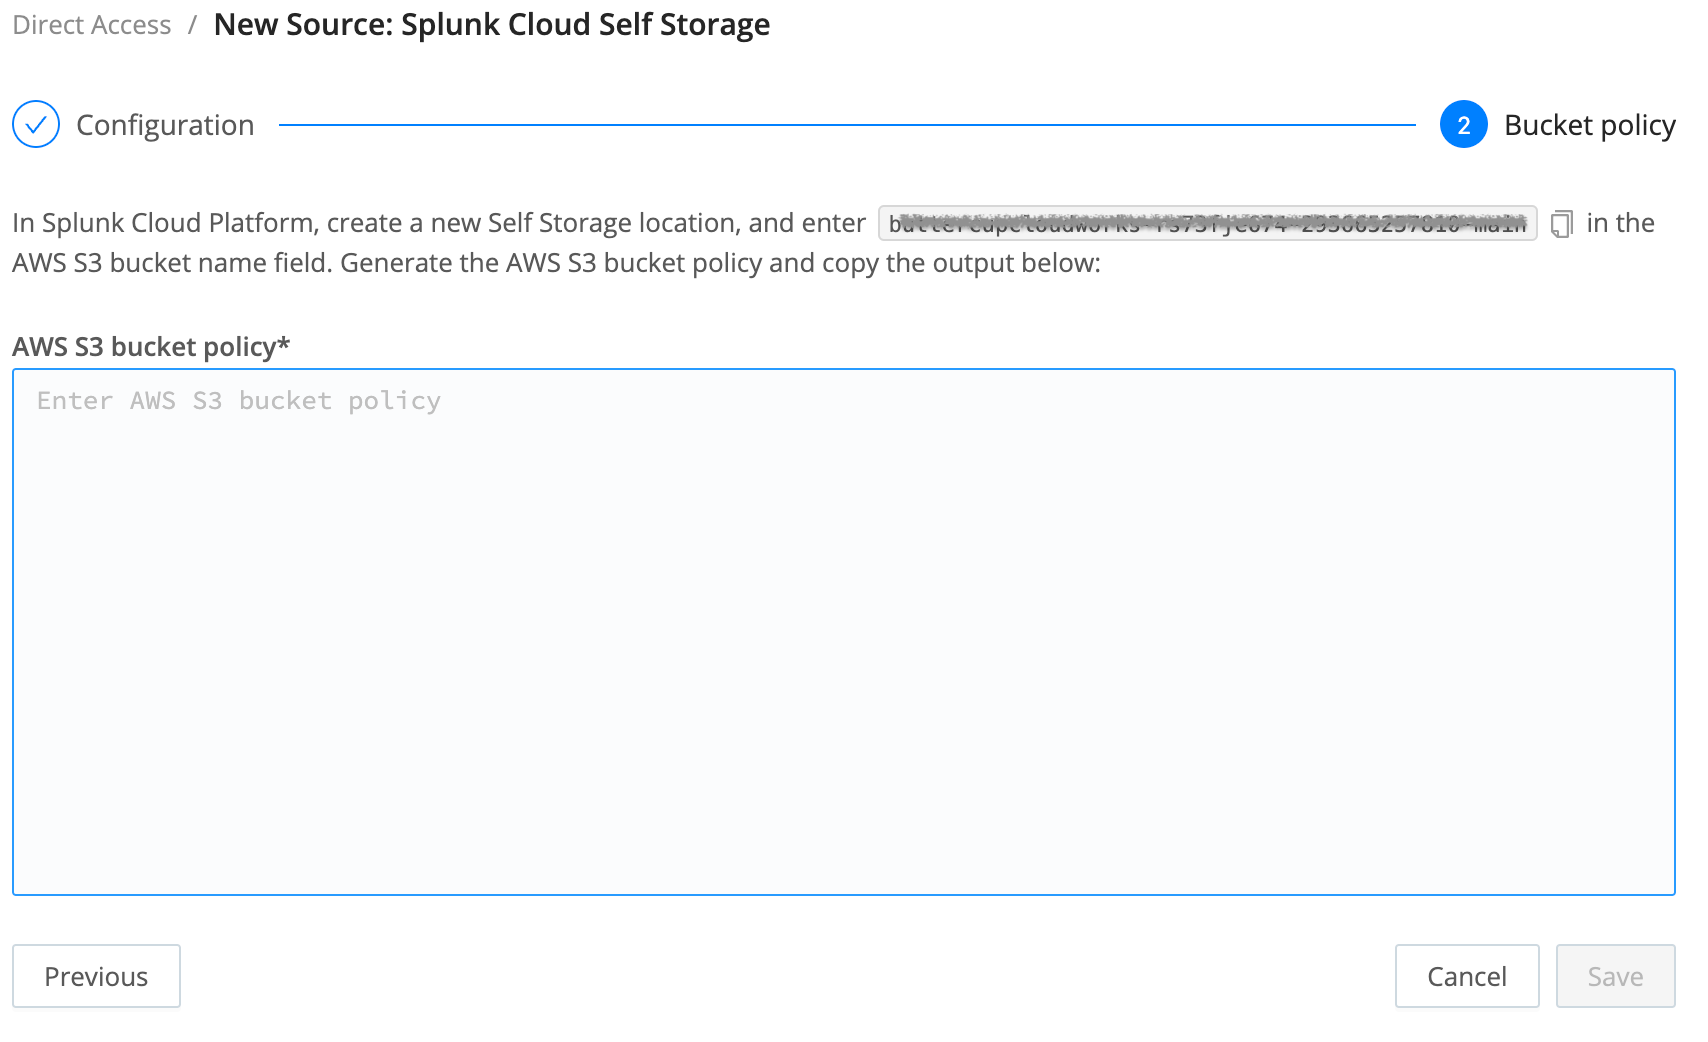
Connect Splunk Cloud to Your Cribl Lake Storage Location
Next, return to your Splunk Cloud Platform, to point this environment to the Storage Location you’ve created in Cribl Lake:
- In the Amazon S3 bucket name field, paste Cribl Lake bucket name you copied in the previous section.
- Select Generate to generate a bucket policy.
- Copy the resulting bucket policy to your clipboard for the next section.
Provision Your Lake
Return to Cribl Lake to link your bucket policy and provision the new Lake:
- In the AWS S3 bucket policy pane, paste the Splunk Cloud bucket policy you copied in the previous section.
- Select Save.
- Wait a few minutes for your new Lake to be provisioned.
Test and Submit the Connection
After provisioning is complete in Cribl Lake, test the connection from Splunk Cloud:
- In the Self Storage Locations dialog, select Test.
Splunk Cloud will write a 0 KB test file to verify that Splunk Cloud Platform has permissions to write to Cribl Lake.
- If you see a success message, select Submit to finish linking your Self Storage location to Cribl Lake.
- If the test fails, see Troubleshooting Direct Access.
Create Cribl Lake Dataset
Once you’ve verified the connection from Splunk Cloud, your final setup step is to create a Lake Dataset to contain your data. Follow the steps in Create a New Lake Dataset, being careful to add these specific requirements to handle DDSS data:
- Give the Dataset an ID that exactly matches your Splunk index name from Set Up Splunk Self Storage Location. (Otherwise, you will be unable to search or replay your data.)
- Set the Storage Location to the default
Cribl Lake, or make no selection on this drop-down. - Set the Data format to
DDSS.
Save your new Dataset, and your Splunk data should begin flowing into it. That’s it!
Breaking a Direct Access Connection
After you link Splunk and Cribl resources, their interdependence means that deleting resources on either side has the following consequences:
- In Cribl Lake, deleting a Splunk Cloud Self Storage Source means that you will lose all your Splunk data archived here. Also, Splunk Cloud will no longer be able to write to Cribl Lake through this integration. However, this deletion will not affect your data flow and storage within Splunk Cloud.
- In Splunk Cloud, deleting a Self Storage location that’s linked to a Cribl Lake Dataset means that Splunk Cloud will no longer archive data to Cribl Lake. However, this deletion will not affect your data already stored within Cribl Lake.
- However, if you cancel your Splunk Cloud account, your Splunk Cloud Self Storage Source in Cribl Lake can still remain intact. This will allow Cribl Stream (Collector) and Cribl Search (queries) to continue reading your Dataset’s current contents. However, no new data can be written to the Dataset.
Limitations of Splunk Cloud Direct Access
A Lake Dataset created and populated via Splunk Cloud Direct Access is read-only to other Cribl products. So, although both Cribl Stream and Cribl Search can process data from the Dataset, neither product can write to it.
A Lake Dataset populated via Direct Access must use the default Cribl Lake Storage Location, not an external
bucket.
A Lake Dataset created via Splunk Cloud Direct Access can’t be assigned to a Lakehouse.
Troubleshooting Direct Access
If Splunk Cloud fails to write the test file to your Lake Dataset, look for the following possible sources of error. Correcting each of these requires re-creating your integration from scratch:
- Regions mismatched between Splunk Cloud and Cribl.Cloud.
- Bucket name does not start with the Splunk Cloud ID.
- Amazon S3 bucket policy not pasted in accurately.