


GitOps
With Cribl Stream’s GitOps features, you can manage Cribl Stream configuration with standard version-control systems and CI/CD flow. You can separate development from production configurations, and thus, safely build and continuously deploy your observability pipelines. The production environment will be read-only, and thus strongly protected against unauthorized or unintended changes. This intentionally restrictive approach is a good fit for some but not all organizations.
The GitOps workflow described here assumes that your development, staging, and production environments are identical or nearly identical. If, on the other hand, your development environment differs significantly from production (in its branching structure, for example, or if users have wide latitude for experimentation), you should consider solutions other than GitOps.
GitOps requires a Distributed Cribl Stream deployment with a certain license tier.
Cribl.Cloud does not support GitOps.
How to Use This Doc
This doc has three sections.
- Work through all three sections, in order, once.
- Once you have done that, you are finished with the first two sections, Preparing Your Git Repo and Preparing Cribl Stream.
- Next, incorporate the HTTP request from the third section (GitOps Workflow) into your CI/CD tool infrastructure.
- From then on, your normal production routine will be to just repeat the GitOps Workflow (that is, the third section) again and again.
You’ll perform setup steps in the Cribl Stream UI, in your Git management system, and at the command line. Screenshots are in light mode for Cribl Stream, and in dark mode for GitHub examples.
Environment and branch names have been chosen to help you keep track of what you’re doing - if you decide to use different ones, exercise care. We’ve chosen names that always make it clear whether we’re talking about environments or about branches:
- Development and Production will be your Cribl Stream environments.
devandprodwill be the branches in your Git repo.
Procedures begin with instructions that are agnostic to the Git management system you want to use, whether that is free GitHub, GitHub Enterprise, GitLab, Bitbucket, or a self-hosted Git server. The detailed instructions that follow are for use with free GitHub. If you’re using one of the other Git management systems, you’ll need to substitute appropriate instructions for the ones that begin “To do this in GitHub …”
Check out Cribl’s free GitOps sandbox for a “deep dive” and to work through a practical example.
If you encounter either of the following situations, see the linked appendix:
- You need to upgrade your GitOps-enabled Cribl Stream deployment.
- You are not using systemd, and need to override the defaults using environment variables.
Preparing Your Git Repo
The procedure in this section only needs to be done once. When you’ve completed it, you can prepare Cribl Stream for GitOps.
Creating SSH Public and Private Keys
You’ll use SSH to connect to your Git management system; Cribl does not recommend using basic authentication for GitOps.
At the command line, generate public and private SSH keys, specifying Ed25519 as the key type:
ssh-keygen -t ed25519 -C "your_email@example.com"Verify that the ~/.ssh/ directory contains both of the newly-generated keys:
id_ed25519(the private key that Cribl Stream will use).id_ed25519.pub(the public key that your Git management system will use).
Copy the public SSH key to your clipboard:
cat ~/.ssh/id_ed25519.pubAssociate the public key with your Git management account.
To do this in GitHub:
- If you do not have a GitHub account, create one.
- Sign in to your GitHub account.
- On the SSH and GPG keys page, click New SSH key.
- Paste the key in the Key field.
- Click Add SSH key.
Creating a Private Git Repo
You need to create a dedicated, private Git repo - your Development environment will write to it, and your Production environment will sync to it. Create a private repo named cribl.
To do this in GitHub:
- In GitHub, select Create new… on the top bar, and choose New repository.
- Name the repo
cribl. - Change the repo from Public to Private.
- Select Create repository. The new repo’s landing page will open.
Preparing Cribl Stream
The procedure in this section only needs to be done once. When you’ve completed it, you can move on to testing and using GitOps.
Setting Up Your Environments
In your distributed Cribl Stream deployment, set up two separate environments, one named Development and the other named Production. Cribl strongly recommends that you use systemd to manage the cribl service.
Complete the following steps in both environments:
- Create one Cribl Leader and two Cribl Workers.
- On the Leader, install a Cribl Enterprise License.
- On the Leader, install
gitusing the following command (or the equivalent for your OS):sudo yum install git -y
Then, in the Production environment:
- On the Leader, install
jq- the GitOps workflow instructions below usejq.- Run this command (or the equivalent for your OS):
sudo yum install jq -y
- Run this command (or the equivalent for your OS):
- Note the Production Leader’s IP address for use later on.
All Leader Nodes should be on the same version to avoid backward compatibility errors.
Configuring Your Production Leader
First, you’ll ensure that your Production Leader and your Git repo can communicate; then, you’ll put your Production Leader into read-only mode.
Creating the gitops User
- Create a new Local User called
gitops. - On the Production Leader’s local filesystem, temporarily record the password for the
gitopsUser. This password well be referred to asGITOPS_USER_PASSWORDin later steps. - Associate the default
gitopsRole with thegitopsUser. (See Adding Roles.)- This Role allows only to
POSTto the/version/syncendpoint of the Cribl API (in the API Reference, see versioning).
- This Role allows only to
Adding a Secret to Git
Your Git repo needs to be able to communicate with your Production Leader. This requires that you store a secret in your Git management system. We’ll use GITOPS_USER_PASSWORD as the secret.
From the Production Leader, upload the GITOPS_USER_PASSWORD to the Git management system (or perform an equivalent operation) now.
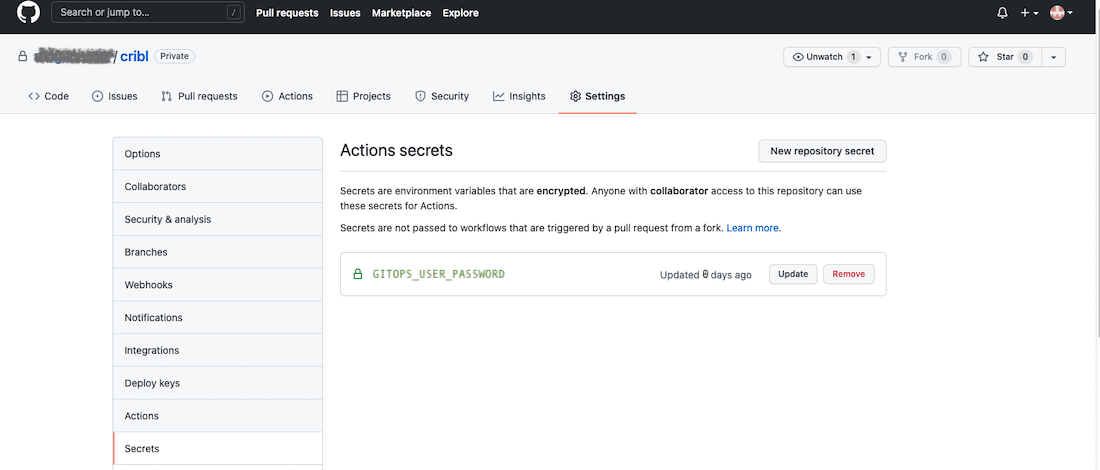
To do this in GitHub:
- In the GitHub site for your repo, navigate to Settings > Secrets and variables > Actions.
- Click New repository secret and follow the prompts.
When done, you should see a GITOPS_USER_PASSWORD row under Actions secrets:
Connecting Your Production Environment to Your Git Repo
In Cribl Stream, in the UI for the Production Leader, select Settings in the sidebar, then select Global > Git Settings.
In the Remote tab:
- In Remote URL, enter the URL for your private Git repo.
- On GitHub, the Remote URL will look like this:
git@github.com:<your_GitHub_username>/cribl.git
- On GitHub, the Remote URL will look like this:
- Make sure that in the Authentication type drop-down,
SSH(the default) is selected. - In SSH private key, copy and paste the private key (
~/.ssh/id_ed25519).The key will paste in with an appended newline below it. Do not delete this newline before you save the Remote Settings, or else you will trigger an error of the form:
fatal: Could not read from remote repository. - Toggle SSH strict host key checking off. This will allow the remote repository to accept your host key information. If you miss this step, you will trigger an error.
- Click Save.
- Toggle SSH strict host key checking on again.
- Click Save (again!).
- Commit and Push.
Check your private Git repo - in the master branch, you should now see your commit.
Setting Up the prod Branch
In this section, we’ll set up the Git prod branch; later on, we’ll set up dev.
Recall that your Git repo has one branch, named master. Now, rename master to prod.
To do this in GitHub:
In your GitHub repo’s landing page (for example,
https://github.com/<your_Git_username>/cribl), select the 1 branch tab. (That’s what the branches tab will be named, assuming that the sole branch ismaster).
The branches tab In the
masterbranch’s row, select ••• at far right, then select Rename branch, and renamemastertoprod.
Now, configure your Cribl Stream instance to be using the prod branch:
- In Cribl Stream, select Settings > Global > Git Settings.
- In the General tab, set Branch to
prod. - Save.
Making the Production Leader Read-Only
In a terminal on the Production Leader, become root:
sudo su -Add systemctl overrides to set environment variables that will (a) make the Production Leader read-only upon startup, and (b) set the branch to prod.
Use
systemctlto open theoverride.conffile in an editor:systemctl edit criblWhen prompted, add the following overrides:
[Service] Environment=CRIBL_GIT_OPS=push Environment=CRIBL_GIT_BRANCH=prodRestart:
systemctl daemon-reload && systemctl restart cribl
Creating the dev Branch
Recall that your Git repo has one branch, named prod. Now, create a new branch named dev, from your existing prod branch.
To do this in GitHub:
In your GitHub repo’s landing page (for example,
https://github.com/<your_Git_username>/cribl), select the 1 branch tab. (That’s what the branches tab will be named, assuming that the sole branch isprod).
The branches tab Click New branch to open the Create a branch modal.
Make sure that Source is set to
prod.In the New branch name field, enter
dev.
Creating the devbranchClick Create new branch to close the modal.
Back in the Branches tab, click Overview to refresh the tab - you should now see both the
prodanddevbranches listed.
Configuring Your Development Leader
First, you’ll point your Development Leader to the dev branch in the remote repo. Then, you’ll ensure that one or more users exist that can push configs to that repo.
Pointing Your Development Leader to Its Branch
In Cribl Stream, in your Development Leader’s UI, select global ⚙️ Settings (lower left) > Git Settings.
In the Remote tab:
- In Remote URL, enter the URL for your private Git repo - and if the URL includes a Git username, this should be
gitops, the one you created above.- On GitHub, the Remote URL will look like this:
git@github.com:<your_GitHub_username>/cribl.git
- On GitHub, the Remote URL will look like this:
- Make sure that in the Authentication type drop-down,
SSH(the default) is selected. - In SSH private key, copy and paste the private key (
~/.ssh/id_ed25519).The key will paste in with an appended newline below it. Do not delete this newline before you save the Remote Settings, or else you will trigger an error of the form:
fatal: Could not read from remote repository. - Toggle SSH strict host key checking off. This will allow the remote repository to accept your host key information. The remote host’s information is stored in
~/.ssh/known_hosts. If you miss this step, you will trigger an error. - Click Save.
- Toggle SSH strict host key checking on again.
- Click Save (again!), but do not Commit or Push yet.
In the General tab:
- Set Branch to
dev. - Leave GitOps Workflow set to
None. - Click Save, but do not Commit or Push yet.
Restart the Development Leader. When it comes back up, it will be able to write to your Git repo.
Setting Up Users to Push to the Remote Repo
You will need one or more users capable of pushing configs to the remote repo. There is more than one way to achieve this. Your choice will depend on the needs of your organization.
- Any user with the
adminRole already has ability to push to the remote repo. If this is your preferred approach, skip to the Pointing Your Development Leader to Its Branch. - If you prefer to allow one or more regular users to push to the remote repo, without having the power of the
adminRole, you can create such users by completing the procedure below.
First, edit the roles.yml file to make a new push_to_remote Role. (We’re using the command line here because you cannot perform this operation in the UI.)
SSH into the Leader Node.
cdinto your$CRIBL_HOME/local/cribldirectory.Open or create the
roles.ymlfile in a text editor.Without changing the existing text in the file, paste in the following snippet:
push_to_remote: policy: - POST /version/sync - POST /version/commit - POST /version/push - GET /system/settings/git-settings description: Members with this role can push configs to a remote repo.Restart Cribl Stream.
Next, back in the UI, create a new config_pusher User.
- In global ⚙️ Settings (lower left) > Access Management > Local Users, click Add User to open the User creation modal.
- Name the new Local User
config_pusher. - In addition to the usual configuration steps, use the Roles drop-down to associate the
push_to_remoteRole with theconfig_pusherUser. - Click Save.
- Commit and Push.
Verify That Your New User Can Push to the Remote Repo
- Log out, then log back in as
config_pusher. - The Version Control drop-down should now display a Push button.
Later, when you are ready to push new configs to the remote repo, click this new Push button.
GitOps Workflow
If you’ve completed the above preparatory sections, your GitOps workflow is ready to go. Here’s an overview, with links to detailed procedures.
- Work in the Development Environment: All your commits and testing happen in the Development environment first; you push changes to the
devbranch in your Git repo. - Merge Changes from dev to prod: When you are satisfied that your changes are ready for production, you create a pull request that brings the
prodbranch up-to-date withdev. This is all in your Git management system, and changes nothing in your Cribl Stream Production environment. - Sync Your Production Leader to Git: For your changes to take effect in production, you will send an HTTP request to the
/version/syncendpoint of the Cribl API, on the Production Leader. Once you are in production, it will be your CI/CD infrastructure - not you - that sends the request. This will cause the Production Leader to pull in the latest changes from your Git repo’sprodbranch - without violating the Production Leader’s read-only status.
The procedures include a harmless test task so that you can validate your setup and acquire a feel for the workflow.
Working in the Development Environment
In this step, you’ll make changes in the Development environment, and subsequently propagate them to Production. To test this with a minimal unit of work, start by adding a Route.
In Cribl Stream, in the Development Leader’s UI, navigate to Routing > Data Routes.
Click Add Route.
Configure the new Route as follows:
Name Filter Pipeline Output test-gitopstruedevnulldevnull:devnullClick Commit.
In the Git Changes modal, add a commit message and click Commit & Deploy.
Finally, push the changes to your remote repo via the Global Config dialog, whose appearance will vary depending on how you’ve configured Git Settings > Collapse Actions. Make sure the dialog says that the Git branch you’re pushing to is
dev, as configured above.
Merging Changes from dev to prod
In your Git management system’s dev branch, you should see the new route.yml appearing in the /groups/<group_name>/local/cribl/ directory.
Merge the changes from the dev branch to prod now.
To do this in GitHub:
Click Compare & pull request. Be sure that the
basedrop-down saysprodand thecomparedrop-down saysdev.
Comparing devtoprodAdd some comments.
Click Create pull request. The UI should say that you want to
merge 1 commit into prod from dev.If GitHub detects conflicts, fix them.
Have the appropriate person on your team review the pull request.
You (or the appropriate person) should now click Merge pull request, then Confirm merge.
If the merge is successful, GitHub will display a confirmation message. Your committed changes have now been merged from dev to prod.
Syncing Your Production Leader to Git
Your changes so far have all been done in the Development environment. Meanwhile, you have committed to the dev branch, and pushed to the prod branch in your Git management system - but your Production environment has not changed.
Since, for safety’s sake, you made the Production environment read-only, you can neither write to it nor update it via a UI. Instead, the following must happen:
You will send an HTTP request to the
/version/syncendpoint of the Cribl API, on the Production Leader (in the API Reference, see versioning). Once you are in production, it will be your CI/CD infrastructure - not you - that sends the request.This will cause the Production Leader to pull in the latest changes from your Git repo’s
prodbranch - without violating the Production Leader’s read-only status.
Below you’ll see a script you can use to send the HTTP request.
- This script is generic, and will require you to adapt it to work with the Git management system you’re using.
- Once you run the script, you should see the changes you made in your Development environment (in this example, the new Route) in the Production environment, too.
Syncing to Git: Generic Script
Substitute your Production Leader’s IP address and the gitops User’s password for the placeholders.
#!/bin/bash

# Authenticate and Save the Token.
TOKEN=$(curl http://<Production_Leader_IP_address>:9000/api/v1/auth/login \
     -H "Content-Type: application/json" \
     -d '{"username":"gitops","password":"$GITOPS_USER_PASSWORD"}' 2>/dev/null | \
     jq -r .token)

# Set up the Authentication Header
export AUTH_HEAD="Authorization: Bearer $TOKEN"

# Make the notification call
curl -X POST "http://<Production_Leader_IP_address>:9000/api/v1/version/sync" -H "accept: application/json" -H "${AUTH_HEAD}"Making the HTTP Request from CI/CD
Now that you have run one of the above scripts to prove that your GitOps workflow works, you should incorporate the script’s HTTP request into your CI/CD setup. Once that is done, you’re in production with GitOps! To develop, test, and push changes to production, just keep running through the whole GitOps workflow.
Appendix: Upgrading
Upgrading a Cribl Stream GitOps deployment is essentially a variation on the day-to-day GitOps workflow described in the previous section, with the key difference that you take the Production environment out of, then put it back into, read-only mode.
Once you have begun the upgrade, do not make any changes unrelated to the upgrade process, in either the Development or Production environment, until the upgrade process is complete. For example, do not start creating any new Routes or Pipelines.
First, in your Development environment:
- Validate that Cribl Stream is working as expected, and that the latest changes have been pushed to the
devbranch in your Git repo. - Stop the Cribl Stream Leader and back up
$CRIBL_HOME(the Cribl install directory). - Use the UI to upgrade the Leader and Workers.
- Create a PR to merge the
devbranch intoprod. Merge the PR.
Next, in your Production environment:
- Stop the Cribl Stream Leader and back up
$CRIBL_HOME(the Cribl install directory). - Take your Production environment out of read-only mode according to the instructions below.
- Use the UI to upgrade the Leader and Workers - but do not commit changes after the upgrade.
- Put the Leader back into read-only mode according to the instructions above.
- Sync the Production environment to the
prodbranch in your Git repo.
Finally, confirm that all Workers in both environments have the latest configuration.
Taking the Production Leader Out of Read-Only Mode
In a terminal on the Production Leader, become root:
sudo su -Comment out the systemctl overrides that set environment variables that (a) had made the Production Leader read-only upon startup, and (b) had set the branch to prod.
Use
systemctlto open theoverride.conffile in an editor:systemctl edit criblWhen prompted, comment out the Git-related overrides as shown:
[Service] # Environment=CRIBL_GIT_OPS=push # Environment=CRIBL_GIT_BRANCH=prodRestart:
systemctl daemon-reload && systemctl restart cribl