


Quick Start
Create a Cribl.Cloud Organization to run your first search.
Sign Up for Cribl.Cloud
Your first step is to create your Cribl.Cloud Organization.
Start at: https://cribl.cloud/signup/.
Select the New User? Free signup option, and register with your work email address.
Use the verification code from Cribl’s email to confirm your registration.
On the Create Organization page, optionally enter an Organization Name (a friendly alias for the randomly generated ID that Cribl will assign to your Organization).
Select an AWS or Azure Region to host your Cribl.Cloud Leader. See the list of supported regions.
The Organization region defines where the Leader Node resides.
Once you select a region when registering your Organization, you cannot change it. You can, however, create Cribl-managed Stream Worker Groups in different AWS and Azure regions.
In Cribl Search, the Organization region is the physical location where searches are executed. In Cribl Lake, the region defines the location where data is stored.
Select Create Organization.
On the resulting page labeled We’re spinning up your Organization…, complete the quick survey to let us know how you plan to use Cribl products.
Select Create Organization.
On the resulting page labeled We’re spinning up your Organization…, complete the quick survey to let us know how you plan to use Cribl products.
The goals that you select here, and the Sources and Destinations that you choose on the next page, will display personalized guidance as soon as you open your Organization.
Select Complete to access your new Organization.
Select the Search tile’s Explore button to open Cribl Search.
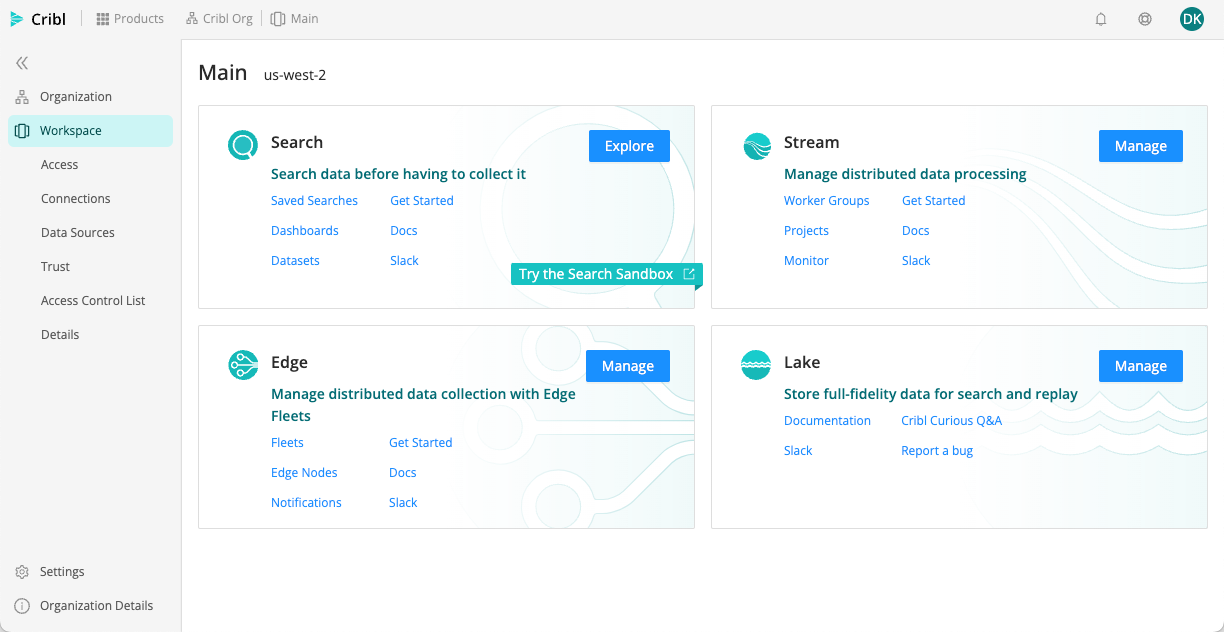
Cribl.Cloud landing page The first time you sign in, you’ll see a tile with a goat who can walk you through setting up Cribl Search. If you skip the walkthrough now, you can start it at any later time by opening the Support/Copilot drawer’s Get Help tab, where you’ll find the goat.

Searching
In this guide, you’ll use a built-in sample Dataset named cribl_search_sample.
From the Cribl Search sidebar, select Data to open the default Datasets tab. Find the
cribl_search_sampleDataset within the Datasets table.Select the Search button on the right side of the
cribl_search_samplerow.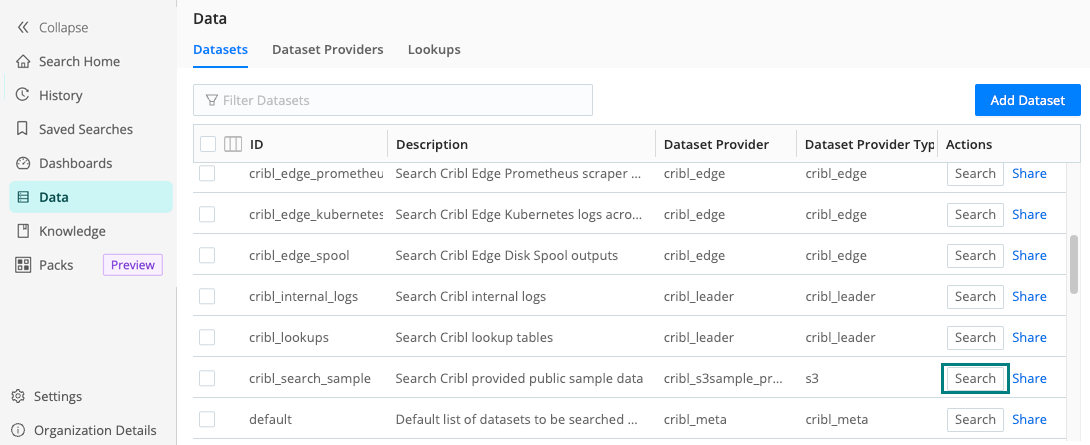
Datasets Search Home opens and runs a basic search on the Dataset.
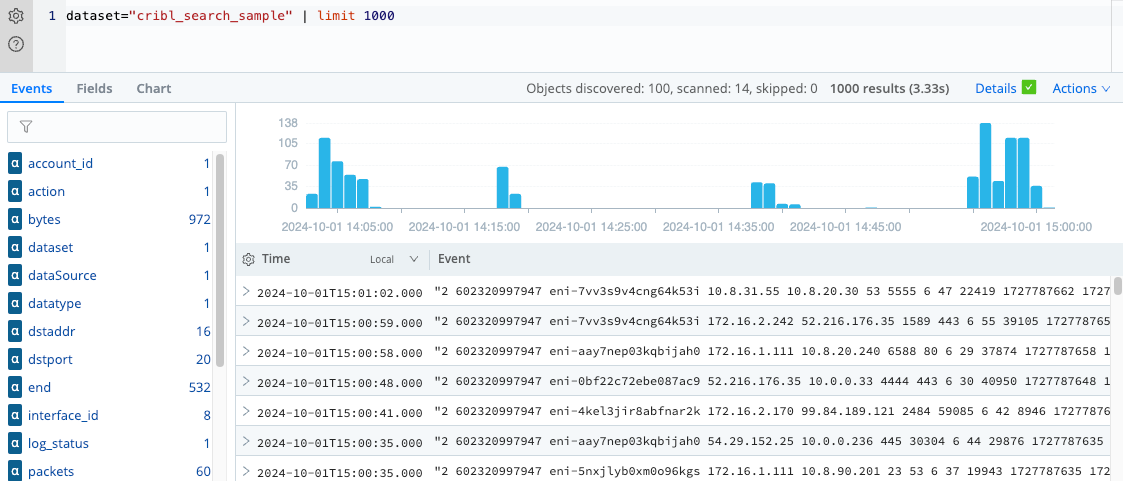
Limit Dataset results We’ve referenced the Dataset with the field
datasetand itsID, in this case,cribl_search_sample. The pipe|character indicates a new process for the query to run. Here, it’s added alimitoperator so the search only returns up to 1,000 events from the Dataset.Next, let’s run an aggregating search - counting the number of events per
source(a built-in field that contains the name of the data object that included the event).dataset="cribl_search_sample" | limit 1000 | summarize count() by source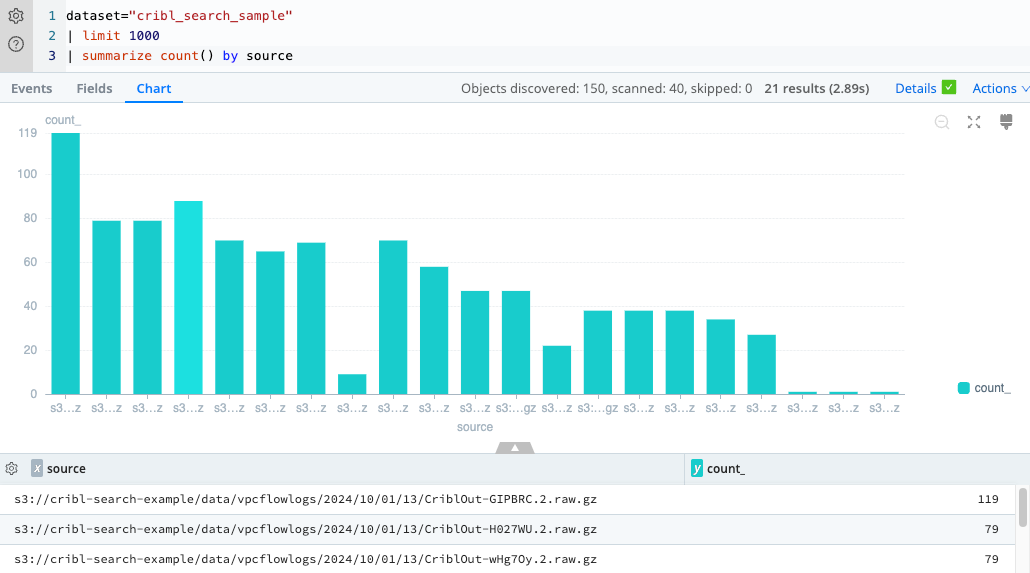
Count by source Aggregate results are displayed on the Chart tab. Cribl Search comes with rich charting options out-of-the-box, allowing you to adjust charts as needed.
Next Steps
Now that you have a Cribl.Cloud Organization and have seen a couple of basic searches, see the following topics:
- Cribl.Cloud for details on management.
- Cribl Search Tour for an overview of the Cribl Search UI.
- How to build a search for details on query writing.
- Common search examples with common use case examples.
These next topics walk you through searching your own data:
Connect to Cribl Edge and Searching Cribl Edge - assumes that you have Cribl Edge Nodes running.
Connect to Amazon S3 and Searching Amazon S3 - configuring and using an Amazon S3 Dataset Provider and Dataset. (This is a specific example of configuring Cribl Search to query other object stores.)