


Notifications via Cribl Stream
Send Notifications about your scheduled searches through Cribl Stream to multiple downstream services.
This topic shows how to send Notifications to Cribl Stream Worker Groups, which can forward them to multiple downstream services, using workflows you’ve configured to also handle Notifications from Cribl Stream itself (and other Cribl products).
This technique is a convenient alternative to configuring multiple Webhook Notification targets in Cribl Search. Here, you configure a single Webhook target for the Worker Group, and let Cribl Stream multiplex the outbound Notifications from there.
We outline this technique in the following general steps:
Identify Ingest Address for your Worker Group
Add Webhook Notification Target in Cribl Search
Identify Ingest Address
To find the ingest address of a Cribl-managed Worker Group, start in the Cribl.Cloud Organization that hosts your Cribl Search instance:
From the top bar, select Products > Cribl.
From the resulting sidebar, select Data Sources.
Use the Group drop-down to select the Cribl-managed Worker Group where you want to send the alerts.
Under Sources Enabled by Default, find the
httpentry.Here, copy the Ingest Address (URL) of your Worker Group. This will point to port
10080. The general format is:https://<groupName>.<workspaceName>.<organizationId>.cribl.cloud:10080
An example with the most typical Group and Workspace names, and with a fictitious Organization name:
https://default.main.goat-farm.cribl.cloud:10080
For a hybrid Group running on a host that you manage, the ingest address will typically be configured through your load balancer.
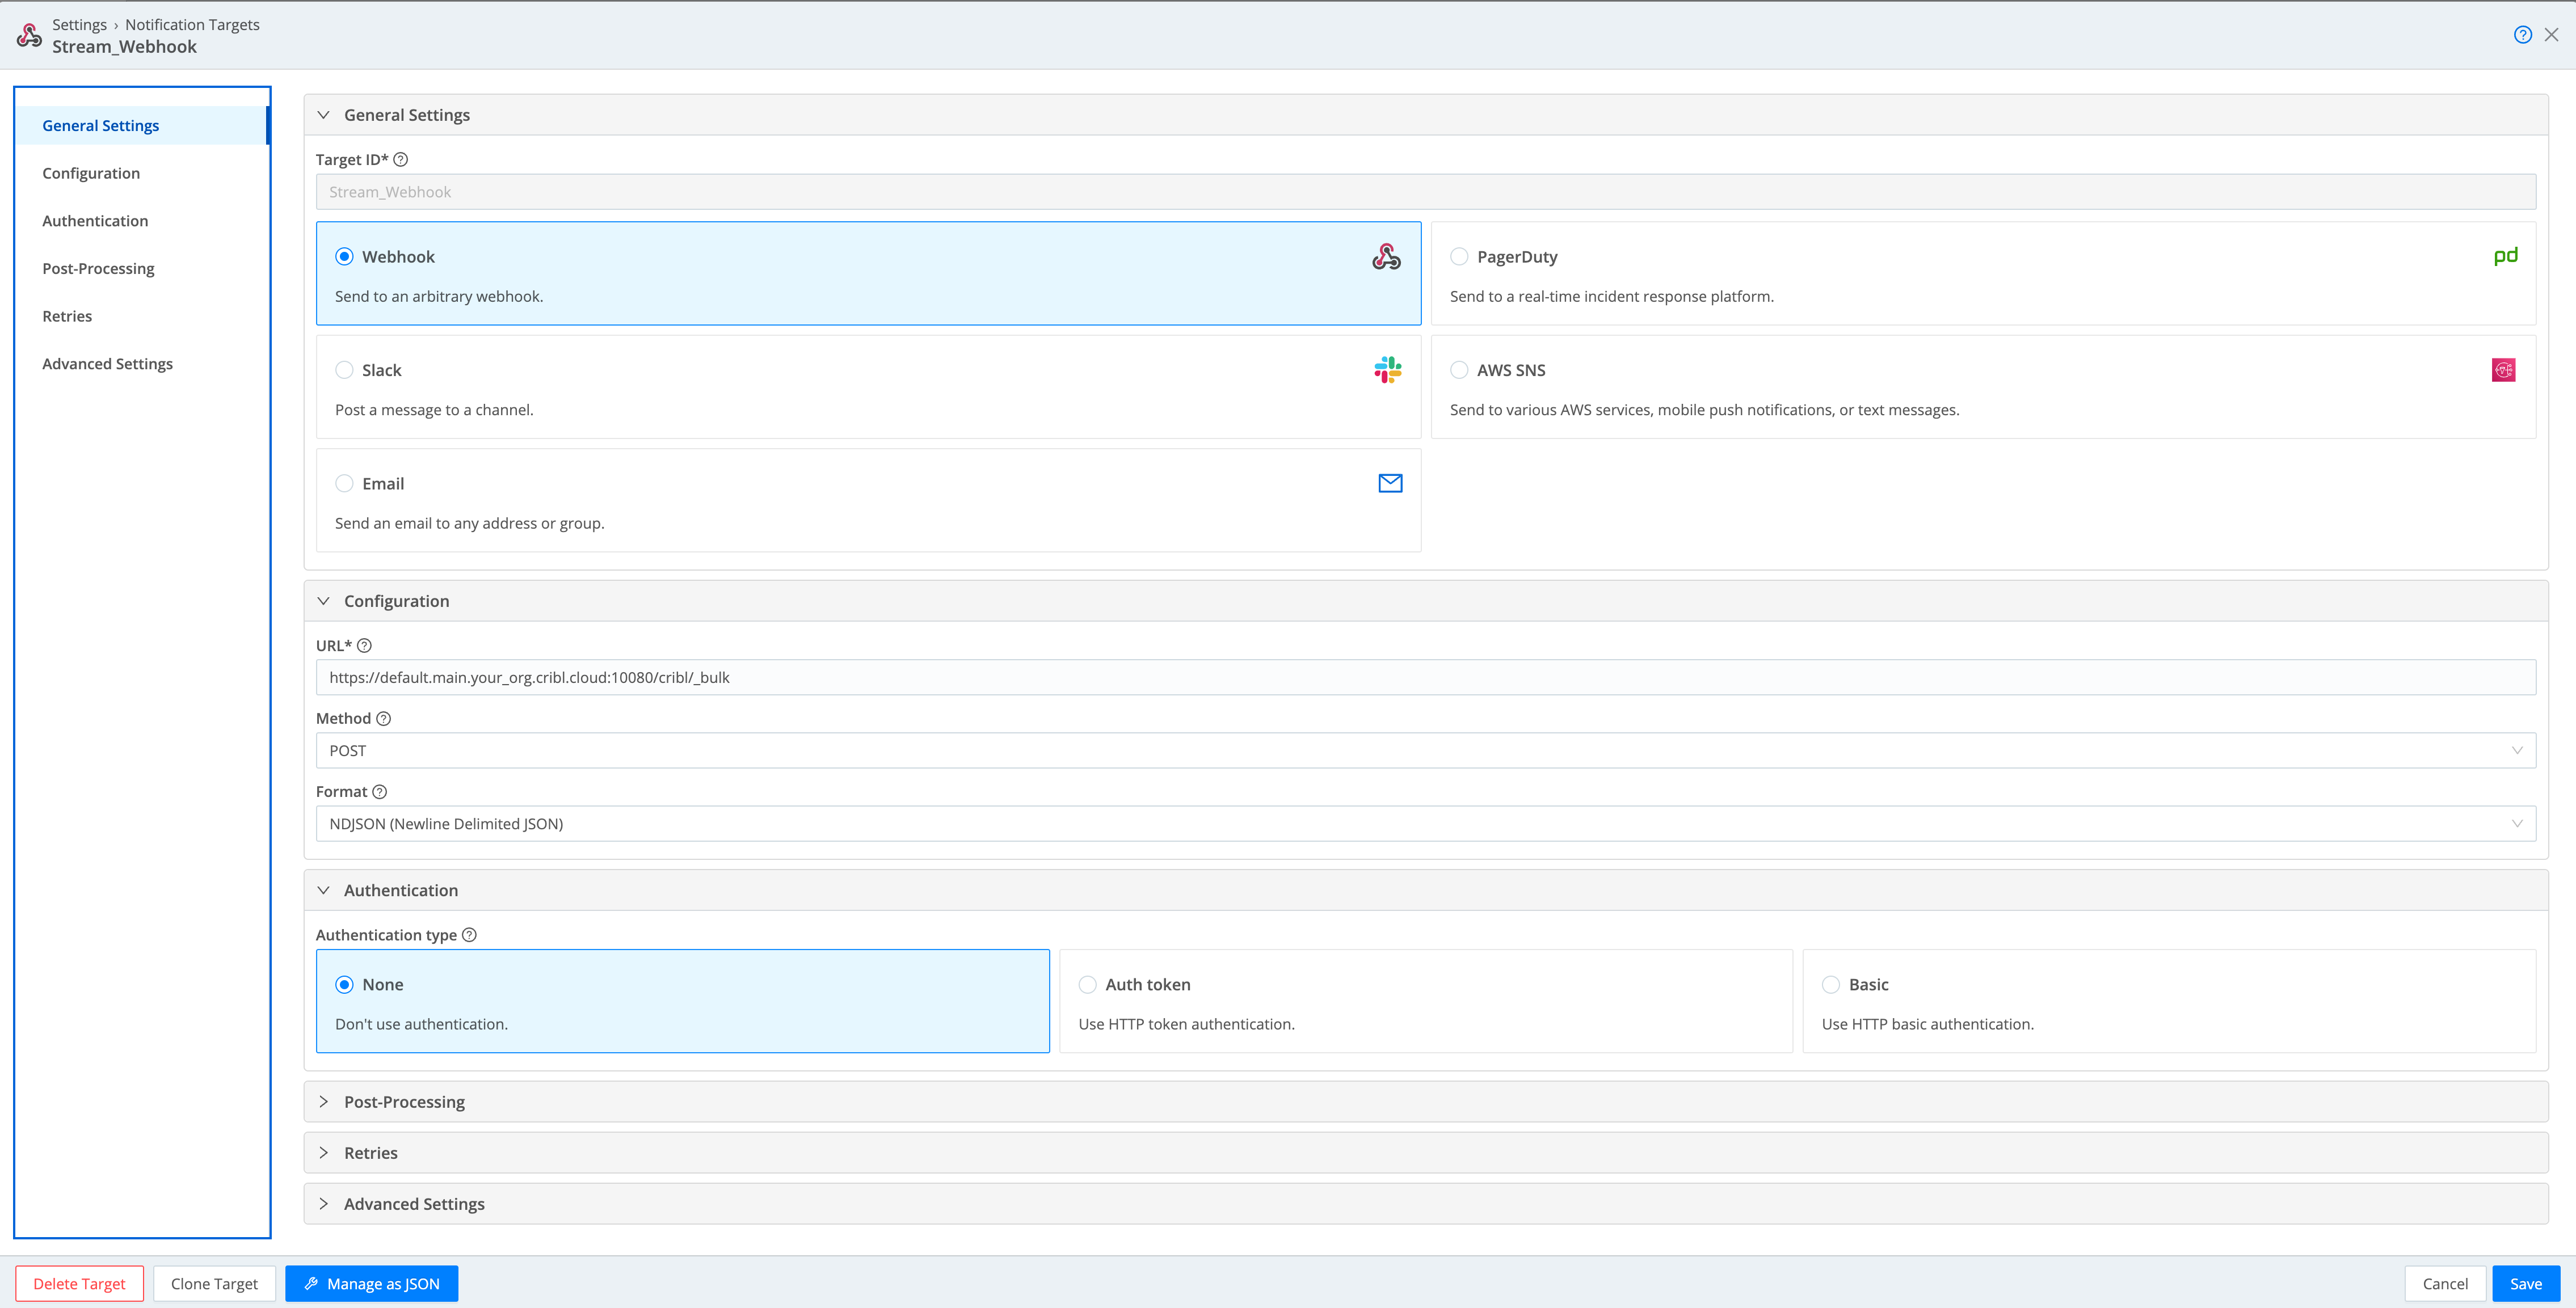
Add Webhook Notification Target
Navigate back to Cribl Search: Select Products > Search.
Select Settings > Search > Notification Targets.
Select the Webhook type.
Select Add Target.
Paste the Ingest Address URL that you copied from your Cribl.Cloud Organization, appending
/cribl/_bulkas in this example:https://default.main.<organizationId>.cribl.cloud:10080/cribl/_bulkSave the new target as
stream_webhookor your desired name.
Schedule and Save Search and Notification
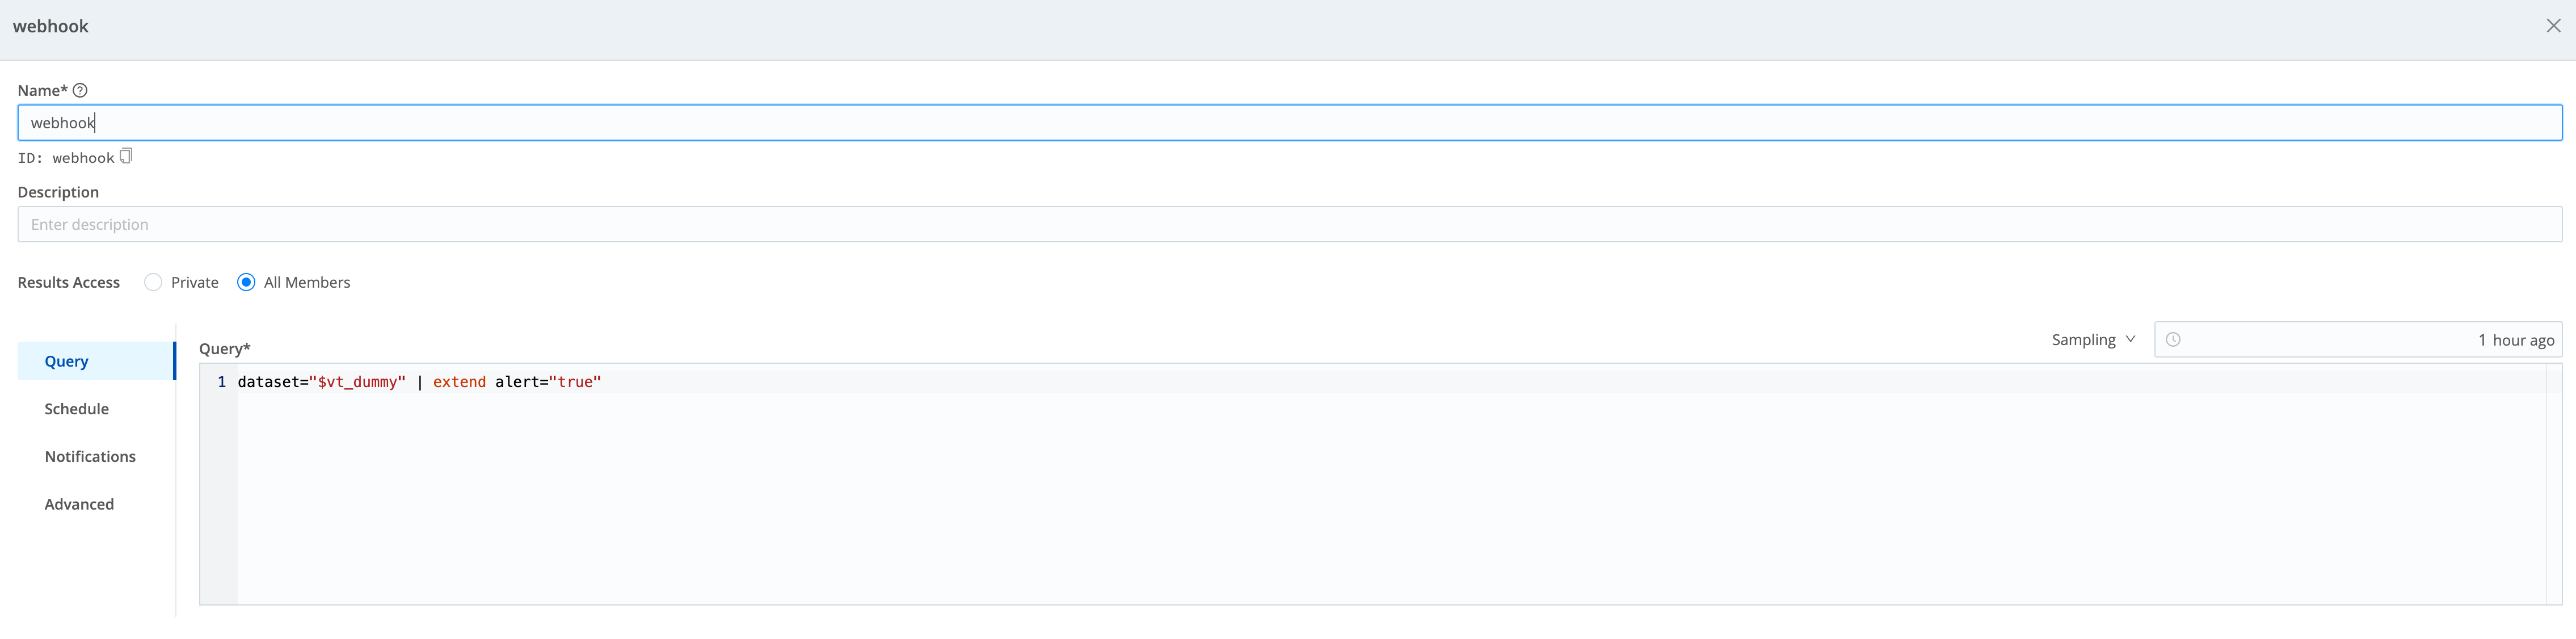
Create a search, customized according to your needs. The example shown here uses this query:
dataset="$vt_dummy" | extend alert="true"Select Actions > Save to open the configuration modal shown below.
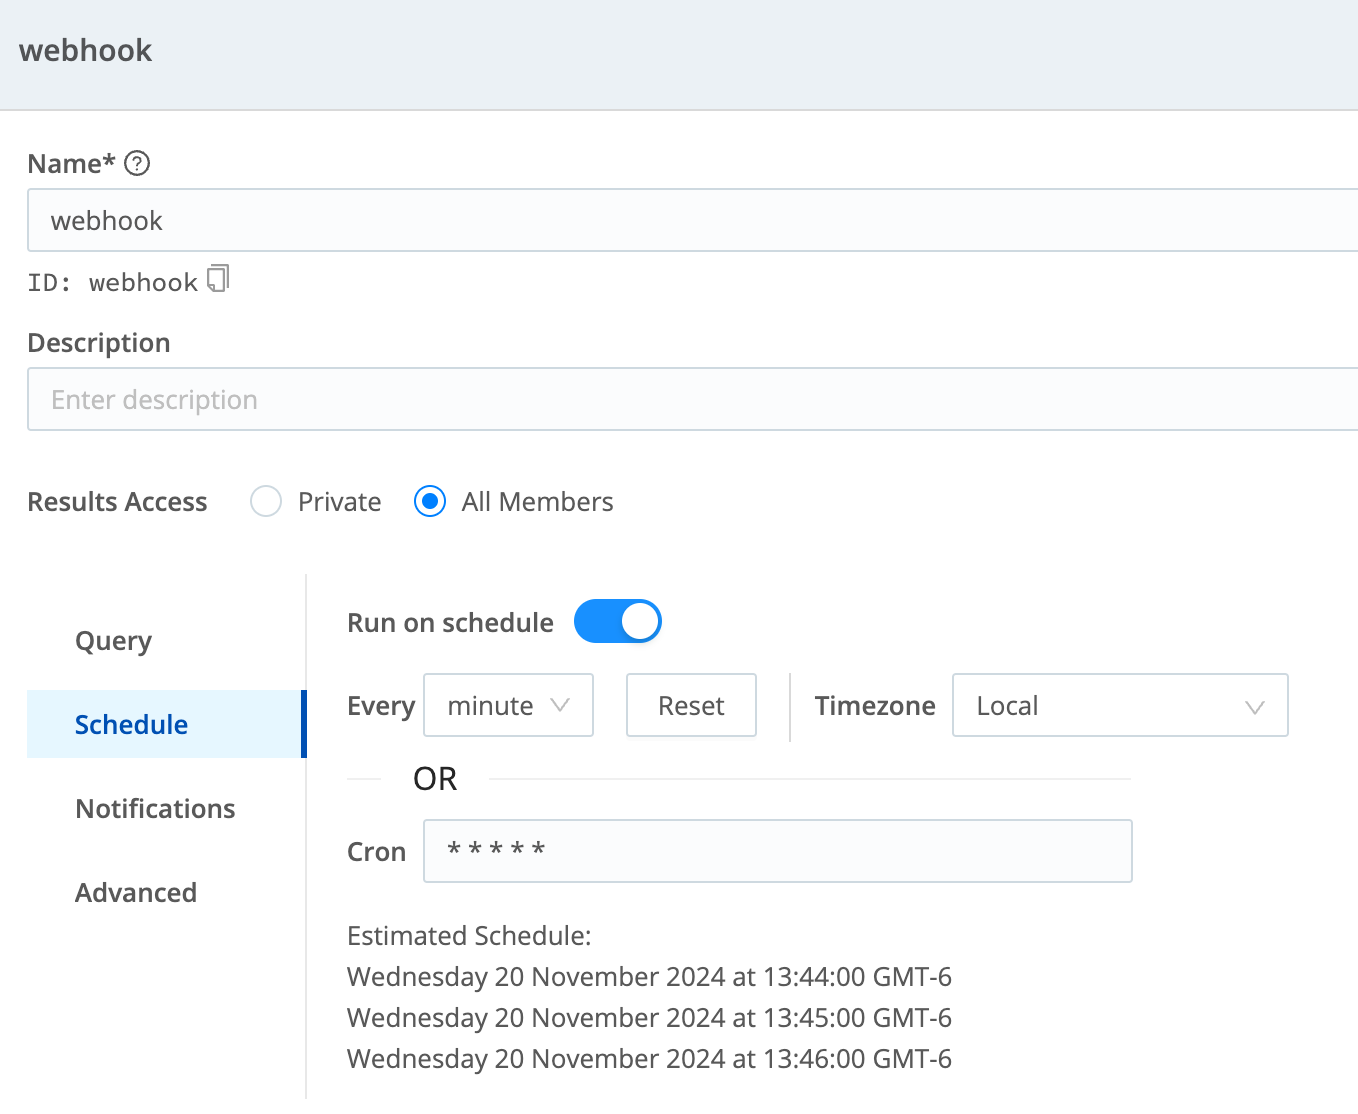
- Schedule the search, according to your needs. This example sets a
* * * * *cron schedule, to repeat the search every minute.
- Add the Notification, pointing to the Webhook target you configured above.
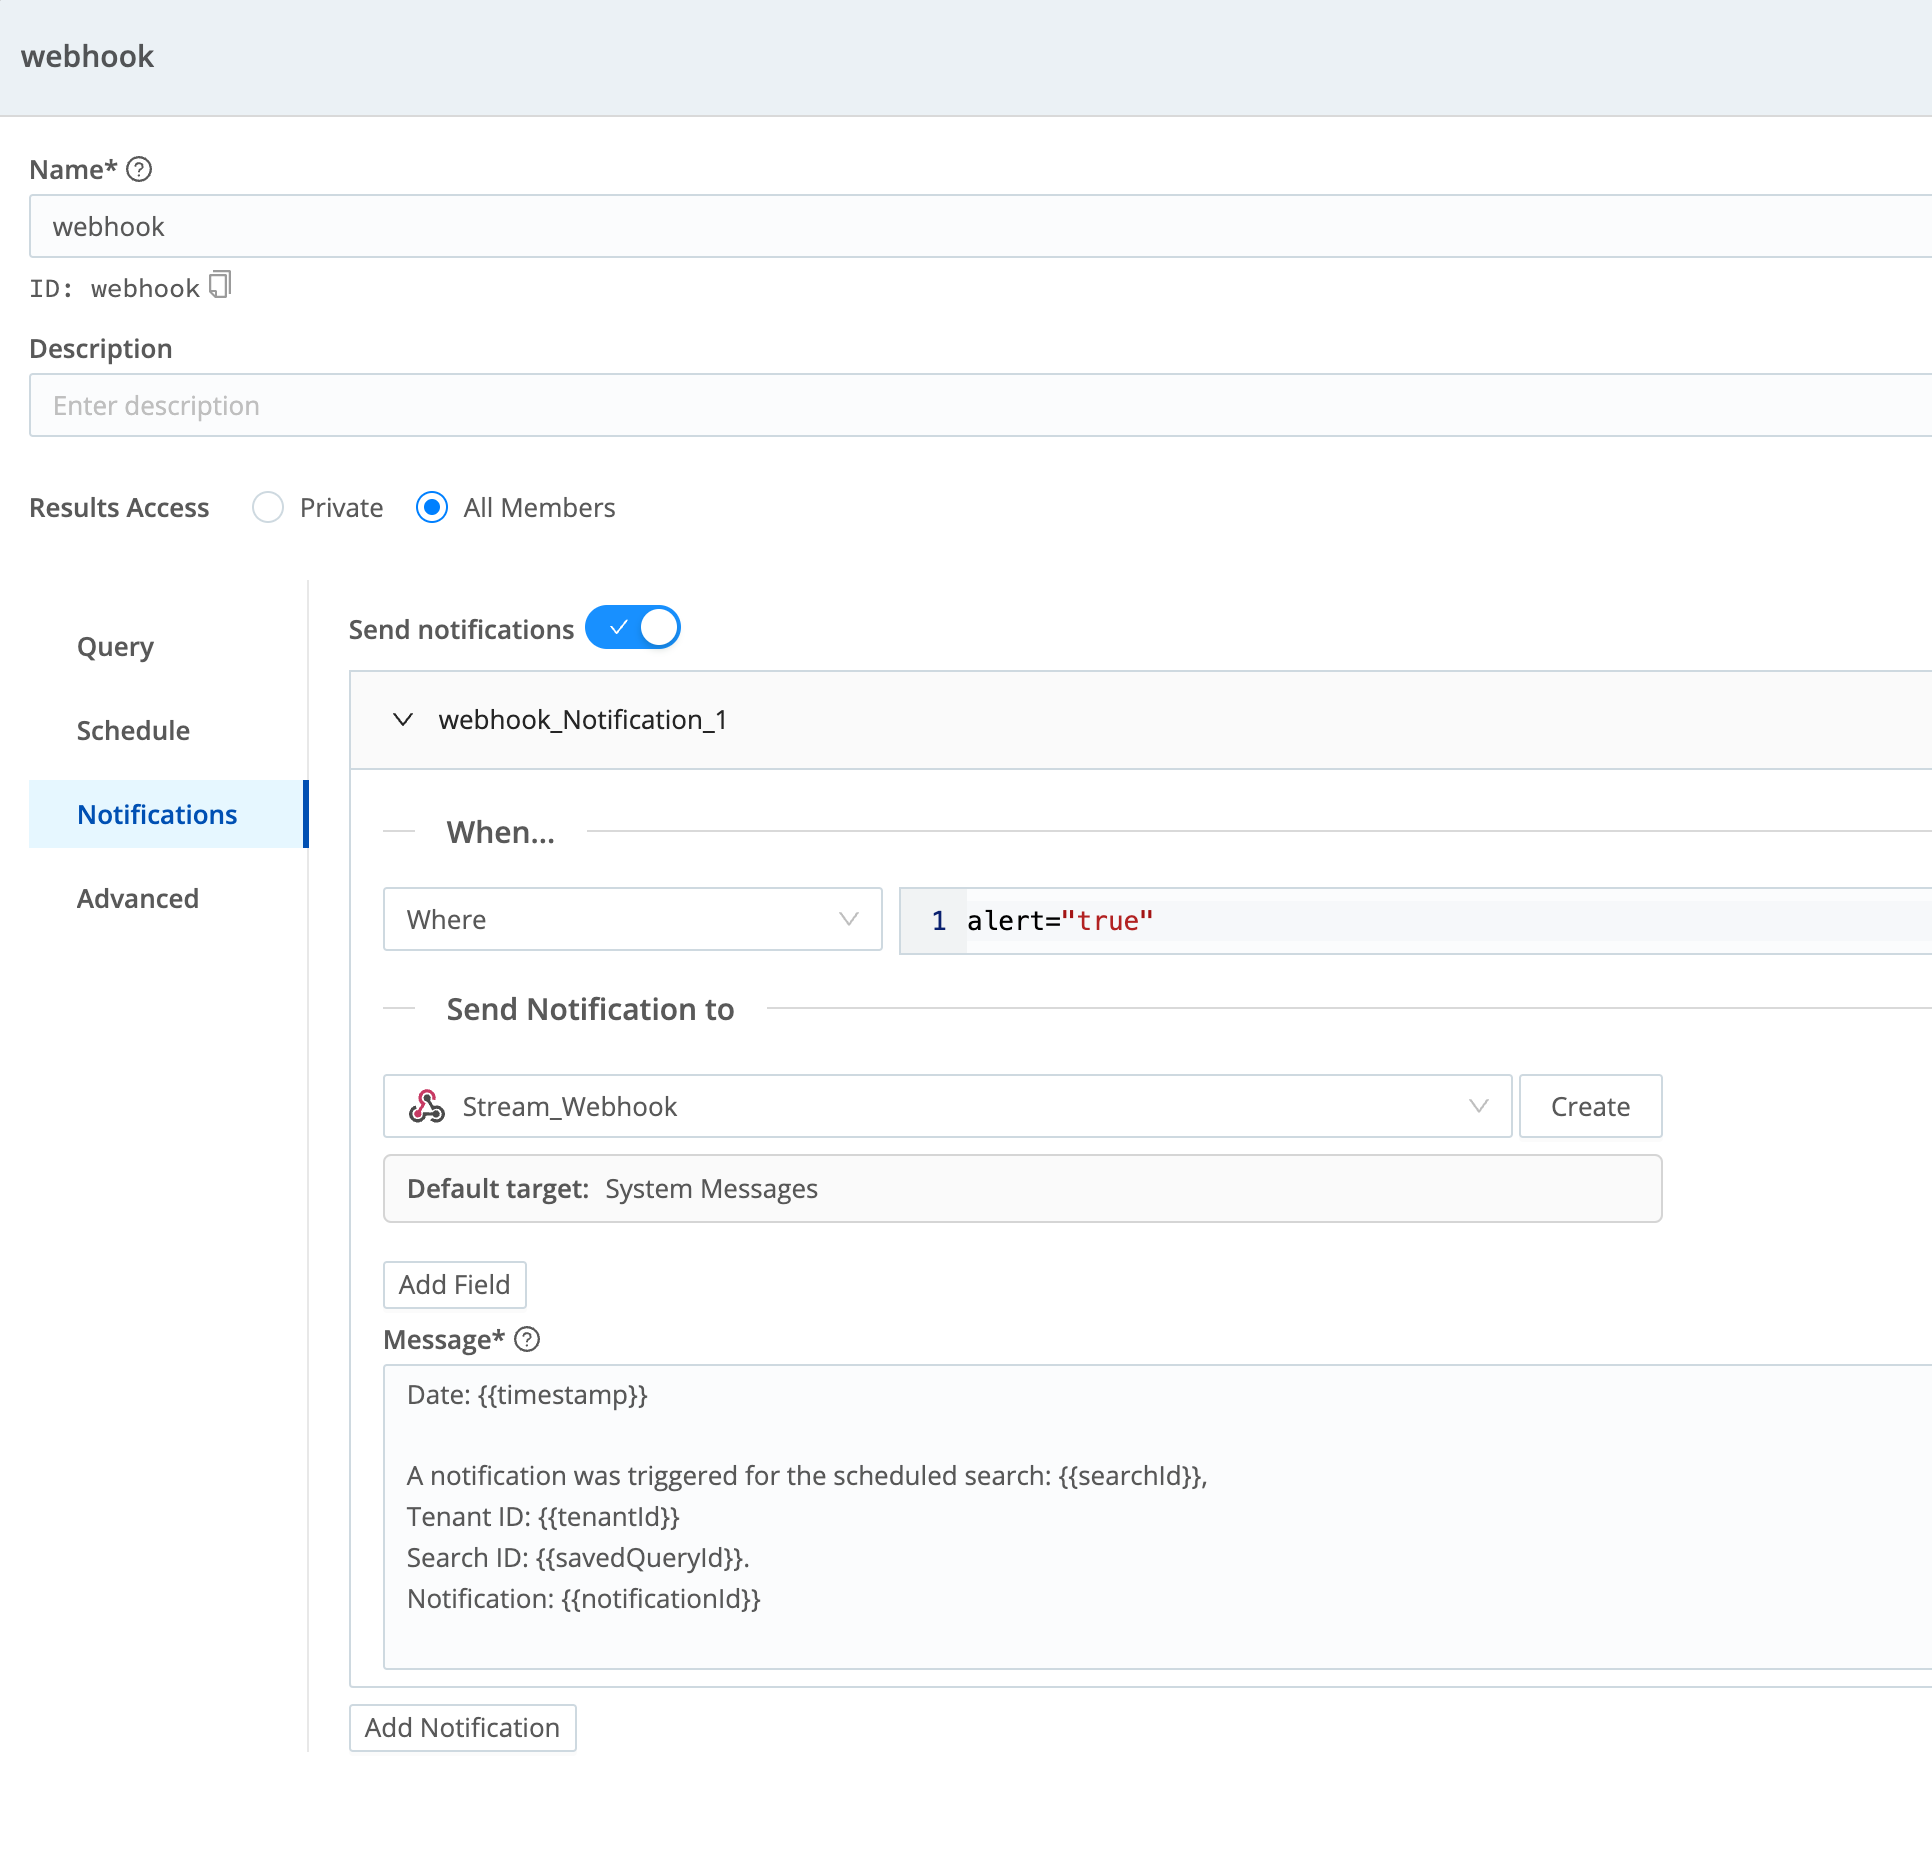
- Save the search, with its configured schedule and Notification.
Verify Inflow to Cribl Stream
Next, make sure that Cribl Search is forwarding your Notifications to Cribl Stream:
In Cribl Stream, navigate to your targeted Worker Group.
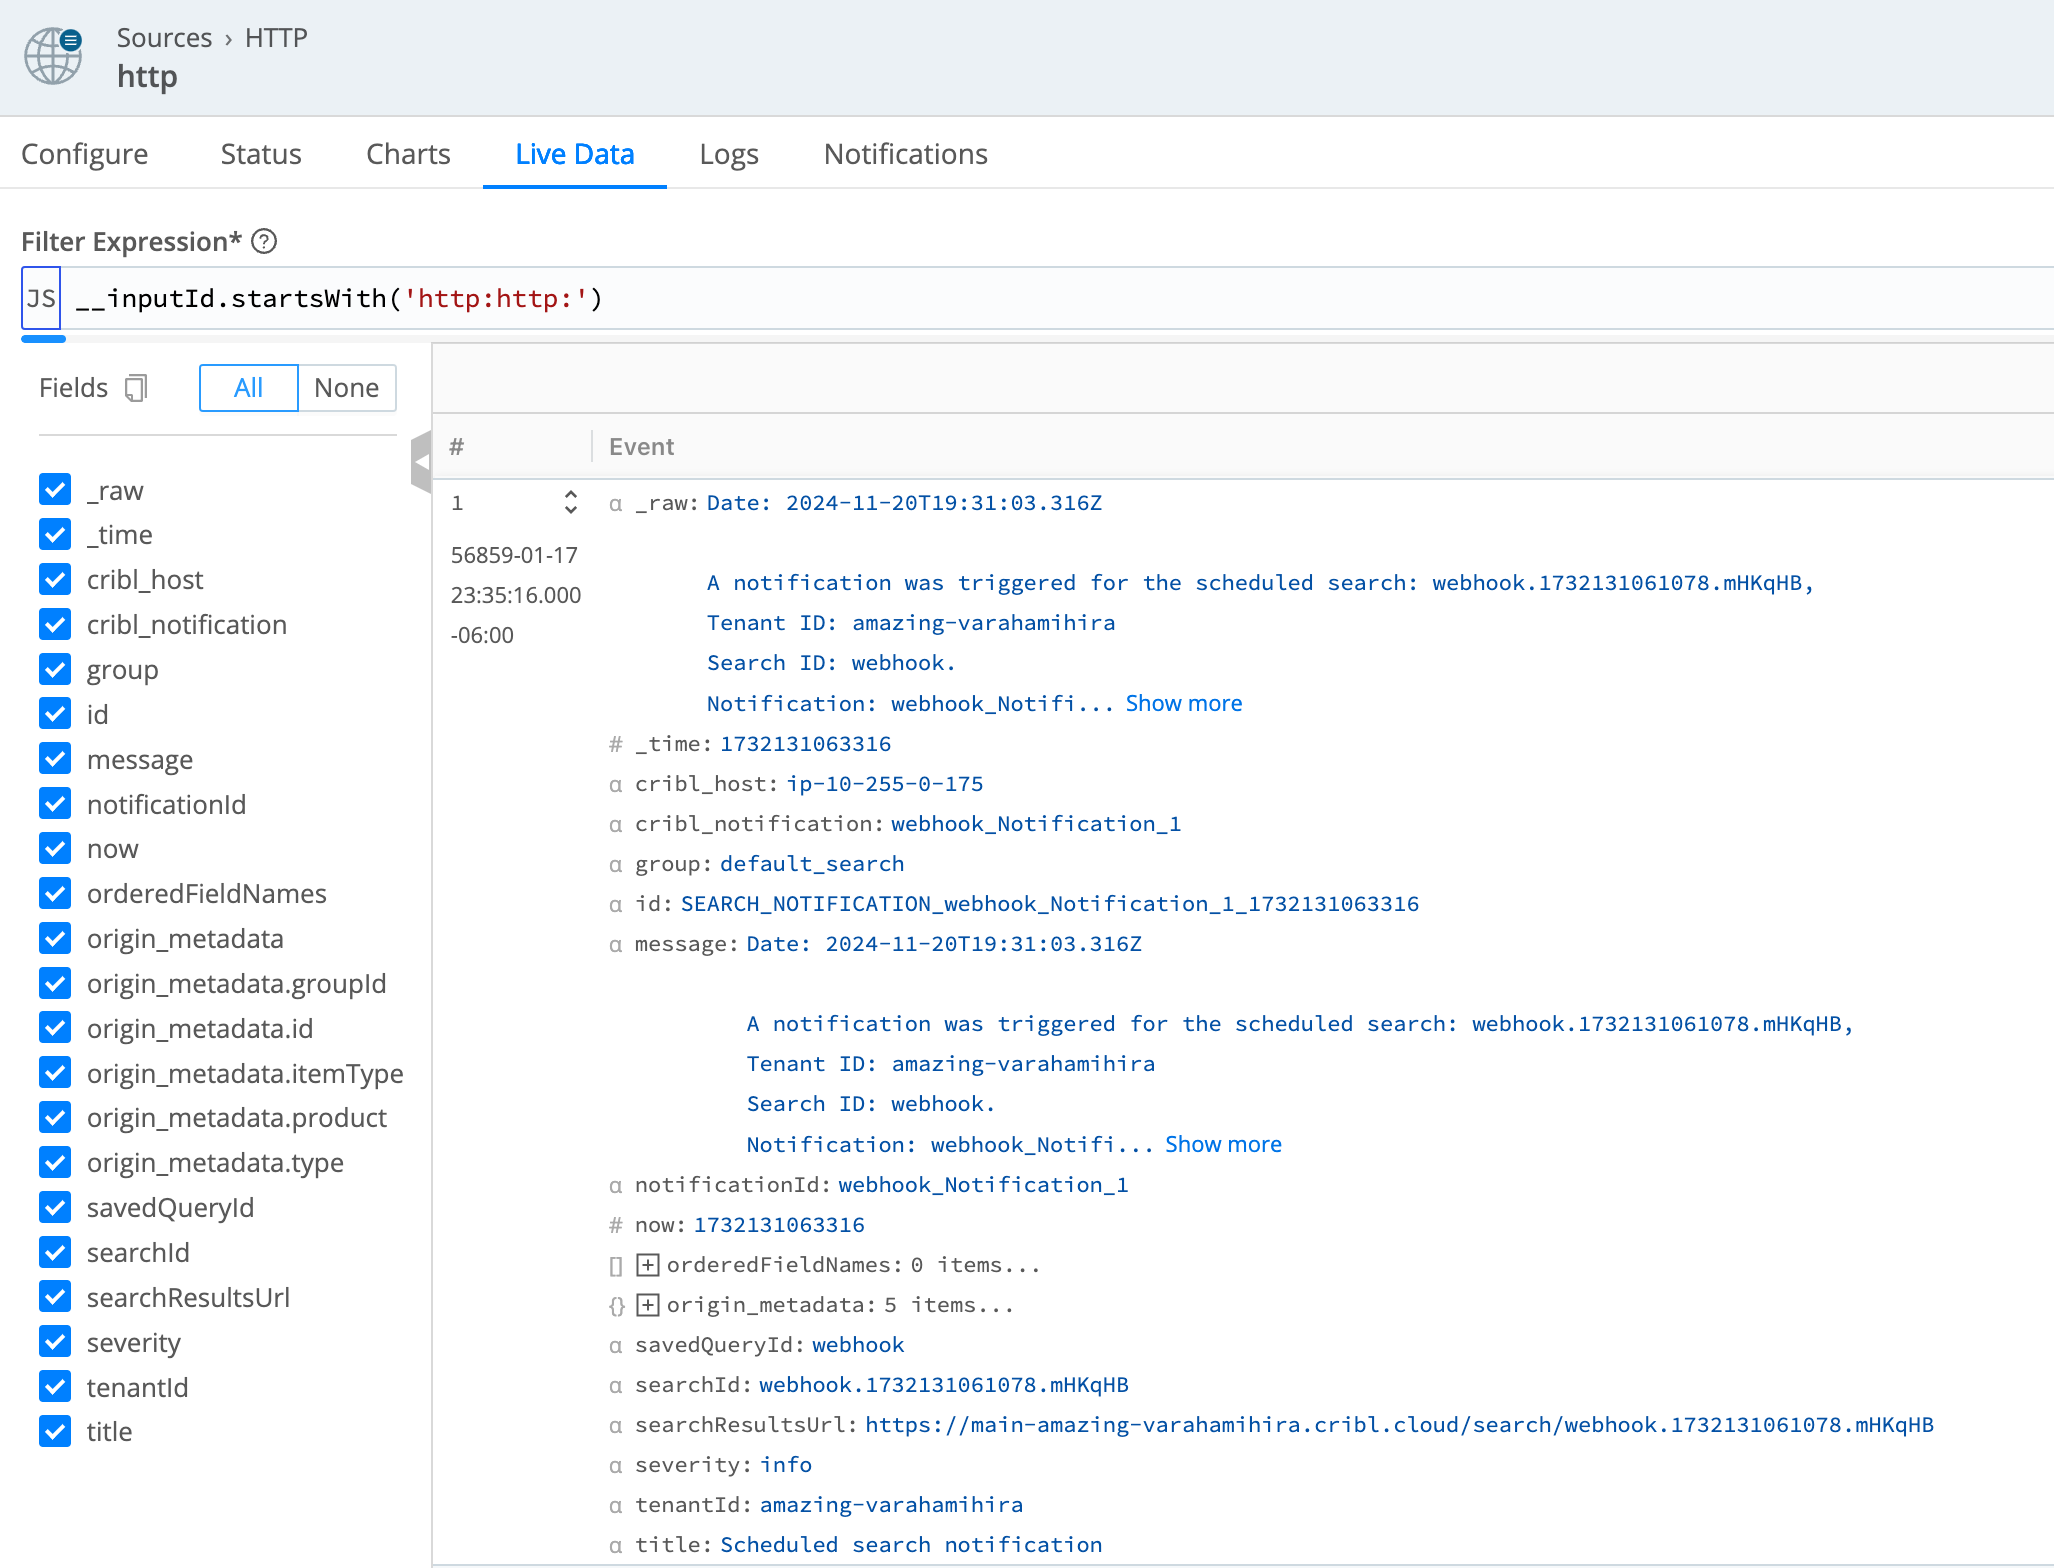
Open the HTTP Source config modal: Select Sources > HTTP.
Select the Live Data tab, then its Capture button.
Set a long time window (several minutes), then select Start.
Wait. In about a minute, a properly configured alert will appear.
Configure Outflow from Cribl Stream
In Cribl Stream, configure or reconfigure a Destination, Pipeline, and Route to relay the alerts to your chosen downstream service(s).
Verify connectivity all the way through to these receivers.
That’s it!