


Connect Cribl Search to Amazon S3
Configure Cribl Search to query your Amazon S3 data.
Amazon Simple Storage Service (Amazon S3) is an object storage service that allows you to store and retrieve data from anywhere.
In this guide, you’ll set up a Dataset Provider and a Dataset to search objects in your Amazon S3 bucket.
Data transfer costs and other charges may apply. For cost and compatibility details, see the Data Transfer Charges and Storage Class Compatibility sections below.
Add an Amazon S3 Dataset Provider
A Dataset Provider tells Cribl Search where to query and contains access credentials. Here, you will add an Amazon S3 Dataset Provider.
To add a new Dataset Provider, select Data, then Dataset Providers, then Add Provider.
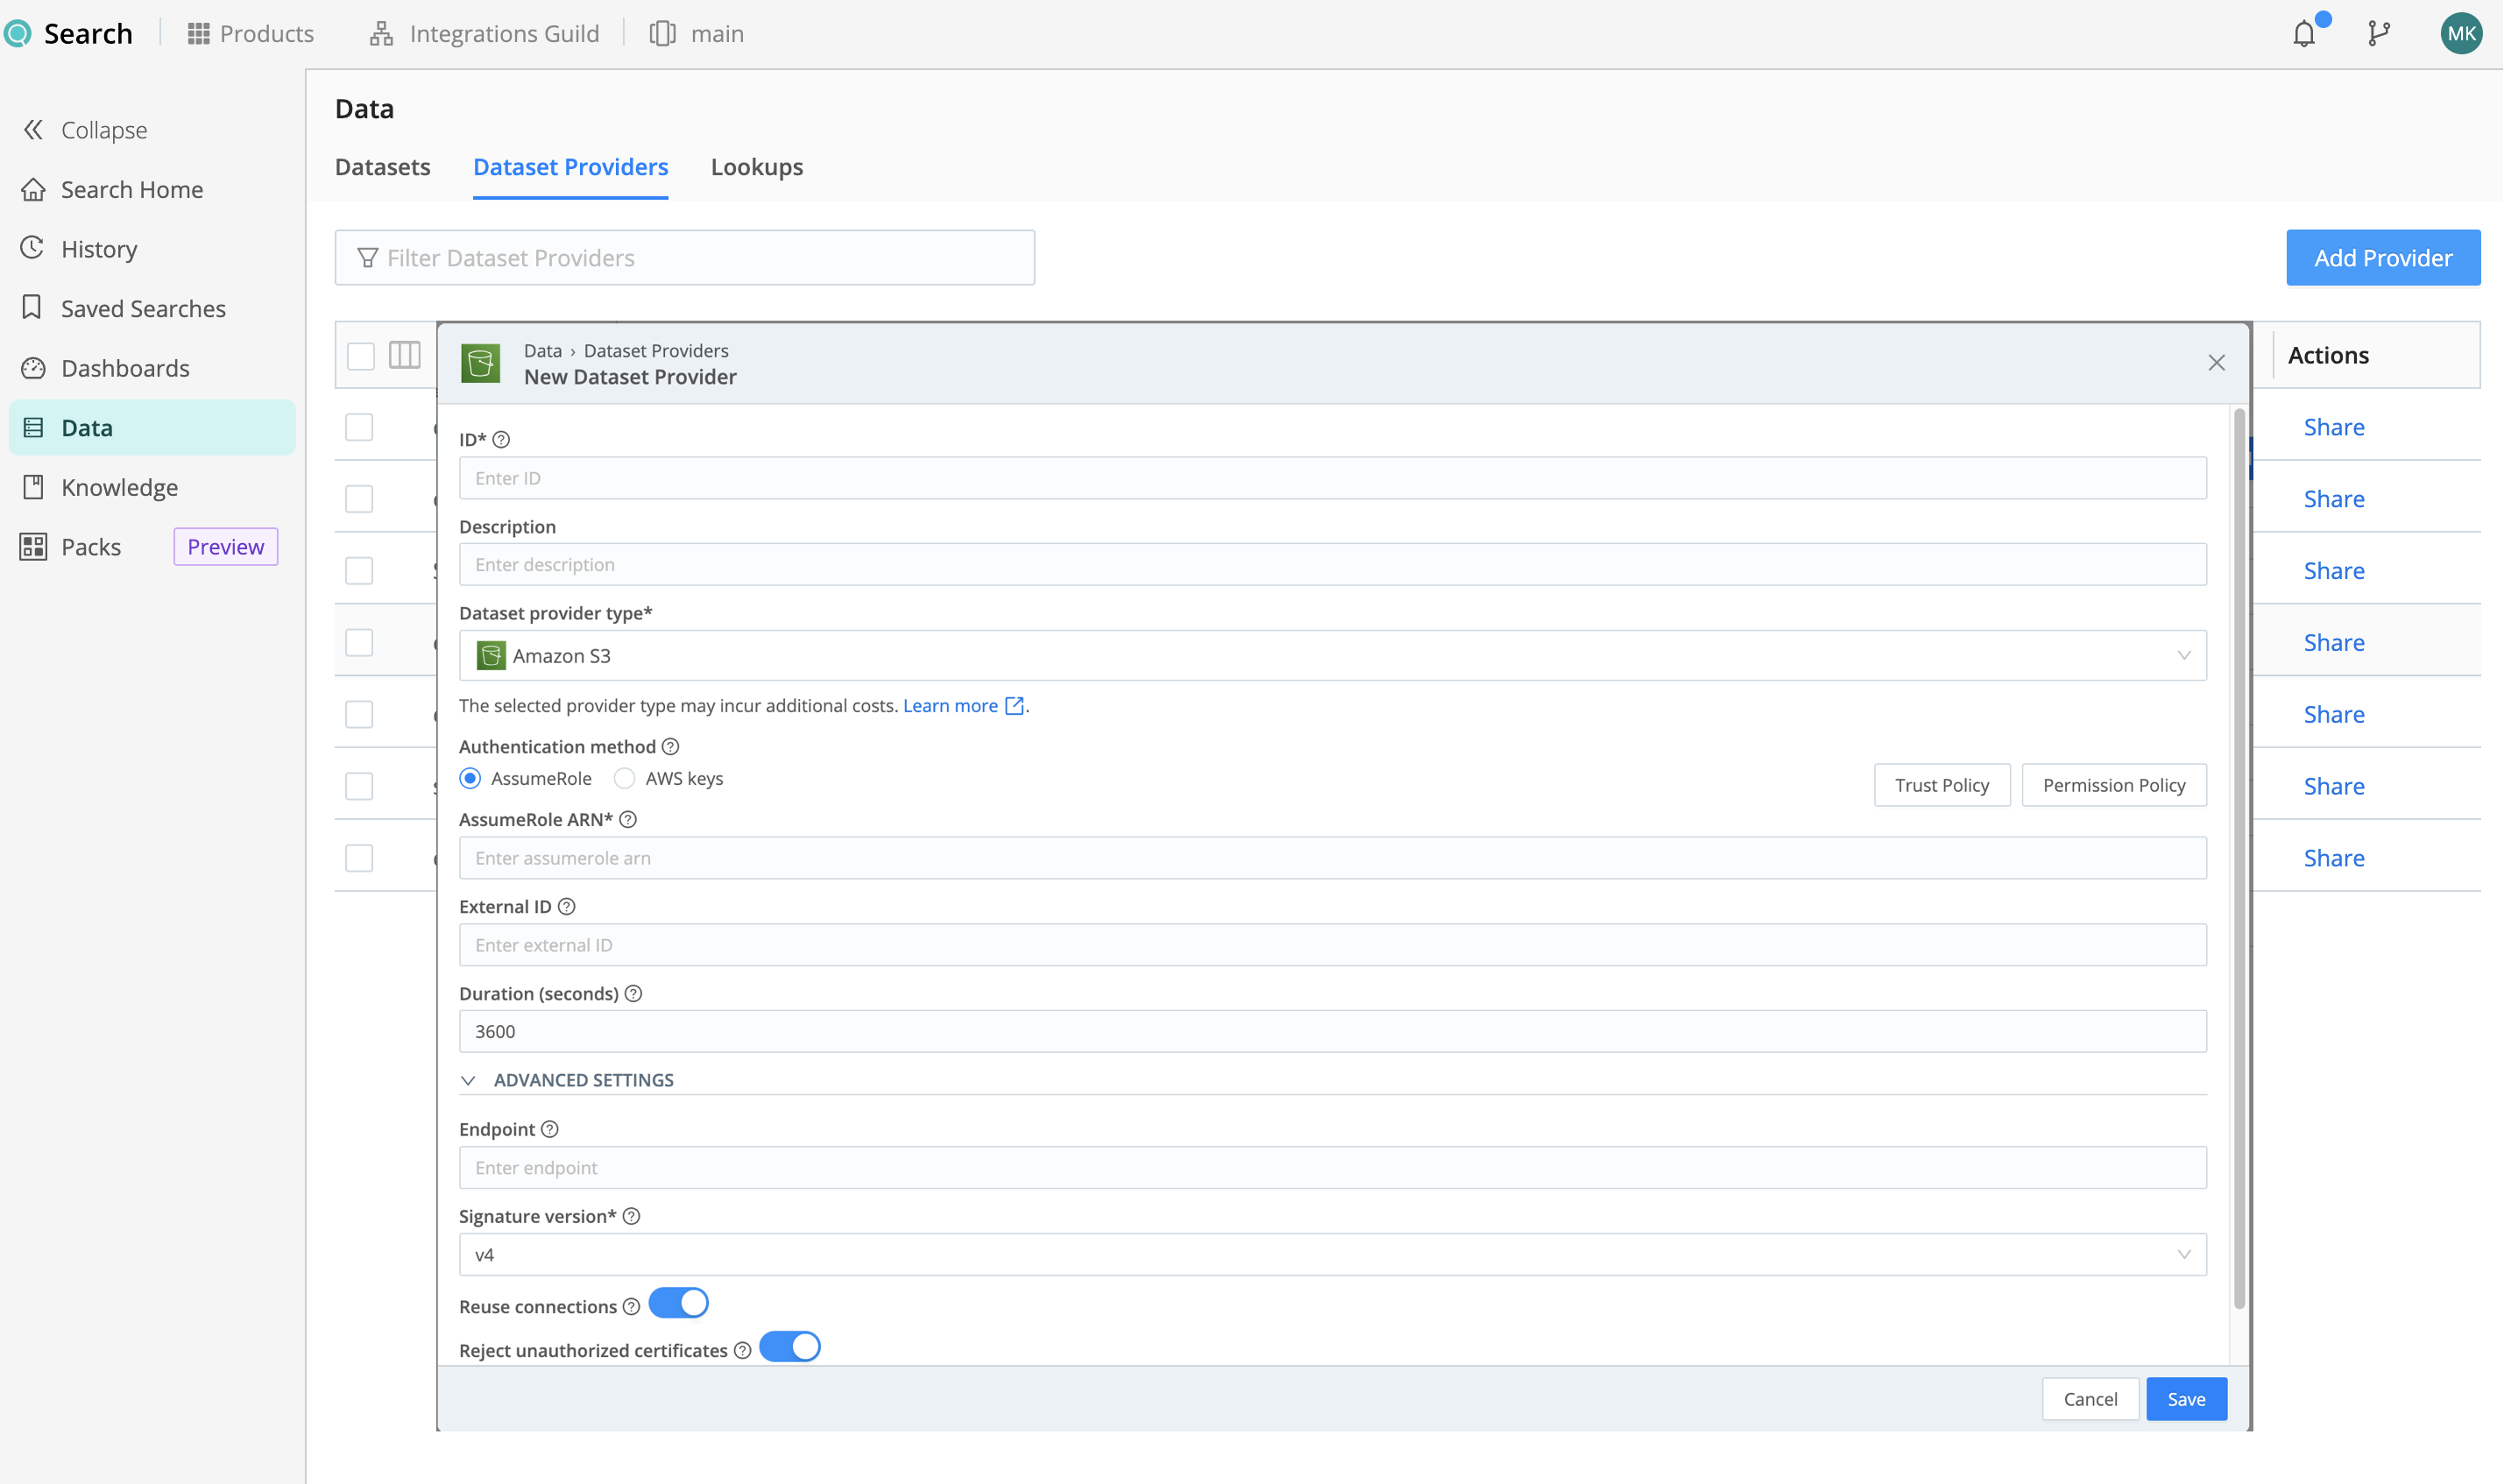
Basic Configuration
Configure the New Dataset Provider modal as follows:
- ID is a unique identifier for the Dataset Provider. This is how you’ll reference it when assigning Datasets to
it. Start the ID with a letter; the rest of the ID can use letters, numbers, (for example,
my_dataset_provider_1) - Description is optional. Here, you can enter a summary that will clarify this Dataset Provider’s purpose to other users.
- Set the Dataset Provider type to
Amazon S3. - Authentication method provides two options, Assume Role and AWS keys. For details on configuring each option, see Authentication Method below.
Advanced Settings
This section provides the following optional configurations:
Endpoint: S3 service or compatible endpoint. If empty, defaults to AWS Region-specific endpoint.
Signature version: Signature version to use for signing S3 requests. Defaults to
v4.Reuse connections: Whether to reuse connections between requests. Toggling on (default) can improve performance.
Reject unauthorized certificates: Whether to reject certificates that cannot be verified against a valid Certificate Authority (for example, self-signed certificates). Defaults to toggled on.
Apply ABAC source-ip tagging: Displayed only if you’ve set the Authentication method to AssumeRole. For details, see ABAC Tagging below.
Wrapping Up
Select Save when your configuration is complete.
Authentication Method
Your choices here are AssumeRole or AWS keys. For rich details on both options, beyond the configuration basics in this section, see Grant Access to AWS.
AssumeRole Authentication
Selecting AssumeRole requires the IAM role’s ARN (AssumeRole ARN), and also exposes the following options:
The External ID on this Dataset Provider must match the external ID defined in the IAM Role Trust Policy.
The Duration (seconds) defines how long the AssumeRole’s session lasts. Minimum is
900(15 minutes), default is3600(1 hour), and maximum is43200(12 hours).The ABAC tagging controls described in the next section.
To the right, select the Trust Policy and Permission Policy buttons to see the default policies that you can copy and expand, so you don’t have to write them from scratch. For more information, see Example Trust Policy and Expand the Permission Policy.
AWS Keys Authentication
Selecting AWS keys requires the IAM user’s Access key and Secret key.
To the right, select the Permission Policy button to see the default policy that you can copy and expand, so you don’t have to write it from scratch. For more information, see Expand the Permission Policy.
ABAC Tagging
Select Apply ABAC source-ip tagging if you want to make your AssumeRole sessions more secure by enabling attribute-based access controls (ABAC). By enabling this option, you can hard-code Cribl’s Virtual Private Cloud Endpoint (VPCE) into your IAM trust policy.
Selecting this option exposes VPC Endpoint IDs for all supported Regions. Use the adjacent Copy buttons to transfer all the VPCE IDs to your IAM permission policy, as shown in Expand the Permission Policy.
Completing both parts of this configuration will make your credentials harder to impersonate. Specifically, your
AssumeRole sessions will include a source-ip tag, enabling you to enforce a condition that aws:RequestTag/source-ip
equals ${aws:SourceIp}. Also, you can enforce that aws:SourceVpce matches one of the allowed VPC Endpoint IDs.
Add an Amazon S3 Dataset
Now you’ll add a Dataset that tells Cribl Search what data to search from the Dataset Provider.
To add a new Dataset, select Data, then Datasets, then Add Dataset.
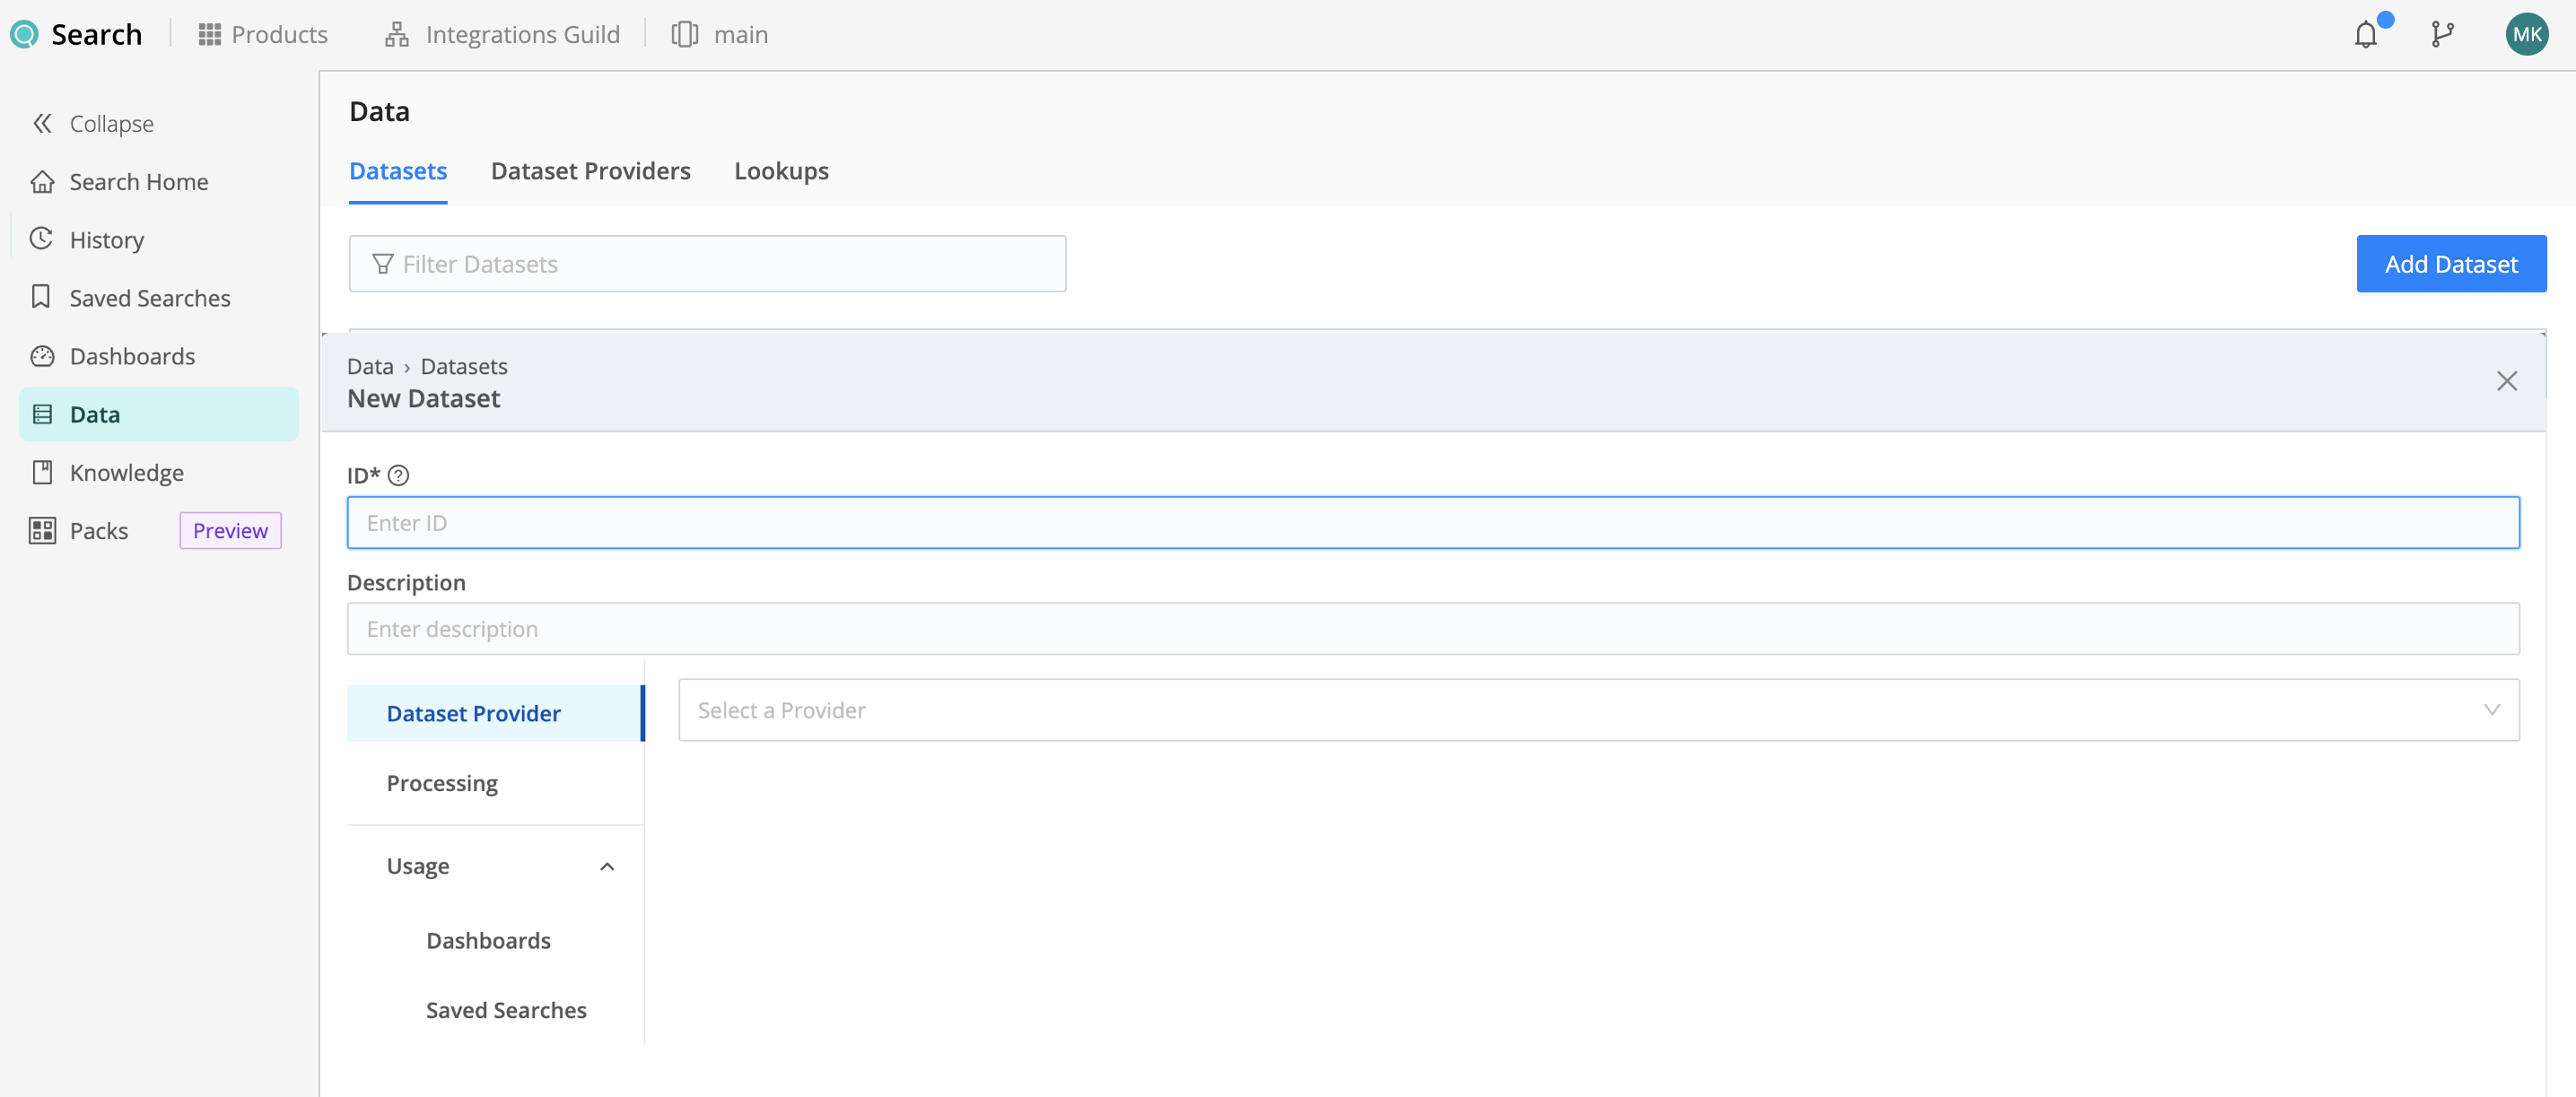
Set the Dataset type to Federated Dataset, and configure the following settings.
Identify the Dataset
Use the first few fields to uniquely identify this Dataset and specify its type:
- ID is an identifier unique for both Cribl Search and Cribl Lake. Start the ID with a letter;
the rest of the ID can use letters, numbers, and underscores (for example,
my_dataset_1). You’ll use this to specify the Dataset in a query’s scope, telling Cribl Search to search the Dataset (for example,dataset=my_dataset_1). - Description is optional. Here, you can enter a summary that will clarify this Dataset’s purpose to other users.
- Set Dataset Provider to the ID of an Amazon S3 Dataset Provider.
- Set Type to v1 (standard, the default) or v2. v2 Datasets support faster search and require NDJSON, Delimited Text, or Parquet format. If you select v2, see v2 Dataset Configuration for the remaining steps.
v2 Dataset Configuration for S3
If you’re switching from v1 to v2, first see Federated Search v2 to see what’s currently supported.
For v2 Datasets, configure the following fields:
- Bucket path is the path to the S3 bucket and objects you want to search. Supports templating (for example,
mybucket/${fieldA}/${fieldB}). For details, see Amazon S3 Bucket Paths. - Filters narrow the search to specific objects and map them to a Datatype. Add one or more filter rows. Each row
has:
- Filter: A glob expression (for example,
**for all objects, or**/*.ndjsonfor NDJSON files). - Datatype ID: The Datatype for matching files. Use Cribl NDJSON (
generic_ndjson), a delimited-text Datatype, or a Parquet Datatype. v2 supports NDJSON, Delimited Text, and Parquet formats.
- Filter: A glob expression (for example,
- Toggle off Auto-detect region if you want to use the Region drop-down to specify where the bucket is located.
- Select Save when finished.
Glob Patterns
The path filter supports using glob patterns when indicating the path. The following glob patterns are available.
| Pattern | Matches |
|---|---|
* | Matches one path segment (any sequence of characters except /). |
? | Matches any single character except /. |
** | Matches any sequence of characters except { and }, but including /. Can match multiple segments, but not brace syntax. |
{a,b,c} | Matches one of the comma-separated alternatives provided in the braces. Alternatives must not contain {, }, *, or ,. |
{M..N} | Matches a numeric range of non-negative integers. Examples: {0..9}, {10..99}. Leading zeros are supported (for example: {001..099}). |
Negations
You can negate brace content by using !, for example:
!{a,b,c}– path must not match any of the alternatives.!{0..9}– path must not match the numeric range.!{foo}– path must not match the literalfoo.*!{...}- path matches anything that does not match the provided suffix.
Escaping
\ (backslash) is the escape character for glob patterns.
\!{ matches a literal !{ in the path (for example, a directory named !{temp}).
Set Up Paths, Regions, Partitioning
For v1 Datasets, define at least one path, Region, and partitioning configuration:
- Skip event time filter is optional. Toggle this on only if you’re sure you want to set the time range of your searches by partition time-boundaries rather than events’ timestamps
- Bucket path is the path to the S3 objects you’d like to search. Start the path with the bucket name, and then add partitioning details. Tokens and key-value pairs are supported (see Amazon S3 Bucket Paths).
- Toggle off Auto-detect region if you want to use the adjacent Region drop-down to specify where the S3 bucket is located. When toggled on, Cribl automatically detects the Region and locks the drop-down.
- Path filter is a JavaScript filter expression that is evaluated against the S3 bucket path. Defaults to
true, which matches all data, but you can customize this value. - The Partitioning scheme defaults to
Defined in Path. For Splunk-specific alternatives (and corresponding options), see Amazon S3 Partitioning Scheme.
Multiple Path Configs
Select Add bucket/path to define as many other path configurations as you want for this Dataset. Each path can have its own filter, Region, and partitioning scheme.
As with parallel Datasets, each partitioning scheme applies per path. When searching a Dataset, Cribl Search will search all its configured paths. However: a failed search on any of a Dataset’s paths will fail the whole search.
Set Up Datatypes and Storage Classes
On the Processing left tab, you specify Datatypes to break data down into discrete events and define fields so they’re ready to search.
Use v2 Datatype for Amazon S3 Datasets when your data is NDJSON, Delimited Text, or Parquet. For other formats, use v1 Datatypes. For details, see Datatypes.
On the Storage classes left tab, select the storage classes that you want this Dataset to search against. You can minimize retrieval costs by selecting only warmer classes. You must select at least one class. For details, see Storage Classes.
Save the Configuration
Bypass the Usage left tabs for now, and select Save when your configuration is complete.
Path/Partitioning Considerations
This section offers details and guidance on configuring search paths, filters, and partitioning schemes. For best practices covering path design across all object stores, see Optimize Paths.
Amazon S3 Bucket Paths
Each Bucket path specifies a separate bucket of data within the Dataset. It defines the scope of this data, to narrow down what data is in the Dataset. This field supports tokens and key-value pairs. For example:
my-bucket/${data}/- wheredatabecomes a field for all events of that Dataset.my-bucket/${data}/${*}- equivalent, the wildcarded path is skipped.my-bucket/<key=value>/<someVarOfInterest>- see Hive-Style Paths just below.my-bucket/<path>/${_time:%Y}/${_time:%m}/${_time:%d}/${_time:%H}/- time-based partitioning.
Hive-Style Paths
To search paths of the form my-bucket/<key=value>/<someVarOfInterest>, your expression should place the wildcard {*}
in the ordinal position, to ignore the hive (K-V) segment:
my-bucket/${*}/${someVarOfInterest}
This will allow Cribl Search to find the wildcarded subdirectory automatically.
Basic Tokens
Basic tokens’ syntax follows that of JS template literals: ${token_name} - where token_name is the field (name) of interest.
For example, if the path was set to /var/log/${hostname}/${dataSource}/, you could use a filter such as hostname=='myHost' && dataSource=='mydataSource' to specify data only from the /var/log/myHost/mydataSource/ subdirectory.
Time-Based Tokens
Paths with time notation can be referenced with tokens, having a direct effect on the earliest and latest boundaries. The supported time fields are:
_timeis the raw event’s timestamp.__earliestis the search start time.__latestis the search end time.
Time-based tokens are processed as follows:
- For each path, times must be notated in descending order. So Year/Month/Day order is supported, but Day/Month/Year is not.
- Paths may contain more than one time component. For example,
/my/path/2020-04/20/. - In a given path, each time component can be used only once. So
/my/path/${_time:%Y}/${_time:%m}/${_time:%d}/...is a valid expression format, but/my/path/${_time:%Y}/${_time:%m}/${host}/${_time:%Y}/...(with a repeatedY) is not supported. - For each path, all extracted dates/times are considered in UTC.
Cribl recommends that your path always include and tokenize the largest available time fields, proceeding down to the smallest desired time fields. Otherwise, your searches might yield unexpected results, because Cribl Search will default the omitted fields to their earliest allowed value.
The following strptime format components are allowed:
Y,yfor yearsm,B,b,efor monthsd,jfor daysH,Ifor hoursMfor minutesSfor secondssfor Unix time (seconds since 1/1/1970)
Time-based token syntax follows that of a slightly modified JS template literal:
${_time: some_strptime_format_component}. Examples:
| Path | Matches |
|---|---|
/path/${_time:%Y}/${_time:%m}/${_time:%d}/... | /path/2020/04/20/... |
/path/${_time:year=%Y}/${_time:month=%m}/${_time:day=%d}/... | /path/year=2020/month=05/day=20/... |
/path/${_time:%Y-%m-%d}/... | /path/2020-05-20/... |
Set Query Time Range by Partition
If your data is partitioned by time (so your paths probably use time-based tokens), you can tell Cribl Search to ignore events’ timestamps, and instead set the time range using the partition time-boundaries.
For example, an event with the timestamp of 2025-07-01T23:59:00.000 might be stored in the July 2 partition. Queries
for July 1 or July 2 might not find it: the first due to wrong partition, the second due to wrong _time. Using
partition time for the query range avoids this issue.
To search by partition time range, toggle on Skip event time filter when setting up your paths. Then, any
time range you set (in the Cribl Search UI or with earliest/latest in the query text) will use partition time
instead of event time.
If you toggle on the Skip event time filter option, Cribl Search will ignore the
_timefield in your events. Do not enable this option if your paths don’t use time-based tokens.
Amazon S3 Path Filter
Each Path filter is a JavaScript expression that Cribl Search evaluates against the corresponding Bucket path.
The Path filter field’s value defaults to true, which matches all data. However, you can customize this value
almost arbitrarily.
For example, with this Path filter:source.endsWith('.log') || source.endsWith('.txt')
…this configuration will search only files/objects with .log or .txt extensions.
At each Path filter field’s right edge are a Copy button and an Expand button that opens a validation modal.
With DDSS or SmartStore partitioning, you can provide the index name as the Path filter, for example:index=="index_y"
Amazon S3 Partitioning Schemes
Each Partitioning scheme drop-down offers alternative options for partitioning inbound data from Splunk. You can
choose among Defined in Path,
Splunk DDSS, and
Splunk SmartStore.
With any option, in the corresponding Bucket path field, provide the path where indexes are stored (that is, your index’s parent folder).
For Splunk SmartStore, the full path takes the form:<parent_folder>/<indexName>/db/<2-letter-hash>/<2-letter-hash>/<bucket_id_number-origin_guid>/<"guidSplunk"-uploader_guid>/
For Splunk DDSS, the full path takes the form:<parent_folder>/<indexName>
With either of these options, if you organize your bucket using this default file path, Cribl Search will automatically discover its content.
Splunk SmartStore Time Range on S3
When you select the Splunk SmartStore partitioning scheme for all buckets and paths within an Amazon S3 Dataset, the
Dataset Provider tab adds an Advanced section.
Use this section’s Time range controls to define a rolling, retrospective time window over which Cribl Search will
scan your Dataset to optimize search performance against it. The time window is evaluated against event timestamps. Its
value defaults to 30 Days back, and you can set it to anywhere between 1 Day(s) and All Time.
Search Amazon S3
Now that you have a Dataset Provider and Dataset, you’re ready to start searching Amazon S3.
Data Transfer Charges
Data transfer to Cribl Search is free if your S3 bucket is in the same AWS Region as your Cribl.Cloud Workspace.
Data transfer to Cribl Search is subject to AWS data transfer costs if your S3 bucket is not in the Regions supported by Cribl.Cloud. AWS also charges API costs in some circumstances. For details, see the Amazon S3 Pricing topic’s Data transfer section. Cribl Search users are responsible for paying Amazon data transfer and API costs; these are not covered by Cribl.Cloud credits.
Cribl Search will try to minimize the amount of data transferred, to the extend possible, by using path filters, pruning, and other methods.
Other Charges
Other charges may apply. For example, LIST and GET requests to your S3 buckets will be charged per AWS S3. See the Requests & data retrievals section in Amazon S3 Pricing.
Storage Class Compatibility
Cribl Search supports searching Amazon S3 storage classes as listed below.
| S3 Storage Class | Cribl Search Compatibility |
|---|---|
| S3 Standard | Will attempt to read |
| S3 Intelligent-Tiering | Will attempt to read objects that have not aged into one of the unsupported classes below |
| S3 Express One Zone | Will attempt to read |
| S3 Standard-IA (infrequent access) | Will attempt to read |
| S3 One Zone-IA (infrequent access) | Will attempt to read |
| S3 Glacier Instant Retrieval | Will attempt to read |
| S3 Glacier Flexible Retrieval | Unsupported - will skip |
| S3 Glacier Deep Archive | Unsupported - will skip |
When encountering objects from an unsupported storage class, Cribl Search skips them. You’ll see the number of such objects next to the total count of search results, under the skipped metric:

To find out which objects were ignored, go to Details > Logs, and
find the logs containing the word skipped.
Search Archived Amazon S3 Objects
To read an object from an unsupported storage class (such as S3 Glacier Deep Archive), first temporarily restore the object in Amazon S3, and then make sure your Cribl Search Dataset is configured to include restored objects.
- In Amazon S3, restore the archived object. The time this takes depends on the object’s size, storage class, and other factors.
- Once the object is successfully restored, open Cribl Search, and go to Data > Datasets.
- Open the Dataset that contains the object, and select the Storage classes left tab.
- Make sure the Restored from Archive check box is selected.
- Select Save.
Now, your next search on this Dataset will attempt to read the restored object.