




Ingest OpenTelemetry Data into Cribl Search
Collect metrics, traces, and logs from OTLP-compliant agents to store them in Cribl Search for fast analysis.
Before You Begin
You’ll need:
- Cribl.Cloud Enterprise. For details, see Pricing.
- Search Editor Permission, or higher. Learn who can do what at Cribl Search Permissions.
- An OpenTelemetry agent or collector that can reach Cribl Search over OTLP/gRPC or OTLP/HTTP.
You don’t need Cribl Stream, Edge, or Lake. (Looking for the OpenTelemetry (OTel) Source in Cribl Stream instead?)
1. Add a Lakehouse Engine
See Lakehouse Engines in Cribl Search.
2. Set Up Your Search Datasets
Create the Search Datasets you’ll route events into, and set their retention. See Create Search Datasets.
If this Source will store metrics, you don’t need to create a Dataset for them. Cribl Search auto-provisions a metrics
Dataset for each lakehouse engine. See The metrics Dataset.
3. Add an OpenTelemetry Source in Cribl Search
On the Cribl.Cloud top bar, select Products > Search > Data > Add Source > OpenTelemetry.
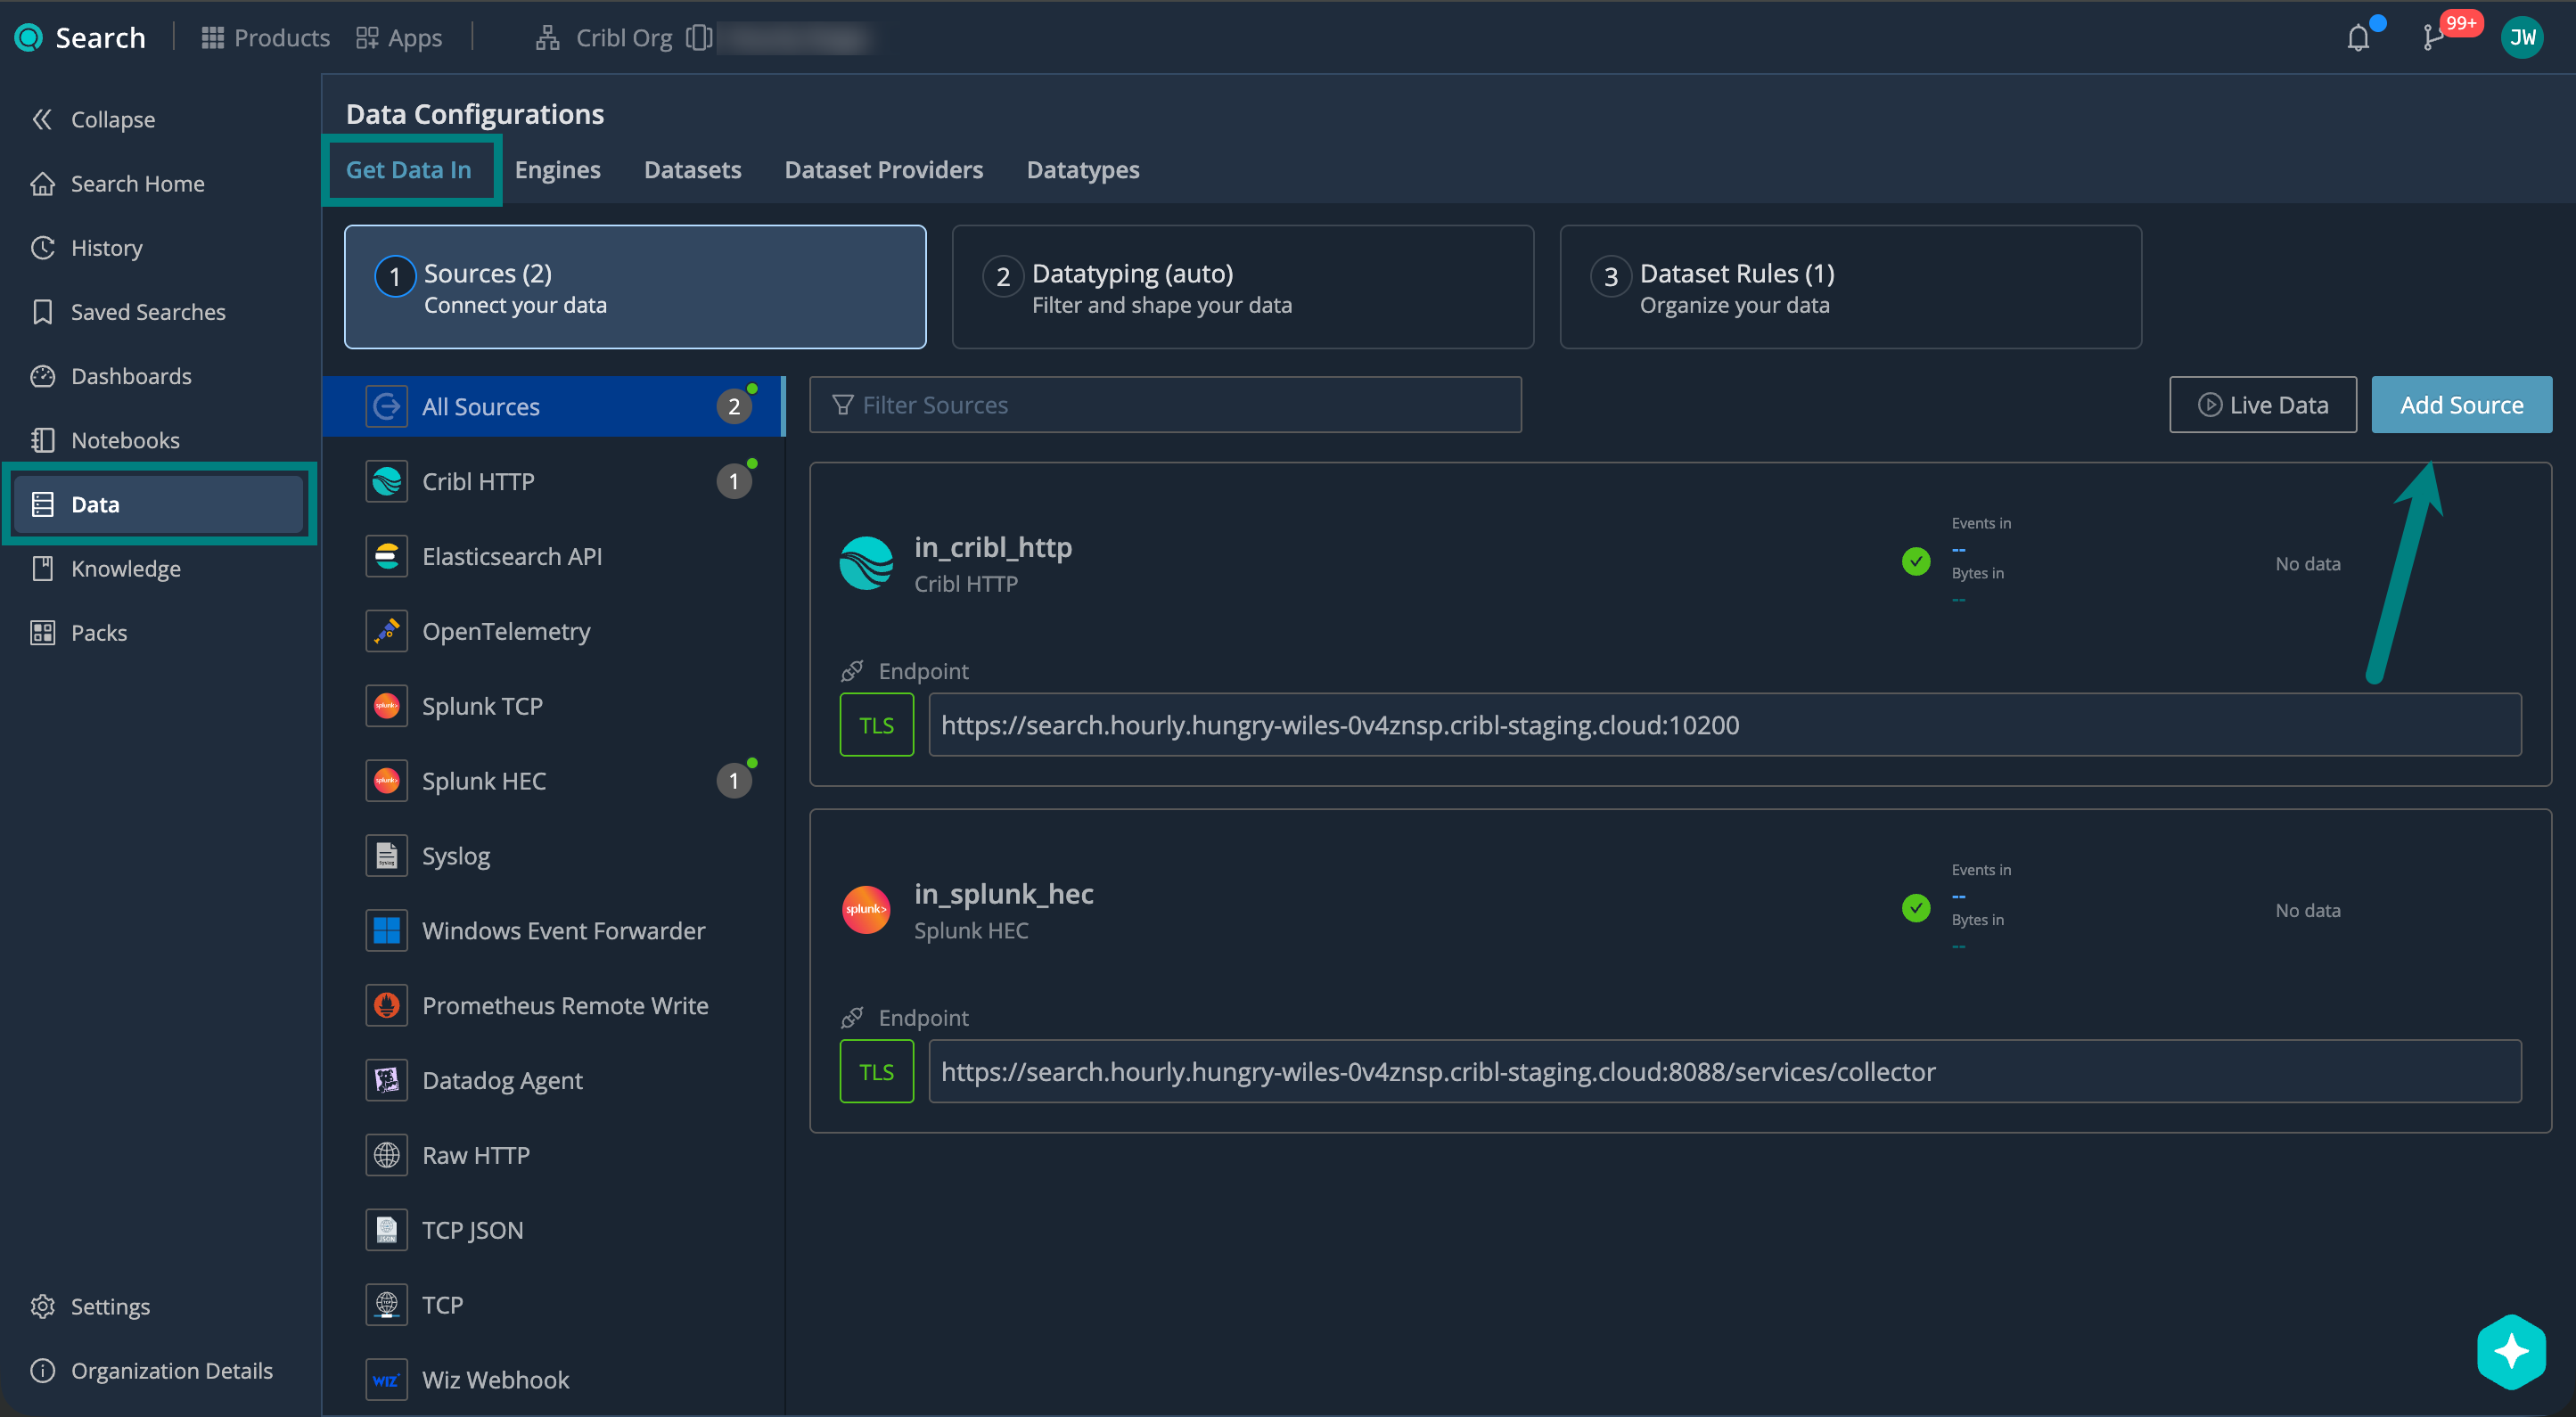
Describe Your Source and Set the Protocol
Under General, configure:
| Setting | Description | Example |
|---|---|---|
| ID | Source ID, unique across your Cribl.Cloud Workspace. Use letters, numbers, underscores, hyphens. | otel_prod |
| Description | Describe your Source so others know what it’s for. | Ingests OTLP from prod collectors |
| Address | Hostname (FQDN) that your upstream sender connects to. You’ll need this to set up your upstream sender. | search.main.foo-bar-abc123.cribl.cloud |
| Port | Network port to listen on. The drop-down labels the two OTLP defaults as gRPC Default (4317) and HTTP Default (4318). Keep the default unless it conflicts with another service. | 4317 (gRPC default), 4318 (HTTP default) |
| OTLP version | Version of the OTLP Protobuf spec to use. Choose the version that matches your upstream sender. | 1.3.1 (default) |
| Protocol | The transport protocol to accept: gRPC (default) or HTTP. Choose the protocol that matches your upstream sender. | gRPC (default) |
Port follows Protocol. Switching to HTTP moves the port to
4318, and switching back to gRPC moves it to4317. If another Source already uses the target port, the port stays where it is and the drop-down marks the target as already in use, so check the port before you save.
Choose Logs, Metrics, or Both
When you set up a Source, use the Store this source data as setting to choose what types of telemetry to keep: logs, metrics, or both. This setting appears only when metrics are enabled for your Organization.
See how each option handles your data:
| Option | OTLP metrics | OTLP logs and spans |
|---|---|---|
| Logs (default) | Dropped. | Stored as events in your Search Datasets. |
| Metrics | Stored in the metrics Dataset of your lakehouse engine. | Dropped. |
| Both Logs and Metrics | Stored in the metrics Dataset of your lakehouse engine. | Stored as events in your Search Datasets. |
Keep these behaviors in mind:
- Both Logs and Metrics stores each metric once, in the
metricsDataset. Cribl Search never keeps a second, event-shaped copy of a metric in a Search Dataset. - Metrics stores metrics only. If you want to keep the logs and spans that the same Source receives, select Both Logs and Metrics.
- A Source that you created before this setting existed behaves as Logs, so the metrics it receives are dropped rather than stored as events.
- Cribl Search extracts the individual data points from your OTLP metric payloads for you. You don’t need to configure an extraction setting.
Metrics is a Preview feature, and your metrics share the compute and storage of your lakehouse engine. To review the impact on your engine, see Explore Metrics in Cribl Search.
To learn which OTLP metric types Cribl Search stores, and how it renames them, see Supported OTLP Metrics.
Set up Authentication
Use authentication to make sure only authorized senders can push data to your Cribl Search Source.
Under Authentication, select the Authentication type you want to use:
No authentication. Use only for testing or trusted internal networks.
Create a username and password. This is what your upstream sender will need to provide when sending data to your Source endpoint.
| Setting | Example |
|---|---|
| Username | otel_user |
| Password | ******** |
Authenticate using a stored credentials secret instead of entering a username and password directly. This keeps credentials out of your Source configuration and makes them easier to rotate.
| Setting | Description | Example |
|---|---|---|
Credentials secret | Reference to a stored text secret that holds the credentials (username and password). Select a secret or Create a new one. (See Create and Manage Secrets in Cribl Stream). | sec_otel_creds |
Create bearer tokens. This is what your upstream sender will need to provide in the authorization header.
Select
Add Token, then enter a token text or Generate a random one.
Authenticate using a stored token secret instead of entering a token text directly. This keeps tokens out of your Source configuration and makes them easier to rotate.
| Setting | Description | Example |
|---|---|---|
Token secret | Reference to a stored text secret that holds the token. Select a secret or Create a new one. (See Create and Manage Secrets in Cribl Stream). | sec_otel_token |
Set Up Encryption
TLS encryption protects your data in transit between upstream senders and your Cribl Search Source. New Sources have TLS enabled by default, with TLS 1.2 as the minimum version.
Under Encrypt, you can review or adjust the Minimum TLS version you want to accept:
| TLS Version | When to Use |
|---|---|
| 1.3 | Provides the strongest security. Use when your clients support it. |
| 1.2 | The default. Use for broad client compatibility. |
| Older than 1.2 | Avoid if possible. These versions are no longer considered secure. |
Select Save to create the Source.
4. Set Up Datatyping
Datatyping applies to the logs and spans that take the event path. If this Source stores metrics only, you can skip this
step, because metrics route to a metrics Dataset through Metric Dataset rules instead.
Configure Datatype rules to parse, filter, and normalize your data into structured fields. We call this process Datatyping.
On the Cribl.Cloud top bar, select Products > Search > Data > Datatyping (auto). Here, you can:
- Use Auto-Datatyping to parse your data automatically.
- Check for uncategorized data that didn’t match any Datatype rules.
- Handle the uncategorized data by adding custom Datatype rules.
See also:
- Datatypes in Cribl Search
- v2 Datatypes in Cribl Search
- List of Stock v2 Datatypes
- Add a Custom v2 Datatype
5. Set Up Dataset Rules
Configure Dataset rules to route the parsed events into your Search Datasets.
On the Cribl.Cloud top bar, select Products > Search > Data > Datasets: Organize Your Data, and see Organize Data with Dataset Rules for details.
Route Metrics with Metric Dataset Rules
If this Source stores metrics, Metric Dataset rules decide which metrics Dataset receives them. By default, a single
catch-all rule sends all metrics to the primary metrics Dataset. A rule for this Source matches
open_telemetry:<your-source-id> - for example, open_telemetry:otel_prod.
Metric Dataset rules apply to data as it arrives and aren’t retroactive, so add your rule before you start sending data. For details, see Add Metric Dataset Rules.
6. Set Up Your OpenTelemetry Sender
Configure your OpenTelemetry collector to export to the Source endpoint.
You’ll need these details from your Source configuration:
| Name | Example |
|---|---|
| Address | search.main.foo-bar-abc123.cribl.cloud |
| Port | 4317 (gRPC default), 4318 (HTTP default) |
| Username / Password Or, Token | otel_user / ********420 |
Examples: OpenTelemetry > Cribl Search
Edit the OpenTelemetry agent or collector’s YAML configuration file, using the following example. For details, see OpenTelemetry docs.
Replace the example address (search.main.foo-bar-abc123.cribl.cloud), token, and port (if you changed the defaults
4317 for gRPC or 4318 for HTTP) with your Source values.
exporters:
  otlp:
    endpoint: "search.main.foo-bar-abc123.cribl.cloud:4317"
    headers:
authorization: "Bearer 420"exporters:
otlphttp:
endpoint: "https://search.main.foo-bar-abc123.cribl.cloud:4318"
headers:
authorization: "Bearer 420"7. Start Sending Data and Verify
Start sending events from your upstream OpenTelemetry sender, and verify that they’re successfully flowing into Cribl Search.
On the Cribl.Cloud top bar, select Products > Search > Data > Live Data.
Here, check for your OpenTelemetry Source. For details, see Live Data.
Live Data shows the logs and spans that take the event path. To confirm that your metrics arrived, open the Metrics Explorer instead: on the Cribl.Cloud top bar, select Products > Search > Metrics, then select the metrics Dataset that your Metric Dataset rules target. For details, see Explore Metrics in Cribl Search.
Supported OTLP Metrics
This section applies when the Source stores metrics. See Choose Logs, Metrics, or Both.
Metric Types
Cribl Search maps each supported OTLP metric type to a Prometheus metric type that you can query with PromQL:
| OTLP metric type | Stored as |
|---|---|
| Gauge | Gauge |
| Sum, monotonic | Counter |
| Sum, non-monotonic | Gauge |
| Histogram with explicit buckets | Histogram |
Cribl Search doesn’t store Summary metrics or exponential histograms. It also drops individual data points that carry an unusable name, value, or timestamp, along with histograms that arrive without a sum. Your sender receives no error when Cribl Search drops a data point, so if a metric you expect is missing from the Metrics Explorer, check its type first.
Cribl Search also drops a data point whose timestamp falls outside the metrics Dataset’s expected time range. By
default, a metrics Dataset accepts timestamps up to 10 minutes in the future and has no lower bound, so a sender whose
clock runs fast loses data even though the data points themselves are valid. To change the window, open the metrics
Dataset and edit Earliest expected timestamp and Latest expected timestamp.
Metric and Label Names
To keep names valid in PromQL, Cribl Search translates OTLP metric and label names into Prometheus-compatible names. The name you query can therefore differ from the name your collector sends:
- Cribl Search appends the unit as a suffix when the name doesn’t already include it. A metric measured in
sgains_seconds, and a metric measured inBygains_bytes. A compound unit such asm/sbecomes_meters_per_second. For example,http.server.durationmeasured inmsbecomeshttp_server_duration_milliseconds. - A counter gains a
_totalsuffix at the end of the name, such ashttp_server_requests_total. If the name already containstotal, Cribl Search moves it to the end instead of adding a second one, somy.total.requestsbecomesmy_requests_total. - A gauge measured in unit
1gains a_ratiosuffix, such assystem_cpu_utilization_ratio. A non-monotonic sum stored as a gauge doesn’t gain this suffix. - In a metric name, any character other than a letter, a number, or a colon becomes an underscore, and a run of them collapses into a single underscore. A name that starts with a digit gains a leading underscore.
- Label names follow the stricter label rules of Prometheus, so a colon becomes an underscore there too, and a label
name that would start with a digit gains a prefix. The OTLP attribute
service.namebecomes the labelservice_name. - When two OTLP attribute keys translate to the same label name, Cribl Search joins their values with the
;character rather than dropping either value. - When your sender includes an instrumentation scope, Cribl Search adds the
otel_scope_name,otel_scope_version, andotel_scope_schema_urllabels.
Cribl Search stores the unit, description, timestamp, and temporality of each metric alongside the data point. It doesn’t keep the original metric name or the original attribute keys, so if a metric is missing under the name you expect, apply these translation rules to work out its queryable name.
Next Steps
Now that your data is in Cribl Search, you can start using it. For example: