


Webhook Notifications
Send webhook Notifications about your scheduled searches.
You can send Notifications to an arbitrary webhook. This topic outlines how to configure a Webhook target, and then how to send individual alerts to the corresponding endpoint
Target Configuration
In the New Target modal, select the Webhook radio button to expose multiple left tabs that provide the configuration options outlined below.
For a streamlined, illustrated example of configuring a Webhook target, see Notifications via Cribl Stream.
General Settings
On this first left tab, fill in the following field.
Target ID: Enter a unique ID used to identify the target. This will show in the Target ID column of the Targets tab. You can’t change it later, so choose an ID that will make this target’s purpose clear to you and other users .
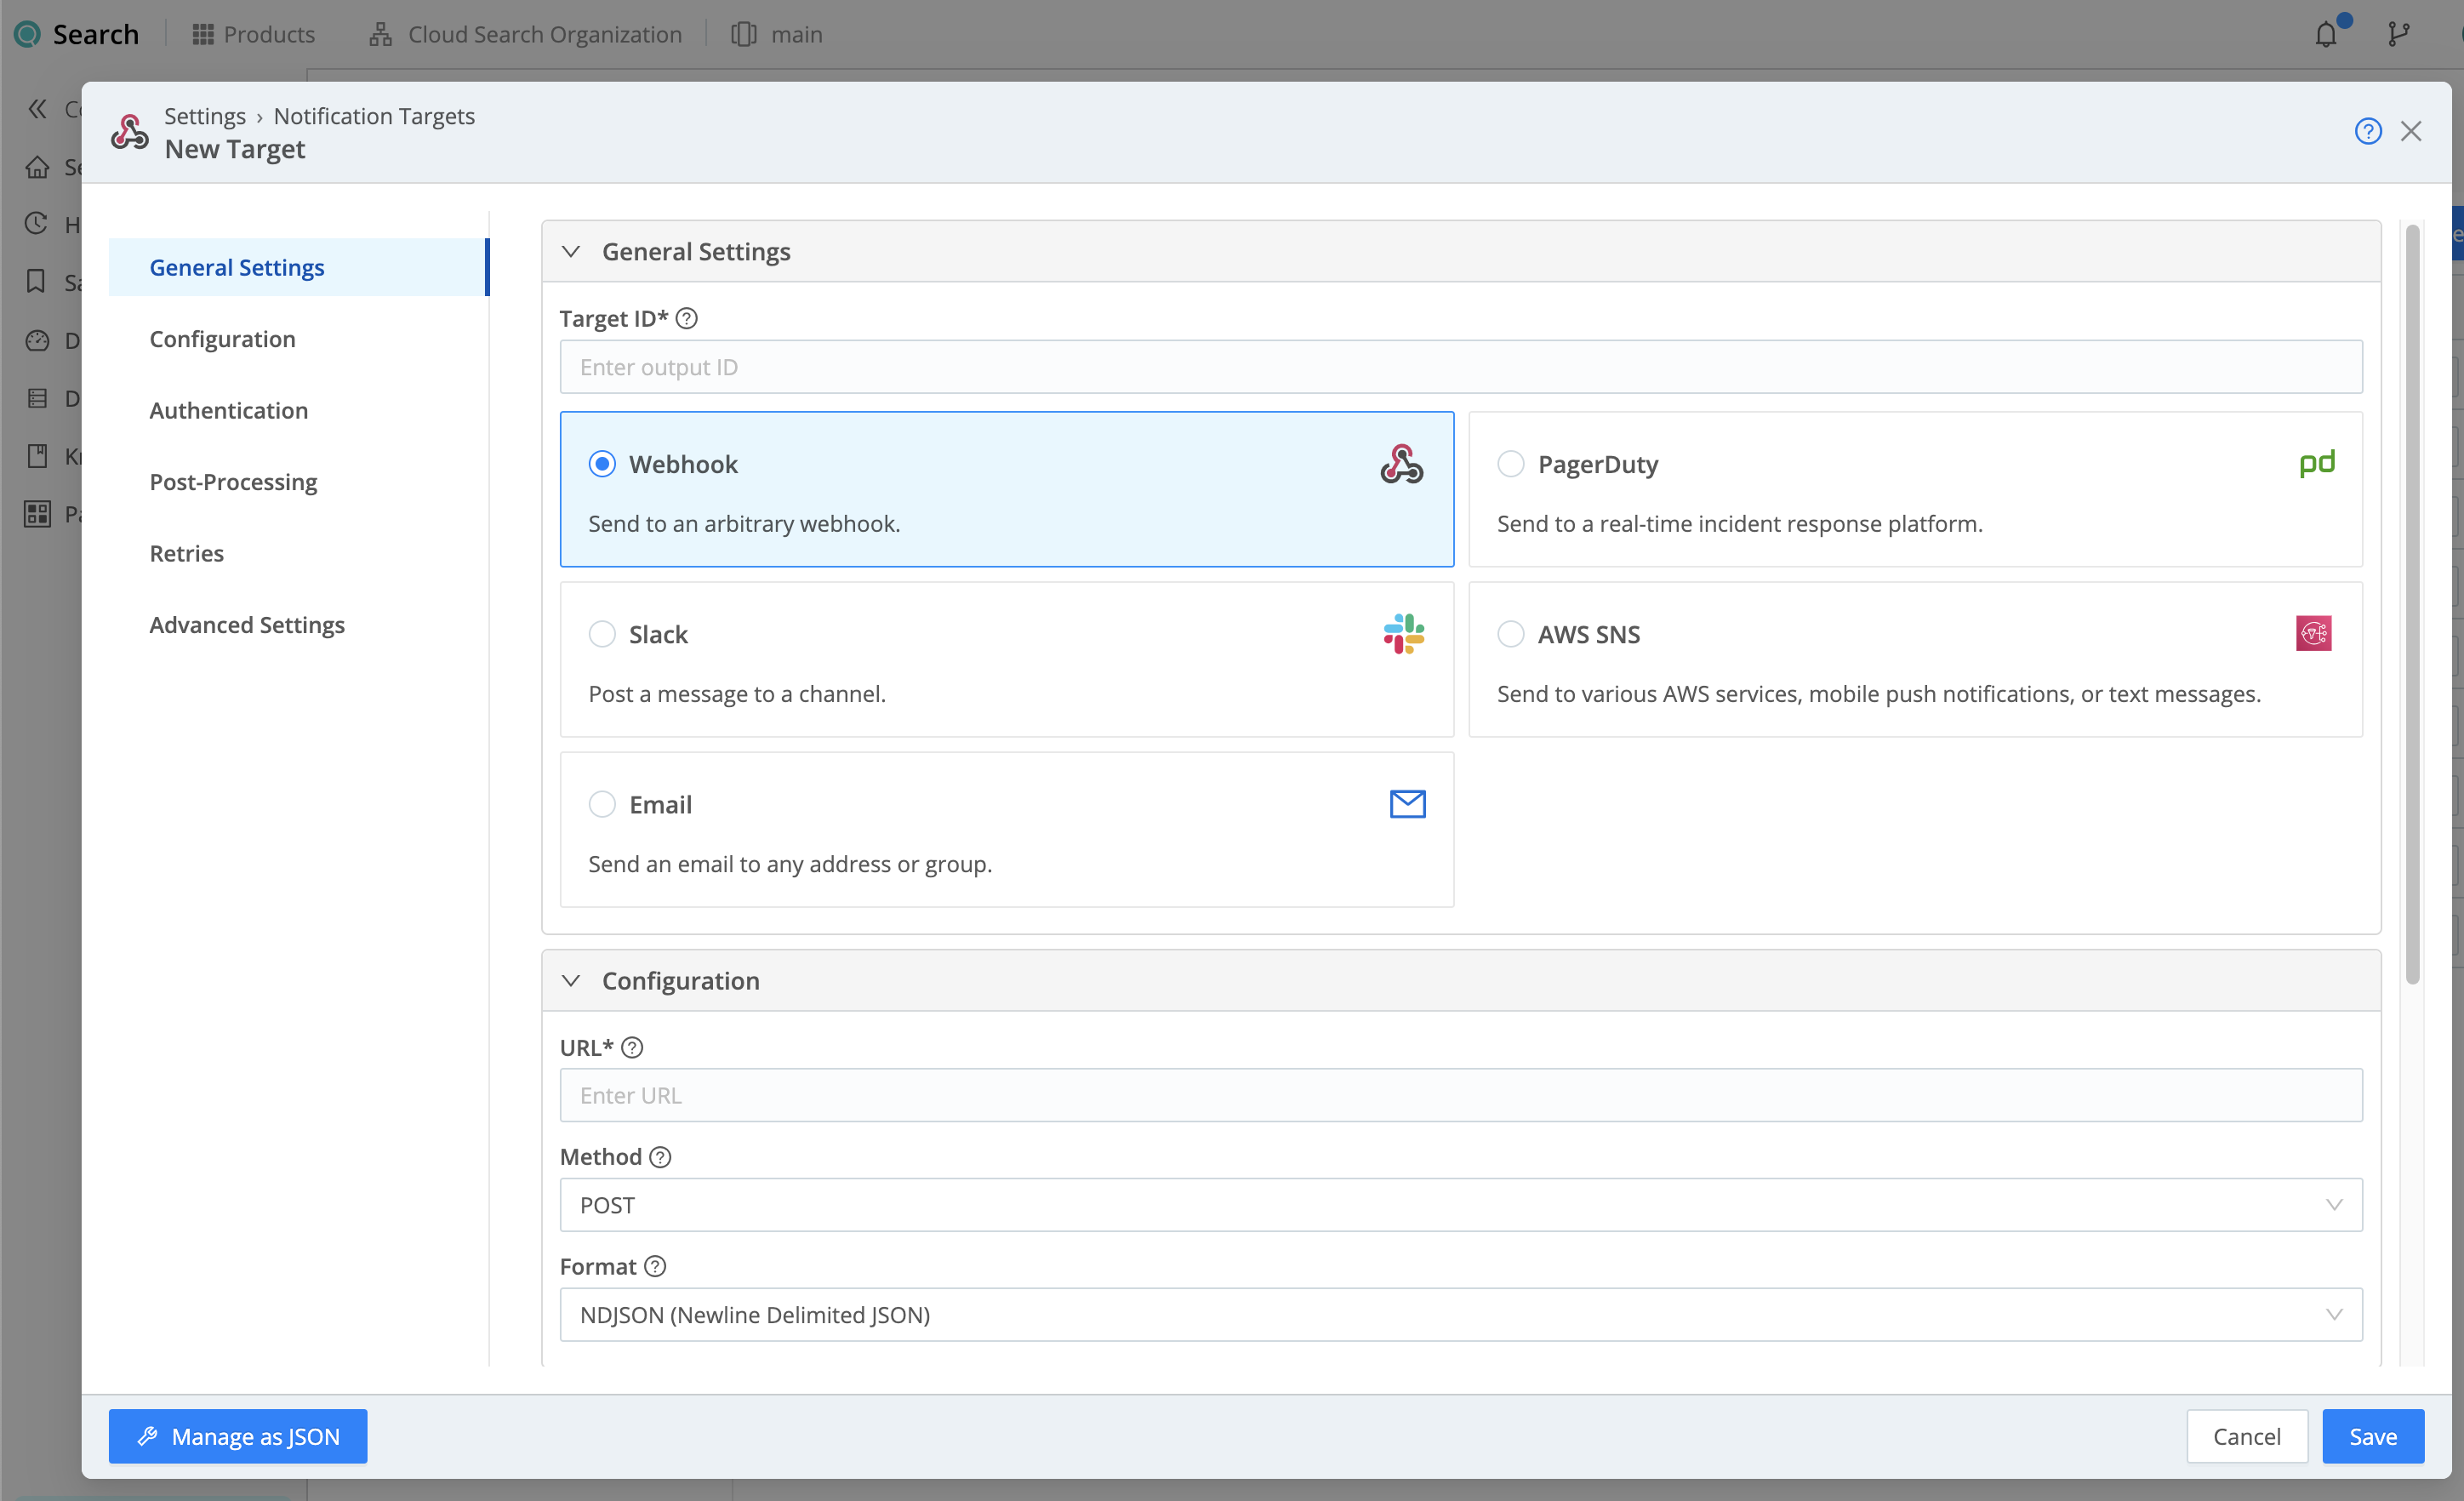
Configuration
This second left tab exposes the added options listed in this section.
URL: The endpoint that should receive Cribl Search Notification events.
To proxy outbound HTTP/S requests, see System Proxy Configuration.
Method: Select the appropriate HTTP verb for requests: POST (the default), PUT, or PATCH.
Format: Specifies how to format Notification events before sending them to the endpoint. Select one of the following:
NDJSON(newline-delimited JSON, the default).JSON Array.Custom, which exposes these additional fields:- Source expression: JavaScript expression whose evaluation shapes the event that
Search sends to the endpoint - for example:
notification=${_raw}. For other fields you can use, see Expression Fields. If empty, Search will send the full Notification event as stringified JSON. - Drop when null: Toggle on if you want to drop events where the above Source expression evaluates to
null. - Event delimiter: Delimiter string to insert between individual events. Defaults to newline character (
\n). - Content type: Defaults to
application/x-ndjson. You can substitute a different content type for requests sent to the endpoint. This entry will be overridden by any content types set in this modal’s Advanced Settings tab > Extra HTTP Headers section. - Batch expression: Expression specifying how to format the payload for each batch. Defines a wrapper object in
which to include the formatted events, such as a JSON document. This enables requests to APIs that require such
objects. To reference the events to send, use the
${events}variable. An example expression to send the batch inside a JSON object would be:{"items" : [${events}] }.
- Source expression: JavaScript expression whose evaluation shapes the event that
Search sends to the endpoint - for example:
Expression Fields
When building the Source expression used with the Custom Format, you can use the following
fields:
starttime: Beginning of the time bucket where this condition was reported. All Notifications have this field.endtime: End of the time bucket where this condition was reported. All Notifications have this field._time: Timestamp when this Notification was created. All Notifications have this.cribl_host: Hostname of the (physical or virtual) machine on which this Notification was created. All Destination and Source Notifications have this.cribl_notification: Configured name/ID of this Notification. All Destination and Source Notifications have this.origin_metadata: Object containing metadata about the Notification origin, with the following fields for all Destination Notifications:type: “output”.id: ID of the affected Destination.subType: Destination’s type (where applicable).
origin_metadata: Object containing metadata about the Notification origin, with the following fields for all Source Notifications:type: “input”.id: ID of the affected Source.subType: Source’s type (where applicable).
Authentication
On this third left tab, select one of the following options for authentication:
- None: Don’t use authentication.
- Auth token: Use HTTP token authentication. In the resulting Token field, enter the bearer token that must be included in the HTTP authorization header.
- Basic: In the resulting Username and Password fields, enter HTTP Basic authentication credentials.

Post-Processing Settings
System fields: In this section, you can specify a list of fields to automatically add to events relayed through this target. By default, includes cribl_pipe (identifying the Search Pipeline that processed the event). Supports wildcards. Other options include:
cribl_host- Search Node that processed the event.cribl_input- Search Source that processed the event.cribl_output- Search Destination that processed the event.cribl_route- Search Route (or QuickConnect) that processed the event.cribl_wp- Search Worker Process that processed the event.
Retries
Honor Retry-After header: Whether to honor a
Retry-After header, provided that the header
specifies a delay no longer than 180 seconds. Search limits the delay to 180 seconds even if the Retry-After header
specifies a longer delay. When enabled, any Retry-After header received takes precedence over all other options
configured in the Retries section. When disabled, all Retry-After headers are ignored.
Settings for failed HTTP requests: When you want to automatically retry requests that receive particular HTTP response status codes, use these settings to list those response codes.
For any HTTP response status codes that are not explicitly configured for retries, Cribl Search applies the following rules:
| Status Code | Action |
|---|---|
Greater than or equal to 400 and less than or equal to 500. | Drop the request. |
Greater than 500. | Retry the request. |
Upon receiving a response code that’s on the list, Search first waits for a set time interval called the Pre-backoff interval and then begins retrying the request. Time between retries increases based on an exponential backoff algorithm whose base is the Backoff multiplier, until the backoff multiplier reaches the Backoff limit (ms). At that point, Search continues retrying the request without increasing the time between retries any further.
By default, this Destination has no response codes configured for automatic retries. For each response code you want to add to the list, select Add Setting and configure the following settings:
- HTTP status code: A response code that indicates a failed request, for example
429 (Too Many Requests)or503 (Service Unavailable). - Pre-backoff interval (ms): The amount of time to wait before beginning retries, in milliseconds. Defaults to
1000(one second). - Backoff multiplier: The base for the exponential backoff algorithm. A value of
2(the default) means that Search will retry after 2 seconds, then 4 seconds, then 8 seconds, and so on. - Backoff limit (ms): The maximum backoff interval Search should apply for its final retry, in milliseconds. Default
(and minimum) is
10,000(10 seconds); maximum is180,000(180 seconds, or 3 minutes).
Retry timed-out HTTP requests: Toggle on to automatically retry requests that have timed out and configure the following settings for retry behavior:
- Pre-backoff interval (ms): The amount of time to wait before beginning retries, in milliseconds. Defaults to
1000(one second). - Backoff multiplier: The base for the exponential backoff algorithm. A value of
2(the default) means that Search will retry after 2 seconds, then 4 seconds, then 8 seconds, and so on. - Backoff limit (ms): The maximum backoff interval Search should apply for its final retry, in milliseconds. Default
(and minimum) is
10,000(10 seconds); maximum is180,000(180 seconds, or 3 minutes).
Advanced Settings
Validate server certs: Reject certificates not authorized by a CA in the CA certificate path, nor by another trusted CA (for example, the system’s CA). Defaults to toggled on.
Round-robin DNS: Toggle on to use round-robin DNS lookup across multiple IPv6 addresses. When a DNS server returns multiple addresses, this will cause Search to cycle through them in the order returned.
Compress: Toggle on (default) to compress the payload body before sending.
If you accept this default, make sure that the endpoint receiving these Notifications supports compression.
Keep alive: By default, Search sends Keep-Alive headers to the remote server and preserves the connection from the
client side up to a maximum of 120 seconds. Toggle Keep alive off if you want Search to close the connection immediately after
sending a request.
Request timeout: Amount of time (in seconds) to wait for a request to complete before aborting it. Defaults to 30.
Request concurrency: Maximum number of concurrent requests per Worker Process. When Search hits this limit, it
begins throttling traffic to the downstream service. Defaults to 5. Minimum: 1. Maximum: 32.
Body size limit (KB): Maximum size of the request body before compression. Defaults to 4096 KB, but you can set this
limit to as high as 500 MB (512000 KB).
High values can cause high memory usage per Edge Node, especially if a dynamically constructed URL causes this target to send events to more than one URL. The actual request body size might exceed the specified value because the target adds bytes when it writes to the downstream receiver. Therefore, we recommend that you experiment with the Body size limit value until downstream receivers reliably accept all events.
Events-per-request limit: Maximum number of events to include in the request body. The 0 default allows unlimited
events.
Flush period (sec): Maximum time between requests. Low values can cause the payload size to be smaller than its
configured maximum. Defaults to 1.
Extra HTTP headers: Name-value pairs to pass to all events as additional HTTP headers. Values will be sent
encrypted. You can also add headers dynamically on a per-event basis in the __headers field; headers added by this
method take precedence over headers defined in the Extra HTTP headers table.
Failed request logging mode: Use this drop-down to determine which data should be logged when a request fails.
Select among None (the default), Payload, or Payload + Headers. With this last option, Search will redact all
headers, except non-sensitive headers that you declare below in Safe headers.
Safe headers: Used to declare headers that are safe to log as plaintext. (Sensitive headers such as authorization
will always be redacted, even if listed here.) Use a tab or hard return to separate header names.
Alerts Using the Target
After you’ve set and saved all of the above target configuration, you can set up Notifications that use the new Webhook target as their destination.
Include Search Results with Webhook Notifications
You can send Webhook Notifications that include a subset of search results in the Notification payload. Once you’ve configured your Webhook target, you specify this option separately on each Notification that uses the target.
To set this up:
- Set up a Webhook Notification target, as outlined above.
- Open a scheduled search, and select Notifications.
- Configure the Notifications, using the Webhook Notification target you’ve created.
- Within the configuration, enable Include search results.
Take the following into account:
- The results table can accommodate up to 100 rows and 20 columns. If it’s larger, Cribl Search will truncate it.
- To make the results more legible, you can limit the number of fields sent (use the
projectoperator) and the length of each field (use thetrimfunction).
Security Risk
Embedding unverified or unsanitized search results into an AWS SNS Notification payload can pose unintended security risks. Cribl recommends reviewing result sets before including results with Notifications.