


Secure Leader/@{node}s Communication
You can configure secure communication between your Leader and @{node}s. As an additional security measure, we recommend you prevent direct browser access to the UI for all @{node}s.
Disable Exposing the API Service for @{node}s
Cribl recommends that in enterprise distributed deployments, you disable exposing the API service to the network on the configured API port for all @{node}s.
- Select a @{group}.
- Open @{settings} (top right).
- Under General Settings > API Server Settings, select Advanced.
- Toggle Listen on port off.
- Select Save.
Secure Browser Access to @{node}
Cribl recommends that in enterprise distributed deployments, you prevent direct browser access to the UI for all @{node}s.
On the Leader Node, start by enabling UI access to @{node}s (Stream, Edge). This way, admins will still be able to tunnel through from the Leader to the UI on any @{node}. This is also a prerequisite for Connect to the Leader Securely described below.
- Select a @{group}.
- Open @{settings} (top right).
- Under General Settings > API Server Settings, select Advanced.
- Toggle Local UI access off.
- Select Save.
Connect to the Leader Securely
For Cribl.Cloud Leader deployments, TLS is enabled by default, so you don’t need to configure it manually – the Cribl.Cloud platform handles this automatically. The TLS configurations described below are only for on-prem and self-managed deployments.
You can configure secure communication between your Leader and @{node}s using the UI, the instance.yml config file, or environment variables.
Secure via the UI
To set up secure communication via the UI, you configure first the @{group}, then the @{node}, then the Leader.
@{group} Setup
For each @{group} whose @{node}s you want to secure:
- Open your TLS/SSL certificate file, and copy its contents to your clipboard. (This can be the same certificate you uploaded to the Leader, or a different certificate.)
- In the sidebar, select @{group}s, and then select the @{group} you want to configure.
- Select Group Settings or Fleet Settings (upper right).
- Select Security > Certificates > TLS.
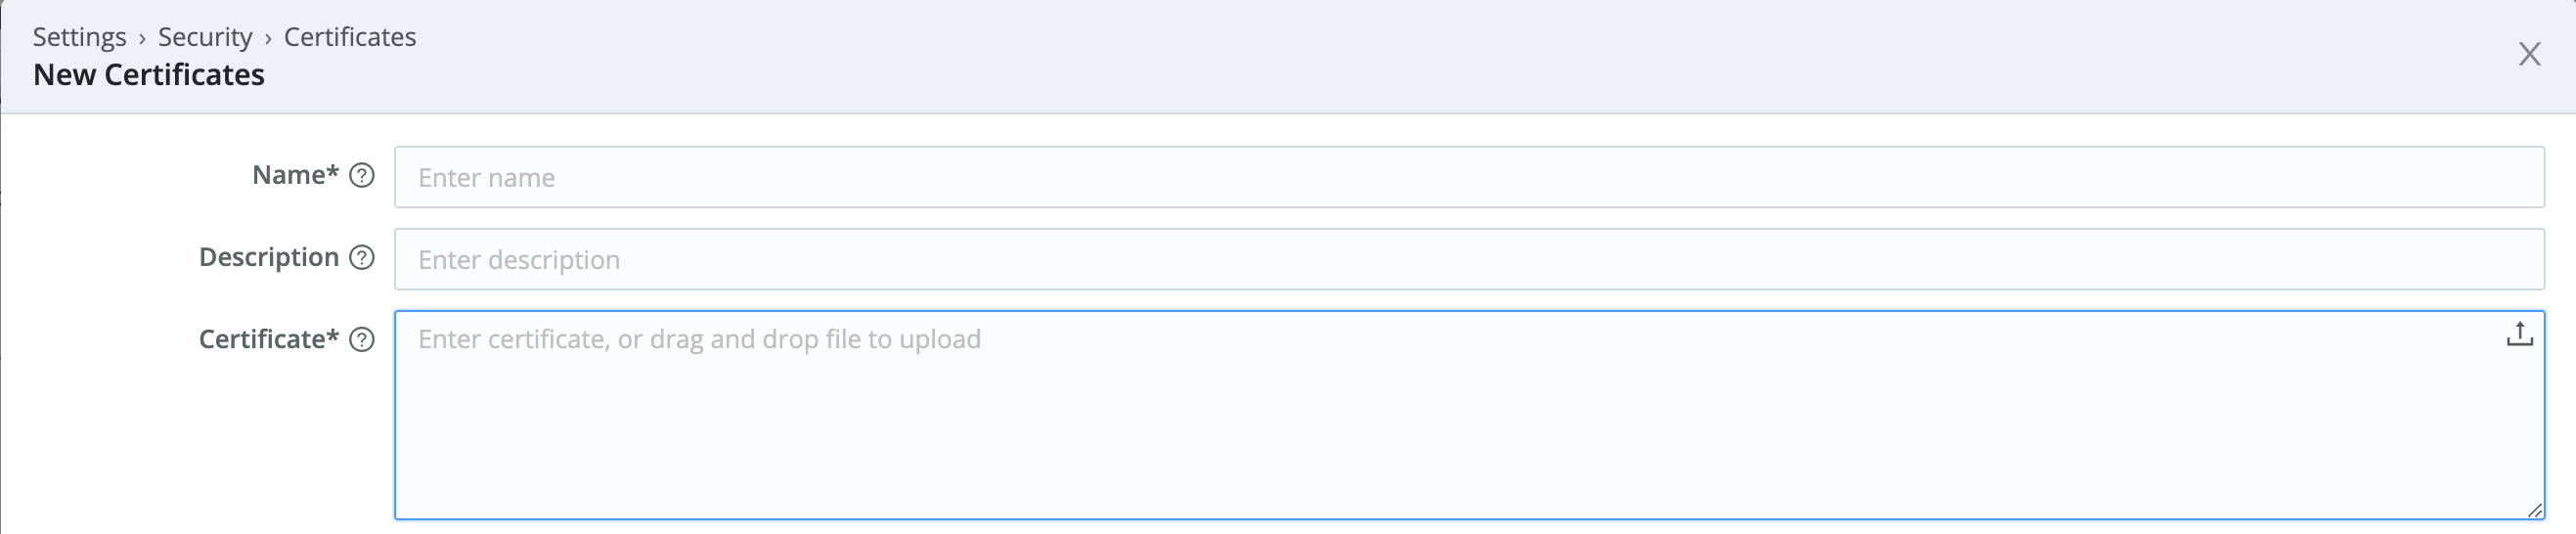
- Click Add Certificate.
- In the New Certificates modal, add the certificate’s contents to the Certificate field.
(You can paste the file’s contents, or you can drag/drop or upload the.pemfile.) - As you did on the Leader, also insert your Private key, and (as needed) your Passphrase and CA certificate.
- Click Save.
- Commit and Deploy the @{group}’s new configuration, including the new certificate.
- Repeat the preceding steps on each @{group}.
@{node} Setup
For each @{node} that you want to secure:
- Enable the Leader’s UI access to each desired @{node} (Stream, Edge).
- Tunnel through from the Leader to the @{node}’s UI.
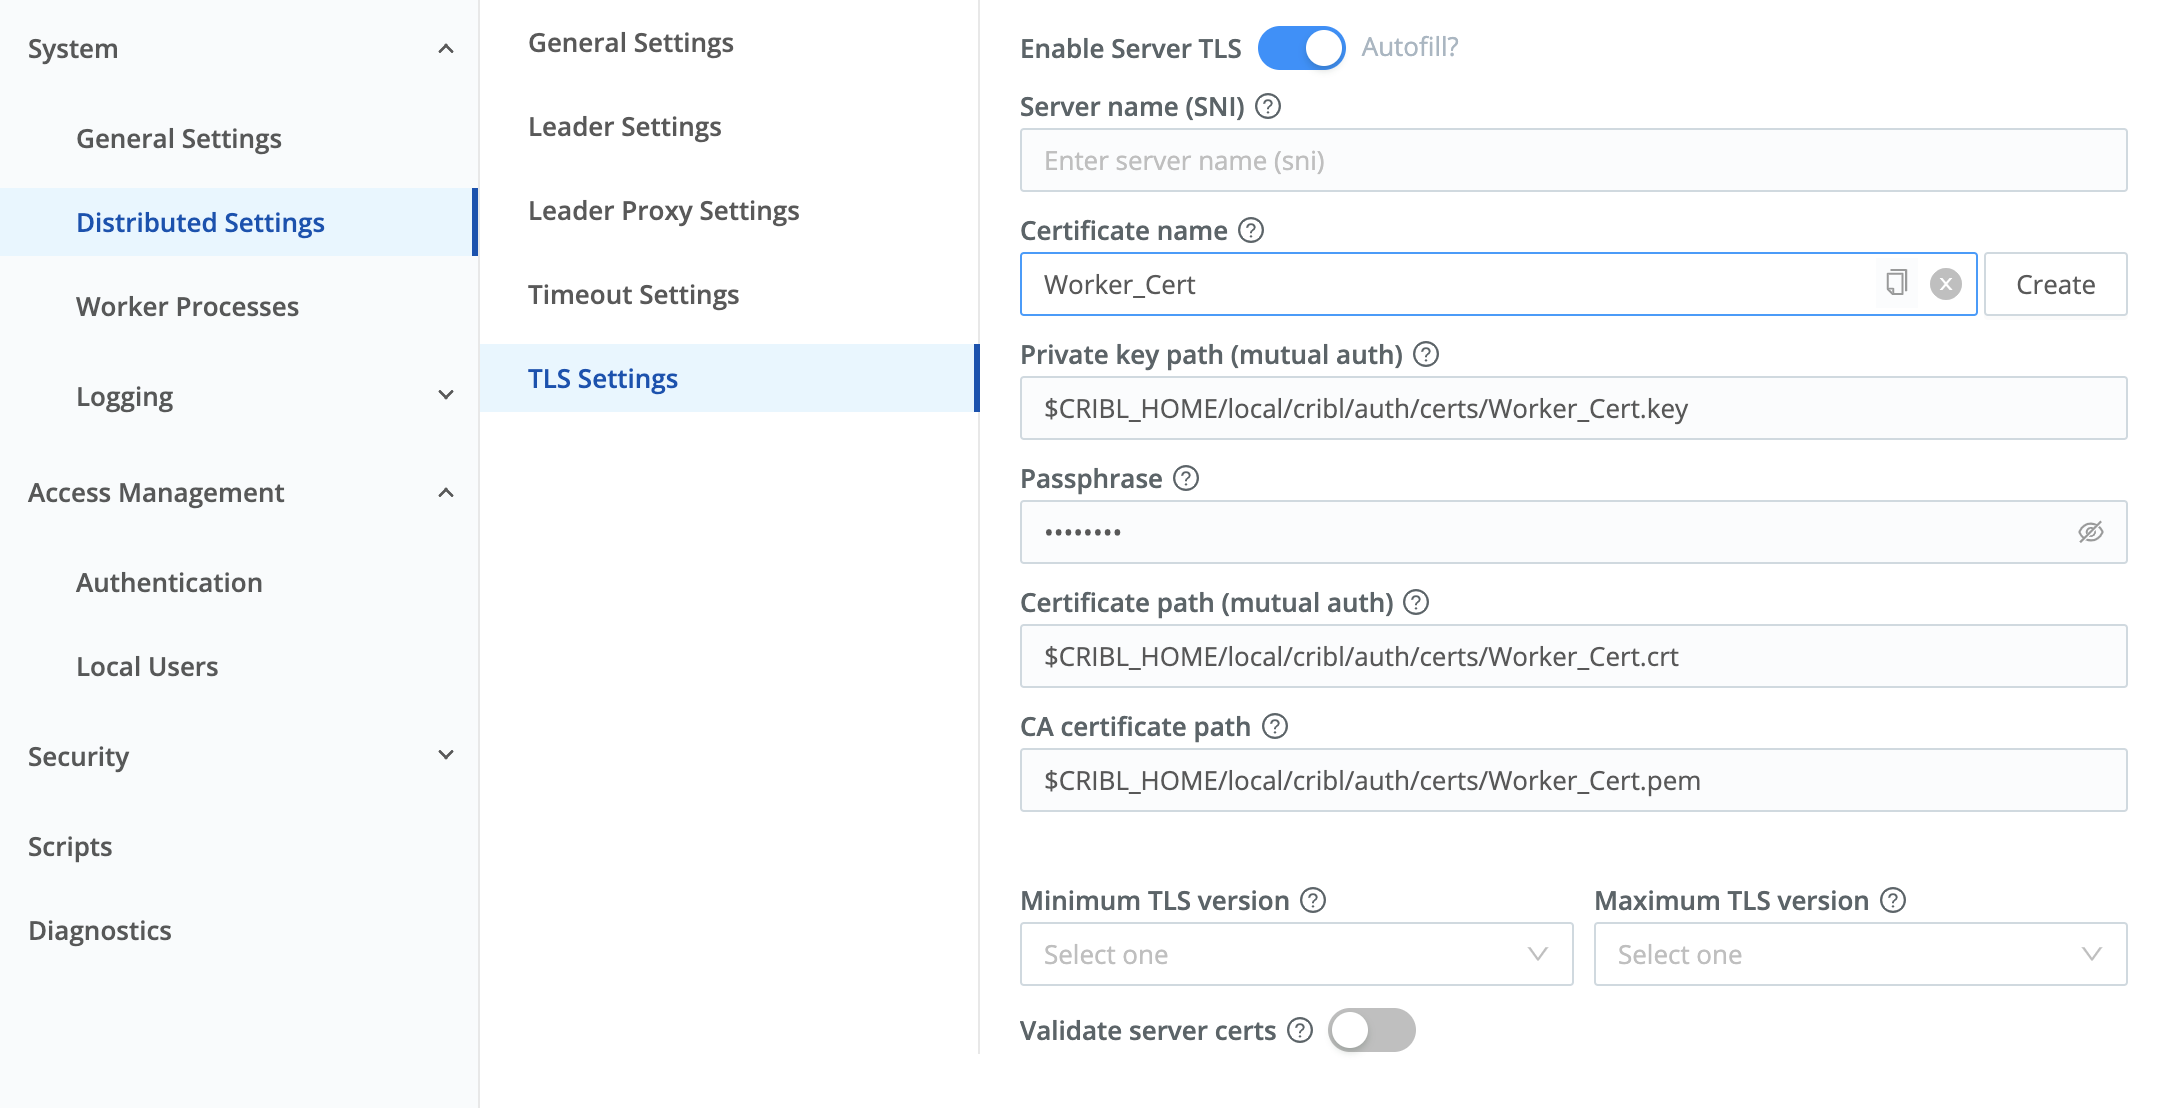
- Navigate to this @{node}’s Worker Settings (upper right) > System > Distributed Settings > TLS Settings.
- Toggle Enable Server TLS on.
This will expose the remaining TLS settings. - From the Certificate name drop-down, select the certificate you uploaded to the parent @{group}.
This will prefill all the required fields. (See all deployed certificates at the left nav’s Security > Certificates link.) - Click Save.
The Worker will be unavailable during a short lag, while it restarts with the new configuration. - Repeat the preceding steps on each @{node}.
Leader Setup
Next, return to the Leader’s UI:
- Select Settings > Global > System > Distributed Settings > TLS Settings.
- Toggle Enable server TLS on.
- In the Certificate name drop-down, select an existing certificate. This will auto-populate the corresponding certificate fields.
- Click Save.
After you’ve enabled TLS on the Leader, generating bootstrap scripts to add or update @{node}s will automatically prepend
https://to the Leader’s URL.
Secure via the YAML Config File
You can also configure the Leader’s $CRIBL_HOME/local/_system/instance.yml file to ensure that TLS is enabled. Here’s the relevant section:
distributed:
  mode: managed-edge
  master:
    host: <hostname>
    port: 4200
    authToken: <token>
    tls:
      disabled: false
      rejectUnauthorized: false
      requestCert: false
    resiliency: none
group: default_fleetAfter you’ve enabled TLS on the Leader, generating bootstrap scripts to add or update @{node}s will automatically prepend
https://to the Leader’s URL.
Secure via Environment Variables
Another way to set up secure communications between @{node}s and the Leader is via environment variables (Stream, Edge).
If you deploy your @{node}s in a container, you can enable encrypted TLS communications with the Leader by configuring the CRIBL_DIST_LEADER_URL with the tls: protocol. This will override the default setting in instance.yml. Here’s the format:
CRIBL_DIST_LEADER_URL=tls://<authToken>@leader:4200
Secure the Leader Node
This is a best practice that enables the Leader to validate itself to clients. We can secure it using the self-signed certificate we created in Configure SSL Certificates:
- Navigate to Settings > Global > General Settings > API Server Settings > TLS.
- Toggle Enabled off.
- From the Certificate Name drop-down, select a cert you’ve previously imported. This will populate the corresponding fields here.
- Click Save.
After this save, you must prepend
https://to all @{product} URLs on the Leader Node. E.g., to get back to the Settings page you just configured, you’ll now need to usehttps://<hostname>:<port>/settings/system)`.