


These docs are for Cribl Stream 4.1 and are no longer actively maintained.
See the latest version (4.17).
QuickConnect
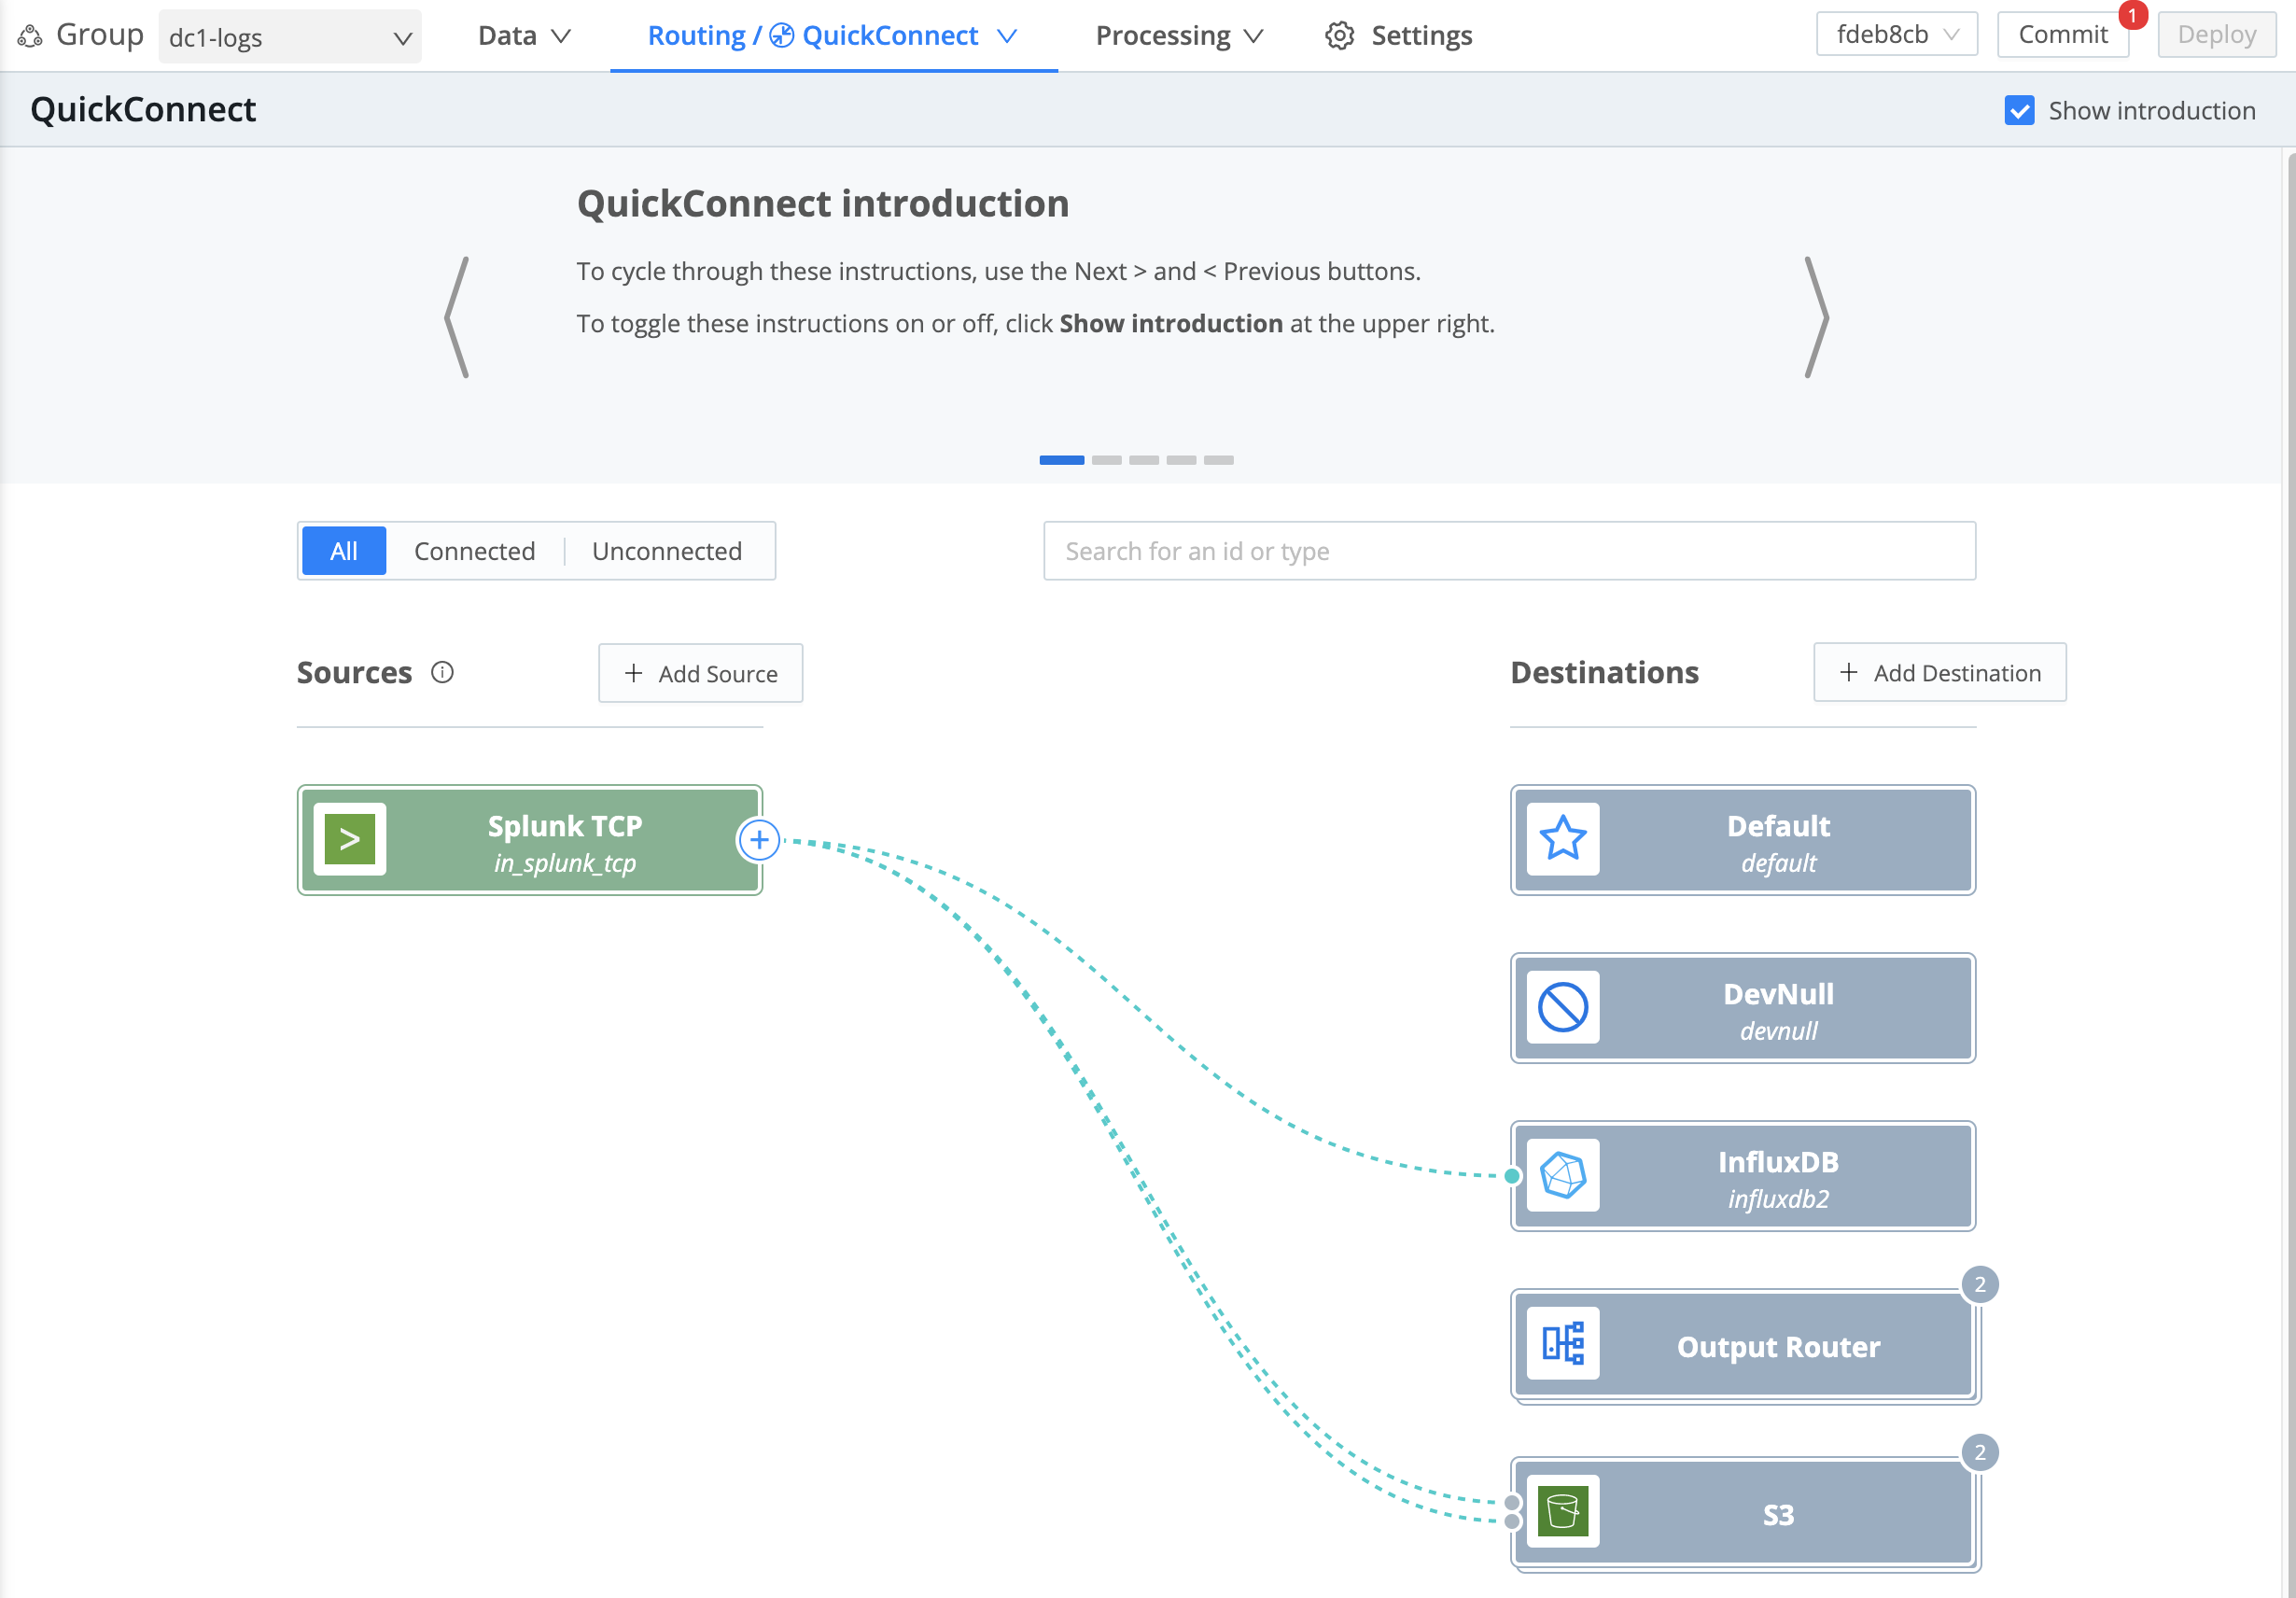
The QuickConnect visual rapid-development UI enables you to visually connect Cribl Stream inputs (Sources) to outputs (Destinations) through simple drag-and-drop.
You can insert Pipelines or Packs into the connections, to take advantage of Cribl Stream’s full range of data-transformation Functions. Or you can omit these processing stages entirely, to send incoming data directly to Destinations - with minimal configuration fuss.
QuickConnect was designed as a simple, quick way to prototype, test, and send data flowing through Cribl Stream. But it’s also entirely suitable for configuring a production deployment, if your needs are restricted to sending data through parallel paths, and you don’t need to use Routes. (See QuickConnect Versus Routes to help you clarify that choice.)
You also have the option to start with simple direct connections, and later add Pipelines’ and/or Packs’ processing power at up to three stages of each connection.
Initiating QuickConnect
When you display the home page of a Cribl Stream single instance or Worker Group, you’ll see tiles that prompt you to choose between the QuickConnect versus Route configuration UIs. Click the left tile to start using QuickConnect.
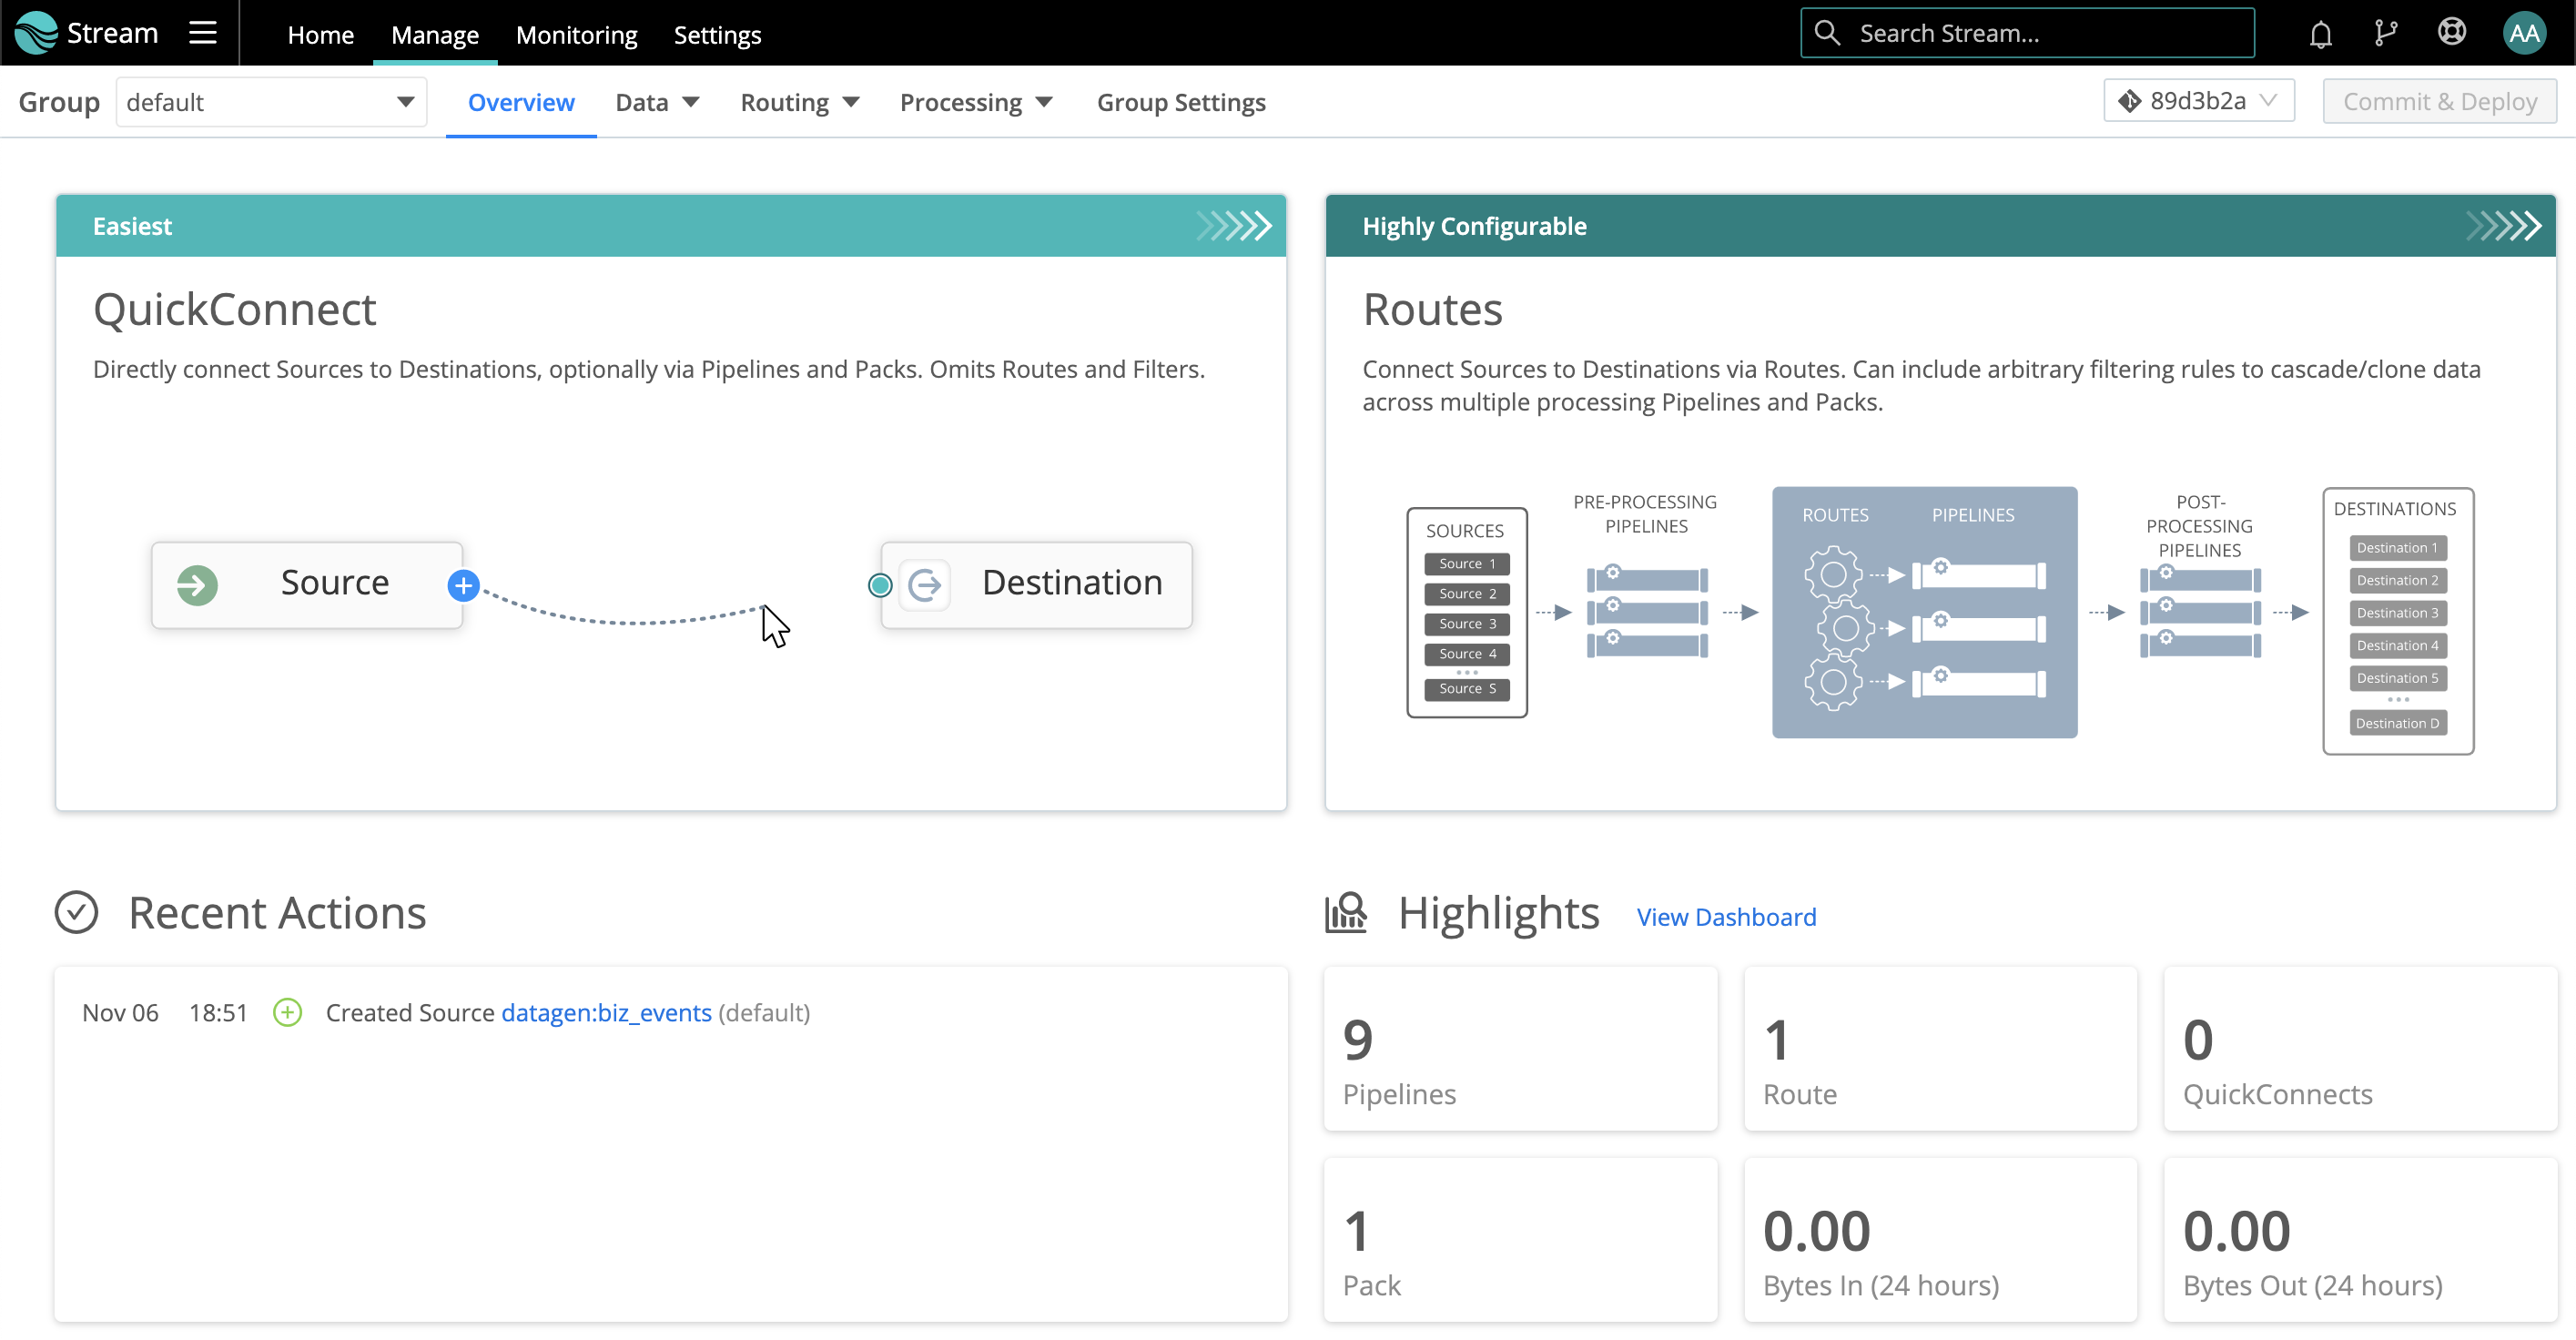
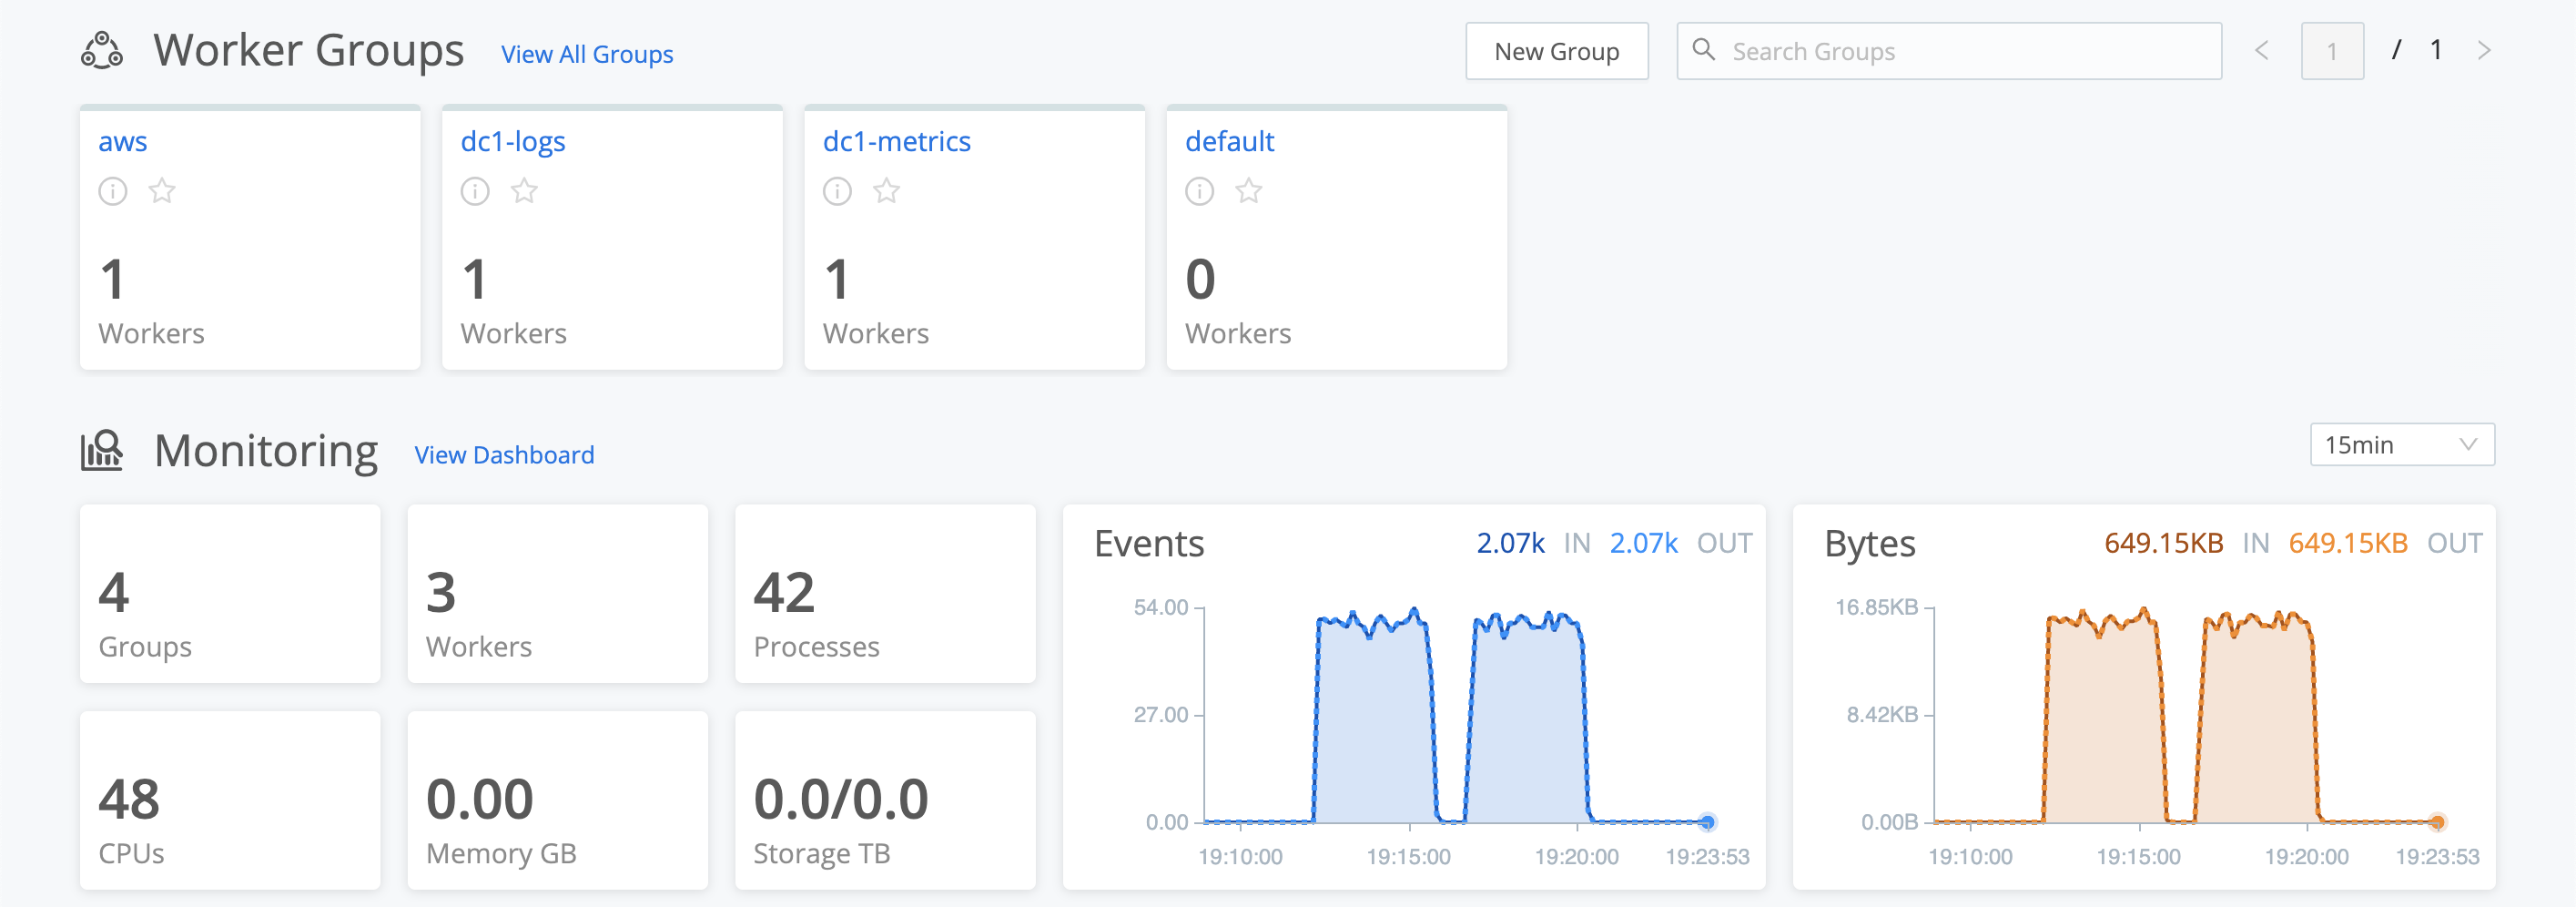
To display the above landing page in a distributed deployment, you must first select a Group. Click the top nav’s Manage link to select the default or a different Group; or click a Group’s tile on the distributed landing page, as shown below.
You can switch to Cribl Stream’s Routes UI at any time from the top nav by selecting Routing > Data Routes. To toggle back, select Routing > QuickConnect.
QuickConnect Versus Routes
QuickConnect provides access to most of Cribl Stream’s configuration options, with a few restrictions (in exchange for the simplified visual interface):
- QuickConnect completely bypasses Routes - which is why every QuickConnect path is independent and parallel. There is no Route-level data filtering, and you forego the Cribl Stream Routing table’s options to clone and cascade data across Pipelines.
- Most Sources are available to fully configure. However, you’ll need to use Routing > Data Routes to configure Collector Sources.
- Each supported Source’s config can be created in either QuickConnect or Routes, and will reside only in that context. But you can switch a config between the two contexts, or you can create an identical config on the opposite side.
- All Destinations are available to fully configure.
- Everything you configure in QuickConnect exists separately from everything you configure in Data Routes. (But remember that you can use the Routing menu to toggle between contexts, and then replicate a QuickConnect configuration on the Data Routes side, or vice versa.)
Using QuickConnect
QuickConnect is designed to be nearly self-documenting, with Introduction help text available at the top of the UI. Here’s a little extra help on help, keyed to the orange, numbered callouts in the screenshot below:

- Use the Show introduction check box at the upper right to toggle the help text on and off.
- Use the dashed buttons to advance or rewind the help text’s carousel (whose position is independent of your connection state).
Enabling Sources and Destinations
When you click to add Sources and Destinations, their configuration options will open in a drawer. Fill in a unique Input ID, and any other required fields marked by an asterisk (*). Then click Save.
Switching Contexts
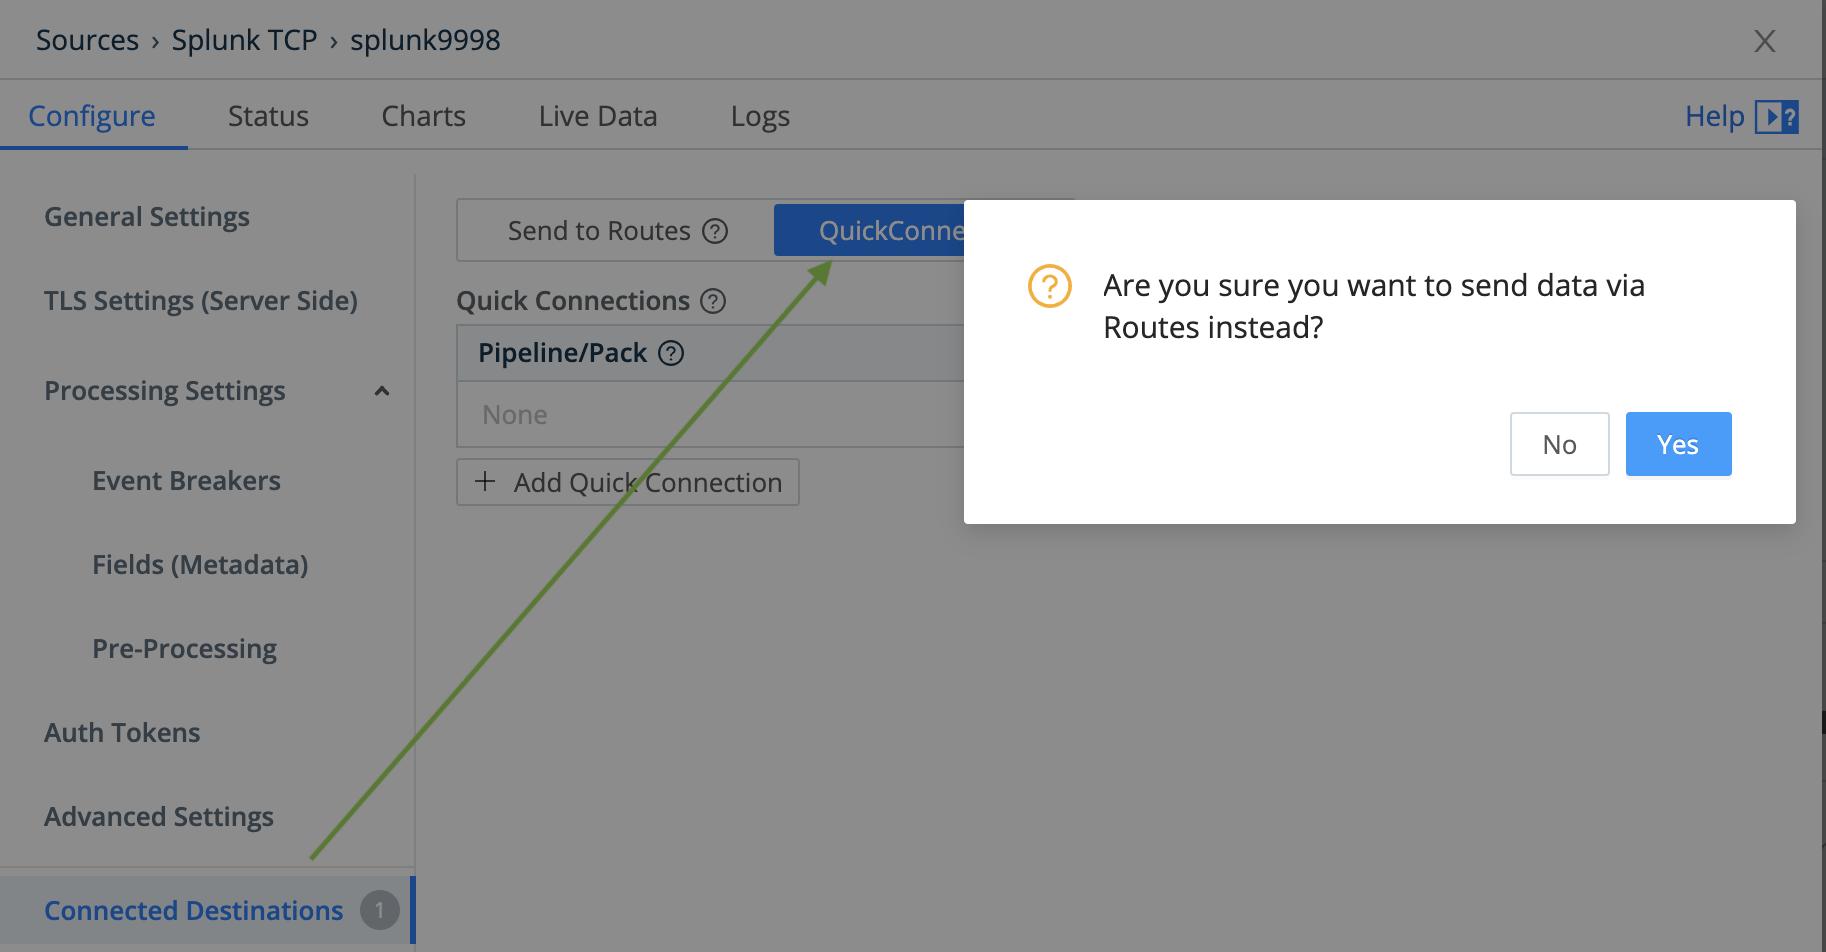
If you switch an existing Source to QuickConnect - for example, one of the preconfigured Sources that ship with Cribl Stream - you’ll see the dialog shown below. This is due to QuickConnect’s independence from the Routes interface - you need to confirm your choice to move the existing configuration from the Data Routes world to the QuickConnect world.
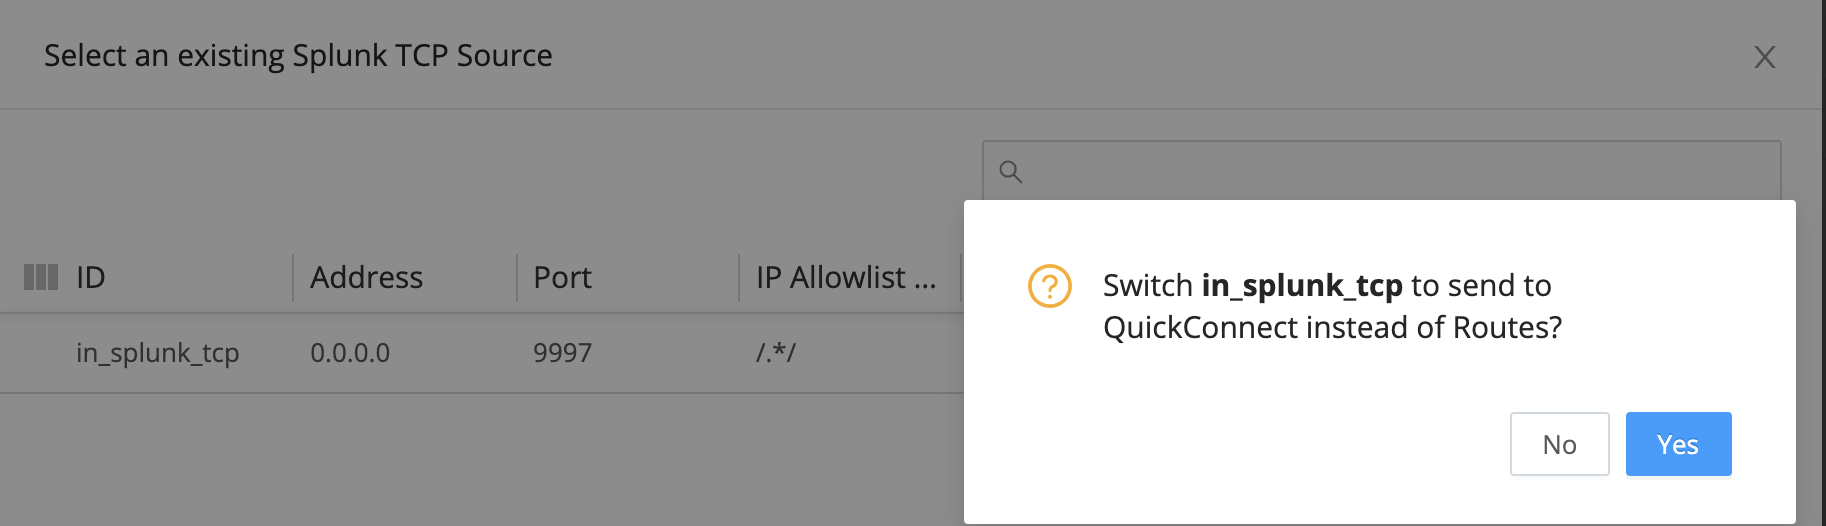
If you switch an existing Source config to QuickConnect, its data will no longer flow through its configured Route.
You can also go the opposite way: move a Source originally configured in QuickConnect to the Routing interface. In the Source’s drawer or config modal, select the Connected Destinations left tab, and then click the resulting tab’s Send to Routes button. Here again, you’ll need to confirm your choice before proceeding.
Selecting a Pipeline or Pack
When you add or modify a connection line, the Connection Configuration modal will prompt you to select a Passthru, Pipeline, or Pack connection. Selecting either Pipeline or Pack will open an Add… modal like this:
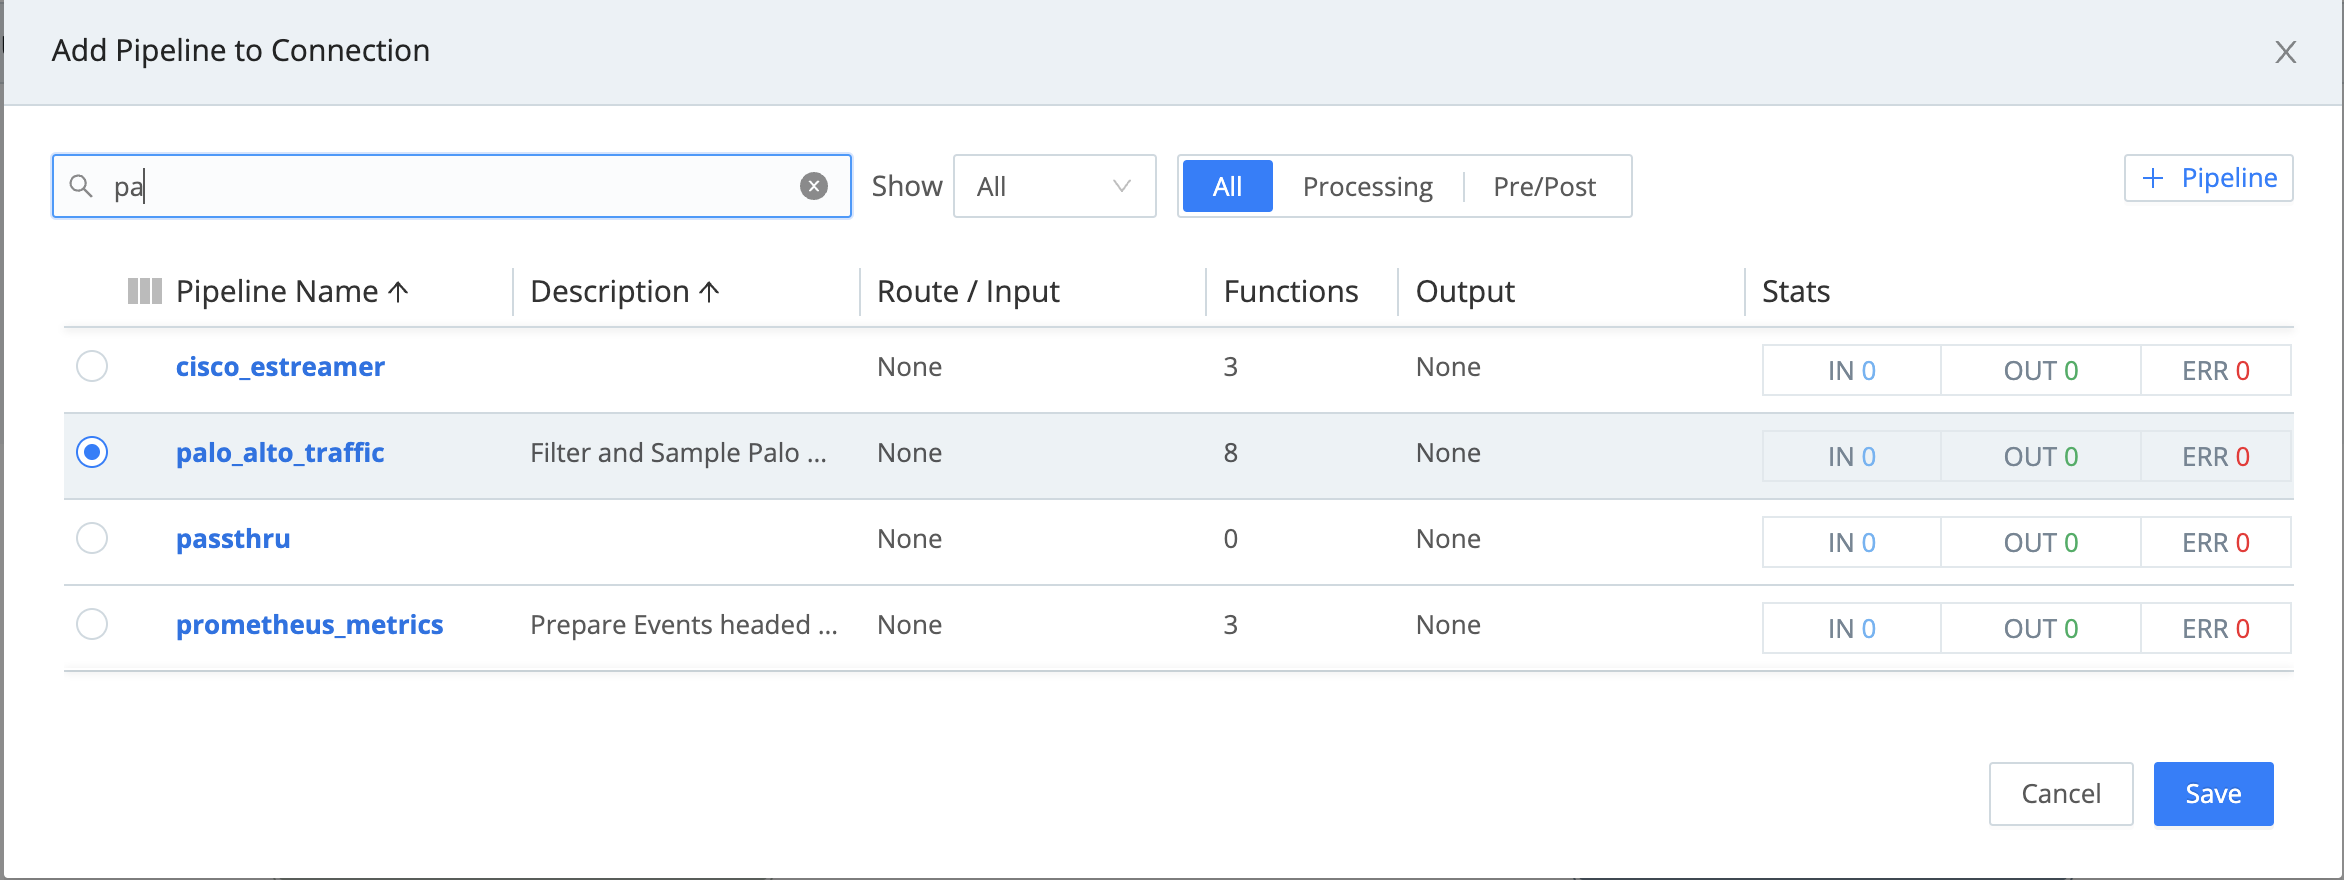
Here, you’re using the radio buttons at left to select among already-configured Pipelines or Packs. Resist the temptation to click on a bold blue Pipeline or Pack name. (Doing so will open the Pipeline’s or Pack’s config in a new modal, which might offer more configuration than you bargained for.)
Instead, click the radio button to the left of the Pipeline or Pack you want to select. (Or click on some black text around the center of your desired Pipeline’s/Pack’s row, which will fill in its radio button.) Then click Save to confirm your choice and close the modal.
If you’ve attached Tags to your Pipelines or Packs, you can use the filter field to search against them. Use the format: TAGS/tag_name.
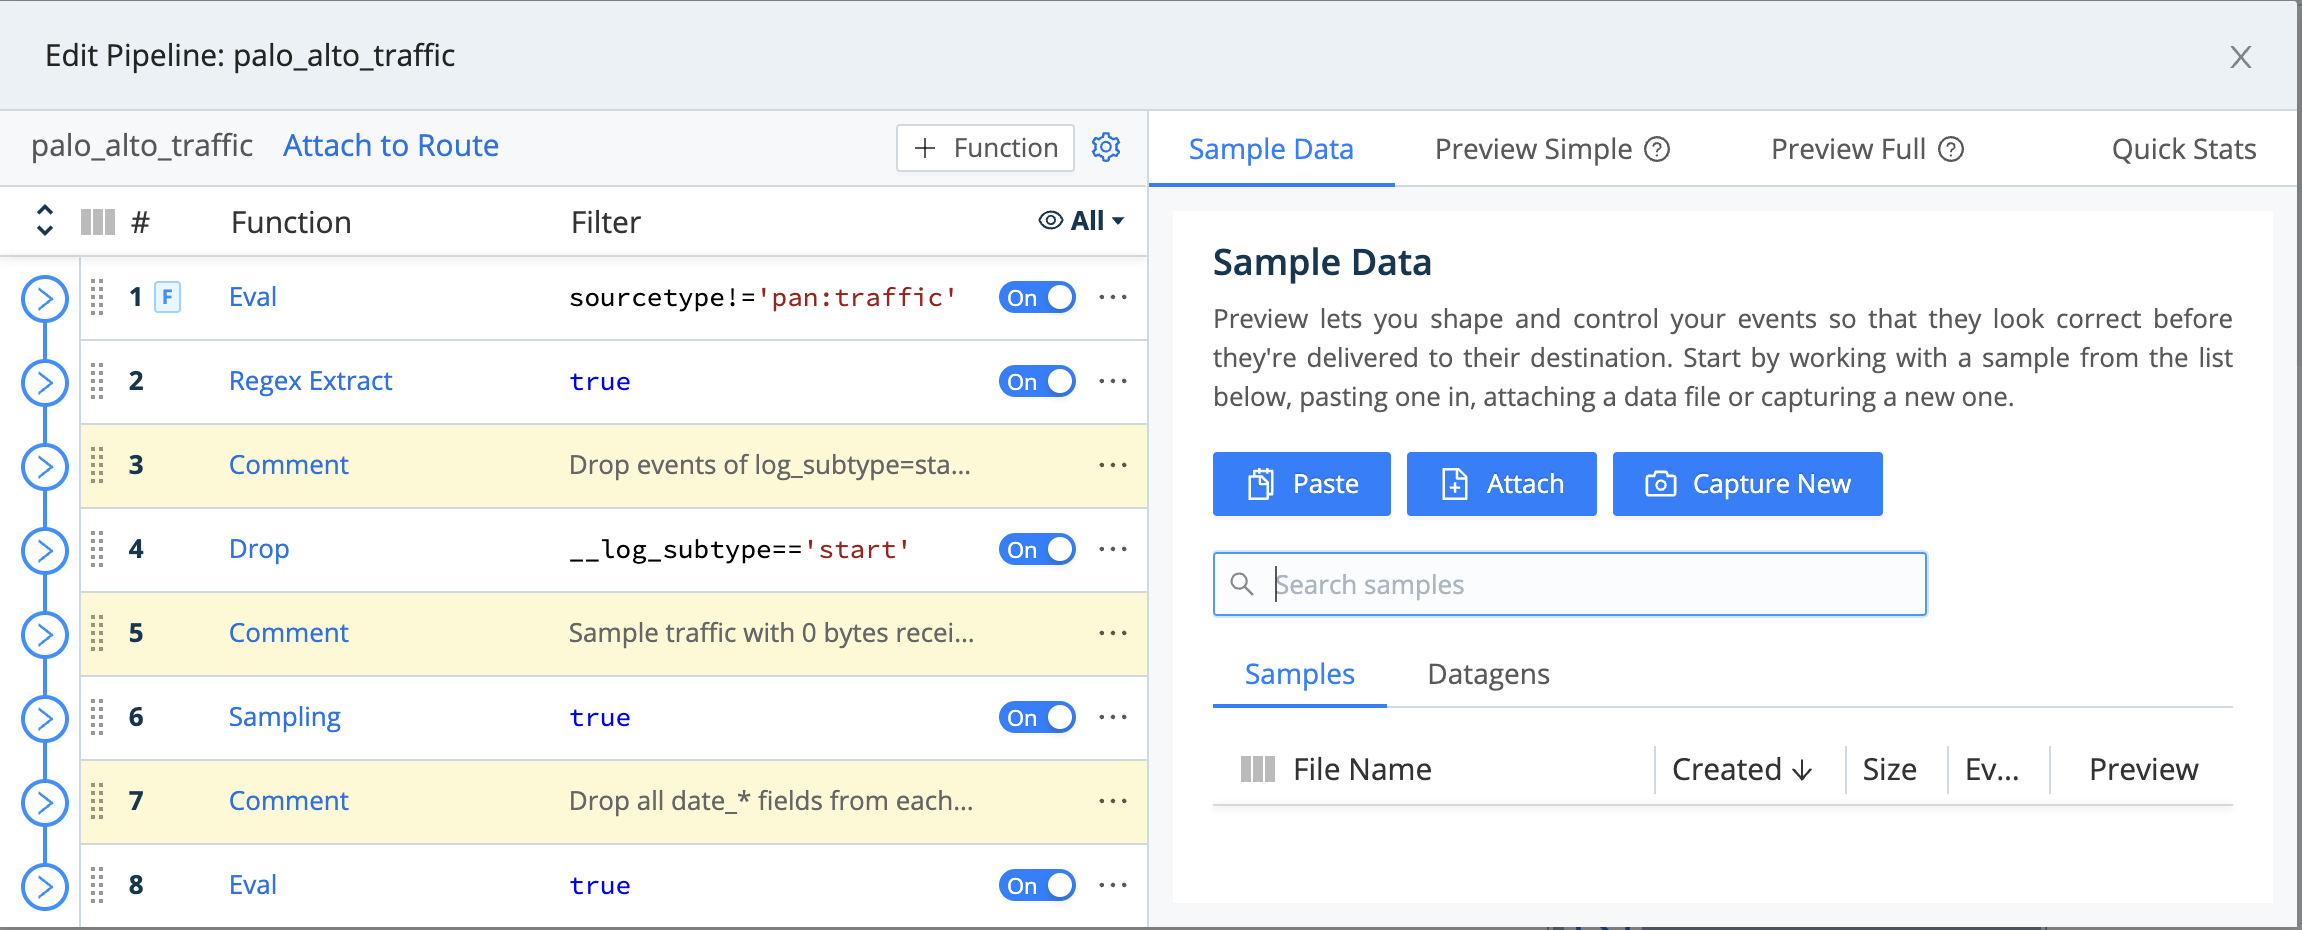
Editing a Pipeline
If you want to modify a Pipeline, this is where you do want to click its blue link in the Add Pipeline to Connection modal. For the options available here, see Pipelines.
Multiple Connections
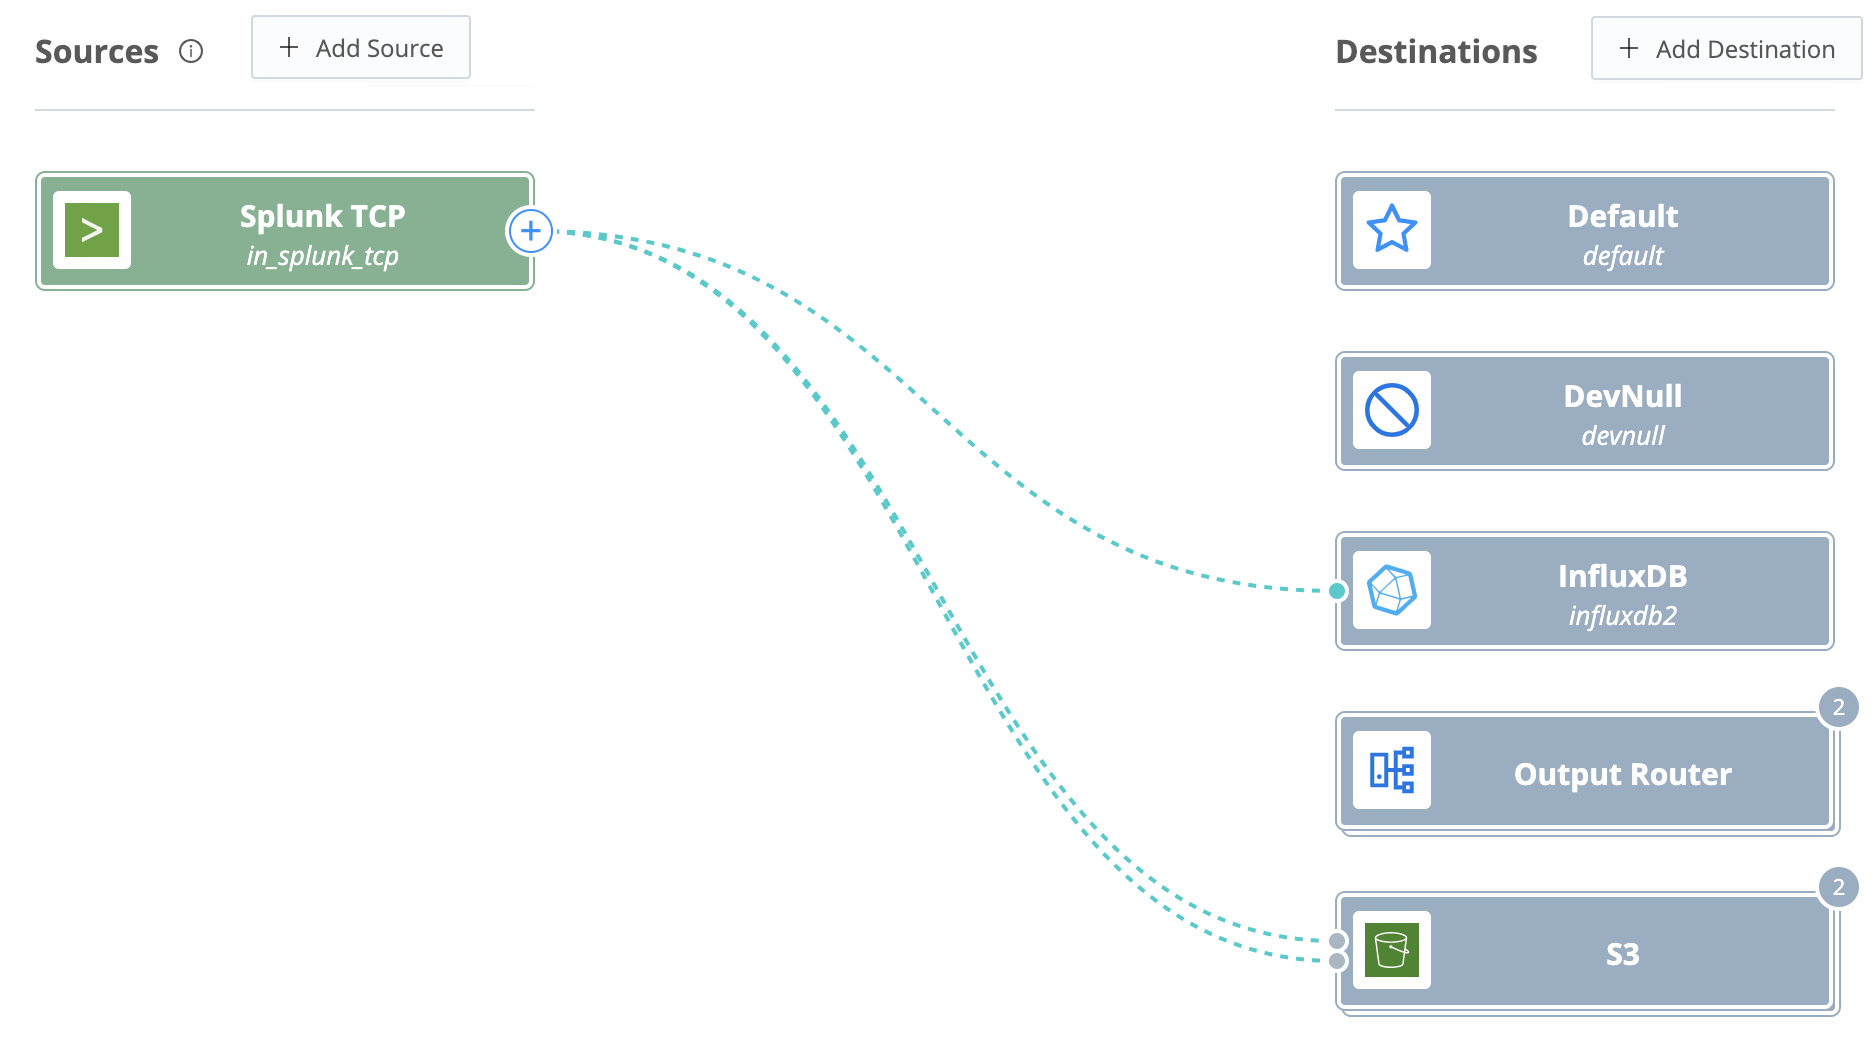
You can drag multiple connection lines between a given Source/Destination pair. (You might do this, for example, to configure parallel Pipelines to handle different data types.)
Also, you can connect one Source to multiple Destinations, or multiple Sources to one Destination. Let’s isolate examples of both, from the screen capture we started with:
Source/Destination Tiles’ Hover Options
Once you’ve configured a Source or Destination, hovering over its tile will display options like these:
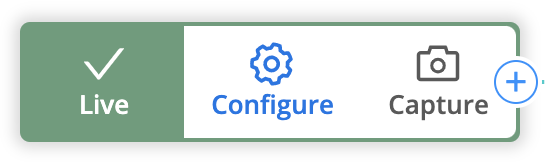
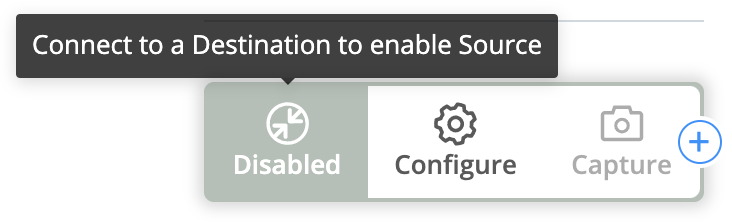
The leftmost button is an indicator of the Source’s/Destination’s state. Live means healthy; disabled, error, or warning states will also appear here. Note that a Source will appear as Disabled until you connect it to a Destination.
Clicking the middle Configure button reopens the Source’s Destination’s configuration drawer, where you can address any problems or simply update the configuration.
The right Capture button captures a sample of data flowing through the Source or Destination, in a drawered version of the Source’s/Destinations’s config modal > Live tab. (Not to be confused with a healthy tile’s left Live indicator.)
Group Connections
Once you’ve configured two or more copies of the same Source or Destination type - for example, to support different configurations of one integration or protocol - QuickConnect stacks their tiles together to keep the display clean.
The number at the stack’s upper right shows how many tiles it contains.
Hovering over a stack doesn’t change its options…until you click on it. This will expand all the tiles in the group, so each tile can now reveal the on-hover options described above.
You can drag multiple connection lines from, or to, the same stack. If you drag or modify a connection from or to a stacked group, the UI will prompt you whether to similarly expand the group to access individual tiles.