These docs are for Cribl Stream 4.10 and are no longer actively maintained.
See the latest version (4.16).
SSO on Cribl.Cloud
With a Cribl.Cloud account on certain plan/license tiers, you can use an identity provider (IDP) to set up Single Sign-On (SSO) for your Cribl.Cloud portal.
The general steps to set up an integration between your IDP and your Cribl.Cloud deployment are:
- In your IDP, configure user groups that map to Cribl.Cloud’s Teams or to predefined Roles.
- Set up fallback access.
- In your IDP, create an application.
- Submit your app’s configuration details to Cribl.
- Verify your connection.
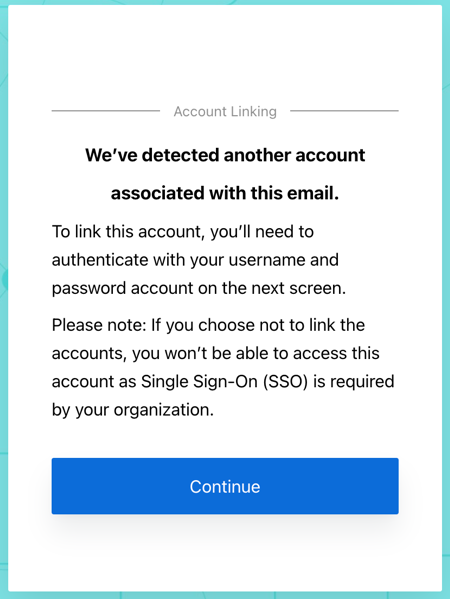
- Link existing Cribl.Cloud users.
The details of specific steps can differ depending on the IDP that you are using.
The following guides show how to configure SSO with different IDPs:
If you encounter issues when setting up SSO integration, refer to SSO Troubleshooting.
Limitations
Cribl offers an SP-initiated (Cribl-initiated) flow, but does not support an IDP-initiated SSO flow. As an alternative, you can allow users to initiate login from your IDP instance by creating a chiclet. Follow the guides for Okta/SAML, Okta/OIDC, or Entra ID/SAML to create a chiclet.
Set Up Fallback Access
Before you start configuring SSO, set up fallback access, so you are not locked out if issues with SSO occur. There are two ways to do this:
Create a Fallback User
In your Cribl.Cloud Organization, ensure that at least one Owner creates a local account, using an email domain that’s separate from the corporate domain on which you’re configuring SSO.
Once you have confirmed your SSO integration is working, you can remove the fallback user.
If you do so, do not disable the SSO integration without first re-creating the non-SSO user. Otherwise, you may get locked out of your Organization.
Bypass SSO with Multiple Organizations
If you have SSO configured and you want to sign up for an additional Cribl.Cloud Organization, you need to bypass SSO. Otherwise, you will be forced to log into your existing Organization, because SSO does Home Realm Discovery and recognizes your email address.
In that case, edit your login URL and delete the word identifier. For example:
- Original URL:
https://login.cribl.cloud/u/login/identifier?state=<long_string_of_characters> - Edited URL:
https://login.cribl.cloud/u/login/?state=<long_string_of_characters>
When you use this URL, instead of forcing you through SSO, Cribl.Cloud will ask for a username and password.
If the account you are trying to log in as has a bad state of permissions, the method above may not work. In that case, try to resolve the permission issue using a fallback Owner. See Create a Fallback User for more information.
Create an Application
In the IDP you are using, create a new application.
Where relevant, select the application type, such as SAML or OIDC
(for example, in Okta you would select SAML 2.0 as the Sign-in method,
and in PingOne, you would choose application type: SAML application).
In Cribl Stream, locate the URLs for your Cribl.Cloud deployment:
- On the top bar, select Products, and then select Cribl.
- In the sidebar, select Organization, then SSO Management.
- Above Web Application Settings, select OIDC or SAML and look for the required URLs below:
- Sign-in URIs:
https://login.cribl.cloud/login/callbackis used for the connection.https://manage.cribl.cloud/<organizationID>/organization/ssois used during setup to test the connection.
- Sign-out URIs:
https://login.cribl.cloud/v2/logout
- Sign-in URIs:
https://login.cribl.cloud/login/callback?connection=<organization-id>is used for the connection.https://manage.cribl.cloud/api/assertis used during setup to test the connection.
- Audience URI:
urn:auth0:cribl-cloud:<organization-id>
Provide the required redirect URIs to your IDP. The exact name and location of the configuration to fill in will depend on your IDP (for example, in Entra ID, you would use Audience URI to fill in Identifier (Entity ID)).
If you are creating a SAML application, in your IDP, configure the following attribute claims:
Claim Name Value emailuser.emailgiven_nameuser.firstNamefamily_nameuser.lastNameNext, in the SAML app configure Group Attribute Statements to include groups. The filter depends on the type of groups you are using.
If you are using static groups, use
Cribl.*as the filter.If you are using dynamic groups with Teams, you can use
.*as the filter.In this case, we strongly recommend using a more specific regex that will match only the necessary groups.
If creating an OIDC application, you must use backchannel authentication. Cribl.Cloud does not support front-channel authentication via OIDC.
Submit App Information to Cribl
Next, provide Cribl with essential details about your application to implement the SSO setup on the Cribl side.
In Web Application Settings, fill in the Cribl Cloud SSO Settings section with the following details from your IDP client configuration:
- Client ID
- Client Secret
- Issuer URL
- IDP Login/Logout URL
- IDP issuer
- X.509 certificate (base64-encoded)
Verify that SSO Connection Is Working
You can now test whether your SSO connection is configured correctly. Navigate to Cribl Cloud SSO settings and select Test Connection.
You will see an error message when the test encounters a configuration error.
Link Existing Users
If your Cribl.Cloud Organization has existing users who have been using a username and password to log in, upon first login with SSO, these users will see a prompt to link their identities. They should accept this prompt to ensure that their existing profile is linked with their SSO profile.


