


These docs are for Cribl Stream 4.2 and are no longer actively maintained.
See the latest version (4.17).
SSO with Okta and SAML
Cribl Stream supports SSO/SAML user authentication (login/password) and authorization (user’s group membership, which you can map to Cribl Roles). Using SAML will change the default Log in button on the login page to a button labeled Log in with SAML 2.0 which redirects to the configured Identity Provider (IDP).
If you are a Cribl Stream admin and want to offer single sign-on (SSO) to your users, you can choose SAML 2.0 as the authentication type, then configure an IDP to use SAML within its single sign-on flow. Once configuration is complete (several steps later), the Cribl Stream login page will send users to the IDP’s login UI. Besides the IDP, some settings will refer to the Service Provider (SP), which in this context is your Cribl Stream instance.
The IDP can be Okta or Google, among others. Configuring SSO requires going back and forth between Cribl Stream and the IDP’s UI. In this page, we walk through the process for configuring SSO with SAML, using Okta as the IDP.
The last part of the walkthrough is a complete description of the Cribl Stream Authentication settings (with SAML 2.0 selected as the authentication method). Skip directly to this section if you just need a UI reference, or if your IDP is not Okta. For non-Okta deployments, please join us on Cribl’s Community Slack at https://cribl-community.slack.com/ and share your questions.
Make sure you don’t get locked out of Cribl Stream! Enable the Allow login as Local User toggle until you’re certain that external auth is working as intended. If you do get locked out, refer to Manual Password Replacement for the remedy.
SSO with SAML is supported only in Cribl Stream versions 4.1.0 and later.
Like other external auth methods, SAML requires either an Enterprise or a Standard license. It is not supported with a Free license.
Plan Your Mapping of Okta Groups to Cribl Stream Roles
In Okta, admins organize their users in groups. In Cribl Stream, there are no user groups, but there are Roles. Your task includes mapping Okta groups to Cribl Stream Roles.
- Mapping groups to Roles is possible only for Cribl Stream deployments that are in Distributed mode, with an Enterprise license applied.
- If you are running Cribl Stream in Single-instance mode, you cannot map Okta groups to Cribl Stream Roles, although you can still set up SSO with Okta.
As you think through how best to map your Okta groups to Cribl Stream Roles, keep these principles in mind:
An Okta group can map to more than one Cribl Stream Role.
A Cribl Stream Role can map to more than one Okta group.
If a user has multiple Roles, Cribl Stream applies the union of the most permissive levels of access.
Cribl Stream automatically assigns the
defaultRole to any user who has no mapped Roles.
The example below illustrates how multiple mappings work: The groups in Mapping b and c each map to multiple Roles, while both the reader_all and editor_cloud Roles map to multiple groups.
| Mapping | Okta Group | Cribl Stream Role(s) |
|---|---|---|
| a | Cribl Admins | admin |
| b | Cloud Admins | reader_all, editor_cloud |
| c | Security Team | reader_all, editor_cloud, editor_firewall |
Cribl Stream Roles and role mapping are supported only with an Enterprise license. With a Standard license, all your external users will be imported to Cribl Stream in the admin role.
Begin Configuring SAML Auth in Cribl Stream
Navigate to Settings > [Global Settings >] Access Management > Authentication > Type and select SAML 2.0.
In the Audience (SP entity ID) field, enter the base URL of your Cribl Stream instance, for example, https://yourDomain.com:9000. Do not append a trailing slash.
For distributed environments with a second Leader configured, modify the Audience field to point to the load balancer instead of the Leader Node.
This will populate three more fields:
- Sign-on callback URL
- Logout callback URL
- Metadata URL
Note the values of all four fields for use in the next section.
If you want the requests that Cribl Stream sends to the IDP to be signed, select or create a Request certificate.
- Note the public key for the certificate that you select or create, for use in the next section.
Integrate Okta with Cribl Stream
In this section, we’ll create an Okta app that uses SAML and integrates with Cribl Stream.
Configure General Settings (Part 1)
Log in to your Okta tenant admin console.
In the left nav, select Applications > Applications to open the Part 1, General Settings page.
Click Create App Integration.
- For Sign-in method, select
SAML 2.0.
- For Sign-in method, select
Click Next to open the Create SAML Integration page.
- In the App name field, enter Cribl Stream.
- (Optional) In the Logo field, upload the Cribl logo. You can use a logo from the Cribl Media Kit.
- (Optional) If you wish to keep your SAML app hidden, check the App visibility check box.
Configure SAML (Part 2)
Click Next to open the Configure SAML > part A, SAML Settings page. Configure these settings as follows:
Single sign-on URL: Enter the Cribl Stream Sign-on callback URL.
Audience URI (SP Entity ID): Enter the Cribl Stream Audience (SP entity ID).
Default RelayState: Leave blank.
Name ID format: Leave as
Unspecified(the default).Application username: Specify a username; can be a plain username, an email, or a custom username. In the SAML assertion’s
subjectstatement, this is the value forNameID. By default, Cribl Stream will use this value as the username in Stream. Alternatively, you can set a custom attribute statement in Okta (as described in Step 2 below), then set the Username field in Cribl Stream to use that instead.Update application username on: Leave as is (
Create and update).(Optional) Click Show Advanced Settings if you want to configure Single Logout, SAML response encryption, etc., as described below.

(Optional) Define custom Attribute Statements that Okta will insert in the SAML Assertions shared with Cribl Stream. The only use case that Cribl Stream supports for this setting is creating a custom Application username, as described in the previous step.
(Optional) Configure Group Attribute Statements. Similar to the previous step, except that here, Cribl Stream supports creating a custom attribute whose value is one or more Okta groups that will populate Cribl Stream’s Group name field.
In Part B, if you want to see your SAML assertion in XML form, click Preview the SAML assertion generated from the information above.

Copy Your App’s Metadata to Cribl Stream (Part 3)
Click Next to open the Feedback page, whose fields are self-explanatory, and click Finish. Okta takes you to the Sign On tab for your newly-created application.
Under SAML Setup in the right margin, click View SAML setup instructions to open the How to Configure SAML 2.0 … page.
Copy each value below to its corresponding field in Cribl Stream. Values that you did not configure above will not appear on the page.
SAML App Value Cribl Stream Field Identity Provider Single Sign-On URL Single sign-on (SSO) URL Identity Provider Single Logout URL Single logout (SLO) URL Identity Provider Issuer Issuer (IDP entity ID) X.509 Certificate Response validation certificate
Ignore the Provide the following IDP metadata to your SP provider text box. Cribl Stream does not support ingesting metadata in this form.
Advanced Settings
The Configure SAML > part A, SAML Settings page offers these Advanced Settings:
Response: This is the SAML response object; it contains an Assertion sub-field. Leave this setting as Signed (the default), because this is the only alternative that Cribl Stream supports.
Assertion Signature: This applies to the Assertion sub-field within the SAML response object. Defaults to Signed, but that has no practical effect because Cribl Stream assumes that the whole SAML response object is signed anyway.
Signature Algorithm Select your preferred algorithm for signing the response that the IDP sends to Cribl Stream.
Digest Algorithm: Select your preferred hashing algorithm for the response that the IDP sends to Cribl Stream.
Assertion Encryption: Choose Encrypted if you want the IDP to encrypt the response that it sends to Cribl Stream. Setting this to Encrypted displays the following three additional options:
- Encryption Algorithm: Select your preferred algorithm for encrypting the SAML response.
- Key Transport Algorithm: Select your preferred algorithm for encrypting the encryption key itself.
- Encryption Certificate: Upload the public key of the Cribl Stream Response decryption certificate you selected or created in Cribl Stream.
Signature Certificate: Upload the public key of the Cribl Stream Request certificate you selected or created in Cribl Stream.
Enable Single Logout: Check the checkbox if you want Cribl Stream to send a logout request to Okta upon logout of the Cribl Stream user. Doing this displays the following two additional options that use values from earlier in these instructions:
- Single Logout URL: Enter the value that Cribl Stream provided for Logout callback URL.
- SP Issuer: Enter the URL that you entered for the Audience setting in the Cribl Stream UI.
Signed Requests: Check the checkbox if you want Okta to validate the signatures of SAML requests that come from Cribl Stream.
Other Requestable SSO URLs, Assertion Inline Hook, Authentication context class, and Honor Force Authentication: Ignore these settings (which are not supported by Cribl Stream).
SAML Issuer ID: Enables you to override Okta’s default value for Identity Provider Issuer.

Finish Configuring SAML Auth in Cribl Stream
This section documents the entire Cribl Stream Authentication UI. If you have been working through the procedures from earlier in this page, you will have completed some of the following steps already.
Navigate to Settings > [Global Settings >] Access Management > Authentication. This exposes the following controls.
Audience (SP entity ID): The base URL, for example: https://leader.yourDomain.com:9000 for a distributed environment. For the IDP, this serves as a unique identifier for the SP (for example, your Cribl Stream instance).
For distributed environments with a second Leader configured, modify the Audience field to point to the load balancer instead of the Leader Node.
Once you enter a URL here, Cribl Stream will automatically populate the following three read-only fields. Copy the values for use in your IDP’s UI.
Sign-on callback URL: URL where the SP (Cribl Stream) will consume assertions (that is, will receive SAML authentication responses from the IDP).
Logout callback URL: URL where the SP (Cribl Stream) will receive SAML logout responses from the IDP.
Metadata URL: URL that exposes a description of the SP (Cribl Stream), including endpoints, certificates, and metadata. Typically, you paste this URL into an import metadata from URL or similar field during setup of IDPs that support such an option.
Request certificate: Certificate the SP (Cribl Stream) should use to sign requests. Create a new certificate, or choose one that you imported as described here. Typically pasted into a Signature Certificate, Verification Certificate, or similar field during IDP setup. Required by some but not all IDPs; for example, when SLO is enabled, Okta requires signed requests.
Issuer (IDP entity ID): Unique ID of the IDP. In the IDP’s UI, typically called Identity Provider Issuer, IDP Identifier, or similar.
Single sign-on (SSO) URL: Endpoint to which authentication requests will be sent (that is, the IDP’s single sign-on service). In the IDP’s UI, typically called Login URL, Single Sign-On URL, or similar.
Single logout (SLO) URL: Endpoint to which logout requests will be sent (that is, IDP’s single logout service). Setting this will enable single logout initiated from the SP (Cribl Stream).
Request binding: Type of binding for SAML requests sent to the identity provider’s SSO/SLO services.
Response validation certificate: The certificate that the SP (Cribl Stream) should use to validate signed responses. Provided by the IDP; contains a public key.
If, in Okta, you have set Assertion Encryption to
Encrypted, then, in Cribl Stream you must both specify a certificate in Response decryption certificate below, and, set Order of encrypting and signing toencrypt-then-sign.
Response decryption certificate: Certificate the SP (Cribl Stream) should use to decrypt encrypted responses. Obtain this from the IDP, where it is typically labeled Token Encryption, Encryption Certificate, or similar. Create a new certificate, or choose one that you imported as described here.
Order of encrypting and signing: Specify the order in which the IDP signs and encrypts responses, if you’ve configured it to do that. Requires a Response decryption certificate to be set.
Username field: In the SAML response, the element from which Cribl Stream should extract the user identifier.
Defaults to
NameID, which is an element in theSubjectblock, for example:<saml:Subject> <saml:NameID Format="urn:oasis:names:tc:SAML:1.1:nameid-format:unspecified">idp-user</saml:NameID> <saml:SubjectConfirmation Method="urn:oasis:names:tc:SAML:2.0:cm:bearer"> <saml:SubjectConfirmationData NotOnOrAfter="2014-02-22T01:20:27.956Z" Recipient="http://localhost/ExampleServiceProvider/SAML/AssertionConsumerService.aspx"/> </saml:SubjectConfirmation> </saml:Subject>Alternatively, if you want to set the username via a custom Attribute when configuring the IDP, you can use the
AttributeStatementblock, for example:<AttributeStatement> <Attribute Name="urn:oid:2.5.4.42" FriendlyName="givenName" NameFormat="urn:oasis:names:tc:SAML:2.0:attrname-format:uri"> <AttributeValue>Dave</AttributeValue> </Attribute> </AttributeStatement>When you are using a custom Attribute as in the previous bullet point, the value for Username field must be what’s in the
Namefield of the Attribute - typically an OID-style name (like the example above, where it’surn:oid:2.5.4.42). Do not use theFriendlyName.
Group name field: In the SAML response, the Attribute that specifies the user groups. Defaults to “groups”. In the IDP’s UI, typically labeled Group Attribute Statements or similar.
When configuring the Group Attribute Statements or equivalent in your IDP, view the full Attribute. You should see something like this:
<saml2:AttributeStatement xmlns:saml2="urn:oasis:names:tc:SAML:2.0:assertion"> <saml2:Attribute Name="groups" NameFormat="urn:oasis:names:tc:SAML:2.0:attrname-format:unspecified"> <saml2:AttributeValue xmlns:xs="http://www.w3.org/2001/XMLSchema" xmlns:xsi="http://www.w3.org/2001/XMLSchema-instance" xsi:type="xs:string"> test-admin </saml2:AttributeValue> <saml2:AttributeValue xmlns:xs="http://www.w3.org/2001/XMLSchema" xmlns:xsi="http://www.w3.org/2001/XMLSchema-instance" xsi:type="xs:string"> test-group </saml2:AttributeValue> </saml2:Attribute> </saml2:AttributeStatement>Note the value for the
Attribute Name. In the example above, it’sgroups.Enter that exact value as the Group name field in Cribl Stream.
Allow login as Local User: Toggle to Yes to allow users to log in without SAML (as an alternative, or as a fallback if SAML login fails).
Role Mapping Settings
This section is displayed only on distributed deployments (Edge, Stream) with an Enterprise License. For details on mapping your external identity provider’s configured groups to corresponding Cribl Stream user access Roles, see External Groups and Roles. See also the explanation of role mapping above. The controls here are:
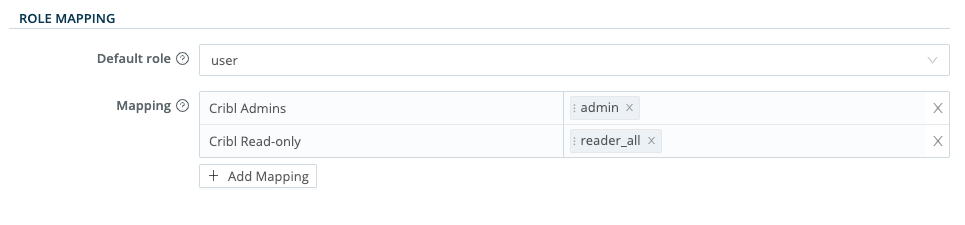
Default role: Default Cribl Stream Role to assign to all groups not explicitly mapped to a Role.
Mapping: Add a mapping for each external user group that you want to map to one or more Cribl roles. Then enter the group and select the role(s).
See also the explanation of role mapping above.
Role Mapping Example
Role mapping UIs will differ from one IDP to another. For this example, we’ll look at Okta’s.
You can assign a Cribl Stream Role to each Okta group name, and you can specify a default Role for users who are not in any groups.
In Cribl Stream, select Settings > Access Management > Authentication.
Scroll down to the ROLE MAPPING section.
Cribl recommends that you set the
defaultRole touser, meaning that this Role will be assigned to users who are not in any groups.Add mappings as needed.
The Okta group names in the left column are case-sensitive, and must match the values returned by Okta (those you saw earlier when configuring Okta and SAML).
Verify that SSO with SAML Is Working
- Log out of Cribl Stream, and verify that SAML is now an option on the login page.
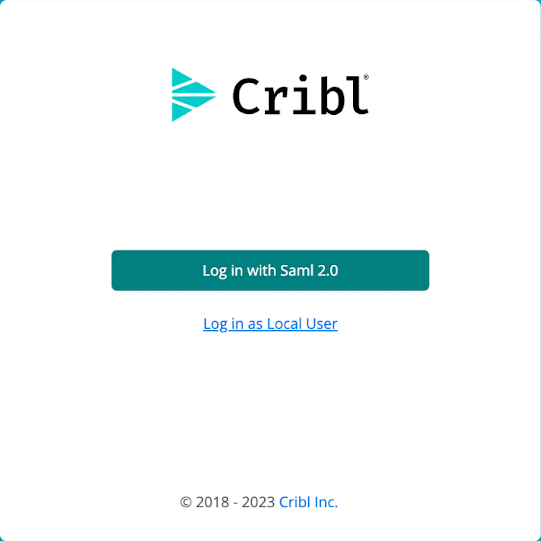
Click Log in with SAML 2.0.
You should be redirected to your IDP to authenticate yourself.
The SSO connect flow should complete the authentication process.
Get Temporary Access Credentials for AWS S3 Buckets
You can use your SSO/SAML IDP to issue temporary access credentials so your on-prem Worker Node can access AWS S3 buckets.
Call the AssumeRoleWithSAML API endpoint. It will return the STS access, secret, and session tokens. These can be written into the ~/.aws/ credentials file, which Cribl Stream will pick up because it uses the native AWS SDK.
You can set up multiple S3 Sources with different credentials. Cribl Stream relies on the AWS SDK for authentication support, and the SDK evaluates credentials in the following order:
- Loaded from AWS Identity and Access Management (IAM) roles for Amazon EC2.
- Loaded from the shared credentials file (~/.aws/credentials).
- Loaded from environment variables.
- Loaded from a JSON file on disk.
- Other credential-provider classes provided by the JavaScript SDK.
To enable the use of multiple Sources, set the S3 Source Authentication method to Auto.
See the AWS SDK documentation and AWS CLI documentation for further information on setting credentials.