


These docs are for Cribl Stream 4.3 and are no longer actively maintained.
See the latest version (4.17).
GitOps
With the GitOps features, you can integrate Cribl Stream configuration management with standard version-control systems and CI/CD flow. Push updates to your remote Cribl Stream via webhook, manually or using automation. This separates development versus production configurations, enabling you to safely build and continuously deploy your Observability Pipelines.
See also our GitOps/GitHub Tutorial and Managing Stream with GitOps Sandbox.
Prerequisites
To use GitOps, you must have a customer-managed (on-prem), distributed Cribl Stream deployment. (Cribl.Cloud does not currently support GitOps).
You’ll need two Leader instances and a Cribl Enterprise license, which can be shared between the two instances. For questions about developer licenses in Dev environments, please contact your Cribl sales team.
You must have access to an external Git management system like GitHub, GitLab, or Bitbucket, or access to a self-hosted Git server.
Cribl recommends that you use private repositories for managing your GitOps environments, so as to prevent leaking of sensitive information.
This page is agnostic about where you host your repos. It provides general concepts, procedures, and reference material. And it includes a setup scenario relying on Basic Auth, which might not be appropriate to your workflow.
To jump straight into a tutorial written around GitHub, with authentication using SSH keys, see GitOps/GitHub Tutorial.
Setup: Best Practices
A Cribl Stream GitOps deployment can start with an existing repository, or you can set up an entirely new repo and start fresh from there.
If you’re already using an existing remote repo for your Cribl Stream deployment, Cribl strongly recommends first cloning a backup of that repo. You’ll be able to use this backup to restore your configuration if it gets overwritten by a misconfigured remote dev branch.
See also our general warning to create any new remote as a completely empty repo, with no README.
Create at least one branch for your production code. You will merge code into this branch and use it to update your production Cribl Stream environment.
Cribl recommends that you also create a separate dev branch for your code. This is where you will sync and work in your development environment. Once changes are validated and tested in dev, you can merge them into production.
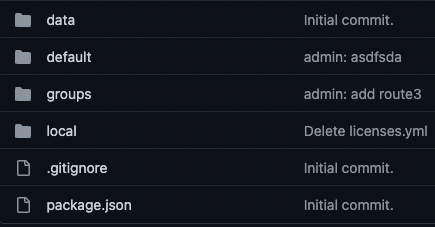
A representative repo would have this basic structure:
Usage Examples
In the example below, we manually ping production Cribl Stream to update, based on a remote master branch, and to deploy the changes. You can set this up via Bearer token (used in the full example below) or via user Role.
Bearer Token
If you have your Bearer token ready, you can use it in a CLI command of this form:
curl -X POST "http://<leader URL or IP>:9000/api/v1/version/sync" -H "accept: application/json" -H "Authorization: Bearer <bearer-token>" -d "ref=master&deploy=true"`Bearer tokens refresh every 60 minutes by default. To extend the lifetime of a token, go to global Settings > Global Settings > System > General Settings > Advanced, and update the Auth-token TTL.
Getting the Bearer Token via UI
If you need to retrieve your Bearer token before applying it, you can access it via Cribl Stream’s UI, as follows:
- From the top nav, select Settings.
- From the resulting left nav, select Global Settings > API Reference.
- Near the API Reference’s top, expand the
GET /auth/groupsendpoint. - Click Try it out.
- Click Execute.
- From the displayed Curl field, copy the generated
curlcommand. - Change the
GETverb toPOST, and execute the resulting command on your command, as shown above.
Getting the Bearer Token via CLI
If you need to retrieve your Bearer token before applying it, you can also access it in the CLI, via a series of commands of the following form. (The final command below replaces the single curl command above.)
On your production environment’s Leader, you’ll need
jq, which you can install using the command:sudo yum install jq -y.
Here, <username> and <password> stand for the credentials of the user getting the token:
mkdir -p ~/.auth

curl http://<Leader-URL-or-IP>:9000/api/v1/auth/login -H 'Content-Type: application/json' -d "{\"username\":\"<username>\",\"password\":\"<password>\"}" 2>/dev/null | jq -r .token > ~/.auth/token

export JWT_AUTH_TOKEN=`cat ~/.auth/token`

export AUTH_HEAD="Authorization:Bearer `cat ~/.auth/token`"

curl -X POST "http://<Leader-URL-or-IP>:9000/api/v1/version/sync" -H "accept: application/json" -H "${AUTH_HEAD}" -d "ref=master&deploy=true"Here’s an example with placeholders filled in. This assumes that the API is running on localhost, and the username and password are each the super-secret admin. Here again, the final command below replaces the single curl command above:
mkdir -p ~/.auth

curl http://localhost:9000/api/v1/auth/login -H 'Content-Type: application/json' -d "{\"username\":\"admin\",\"password\":\"admin\"}" 2>/dev/null | jq -r .token > ~/.auth/token

export JWT_AUTH_TOKEN=`cat ~/.auth/token`

export AUTH_HEAD="Authorization:Bearer `cat ~/.auth/token`"

curl -X POST "http://localhost:9000/api/v1/version/sync" -H "accept: application/json" -H "${AUTH_HEAD}" -d "ref=master&deploy=true"User Role
Alternatively, before putting your environment into GitOps mode, create a new user and give them the gitops Role. This Role’s only permission is to POST to the sync endpoint.
Before you proceed to the next section: Switching to a branch whose remote has not been hydrated with your valid Cribl Stream configuration can delete your local Stream config. This risk exists whether you switch branches using Stream’s UI, or using environment variables. This is why, above, we emphasize first creating backups.
Setup Steps
This example relies on the Bearer token technique presented above.
Start with a production Cribl Stream, synced to an external git repository.
Create a new branch in the repository, called
dev.Rehydrate your dev environment from the
devbranch.On the dev box’s command line, run:
CRIBL_GIT_REMOTE=https:<your_remote_repo> CRIBL_GIT_BRANCH=dev CRIBL_GIT_AUTH=basic CRIBL_GIT_USER=<user> CRIBL_GIT_PASSWORD=<password> bin/cribl startSet your production environment to GitOps mode, using environment variables, as shown here:
CRIBL_GIT_REMOTE=https:<your_remote_repo> CRIBL_GIT_BRANCH=<your prod branch, usually master> CRIBL_GIT_OPS=push CRIBL_GIT_AUTH=basic CRIBL_GIT_USER=<user> CRIBL_GIT_PASSWORD=<password> bin/cribl startYour production branch will now be in read-only mode. You can push changes to production via a webhook called from your versioning system. (See the example using Git actions and our request, above.)
When you make changes in your dev environment, those changes will be synced with your dev repo whenever they are committed and pushed. Your production environment will be updated only when a request is sent to the production API.
Update the dev repo, then use PR and merge capabilities in your version-control system to merge updates into your production branch. (This will follow the workflow outlined in your version-control system of choice.)
Send a request to your production environment to pick up the changes on your production branch:
curl -X POST "http://<leader URL or IP>:9000/api/v1/version/sync" -H "accept: application/json" -H "Authorization: Bearer <bearer token>" -d "ref=<production branch>&deploy=true"Alternatively, you can set up a condition in your versioning tool to automatically update production with an action. In GitHub, that action would look like this:
name: Deploy to Production on: push: tags: - 'v?[0-9]+.[0-9]+.[0-9]+' - 'v?[0-9]+.[0-9]+.[0-9]+-[RT]C[0-9]+' jobs: deployment: runs-on: ubuntu-latest steps: - name: deploy uses: satak/webrequest-action@master with: url: http://54.190.53.106:9000/api/v1/version/sync method: POST payload: '{"ref":"master","deploy":"true"}' headers: '{"Authorization": "Bearer ${{ secrets.BEARER_TOKEN }}"}'- This action will start whenever a new release is created in GitHub, using a tag with the naming convention
v0.0.0orv0.0.0-TC1orv0.0.0-RC1. - This helps control multiple updates to production as part of a single release or deployment. This is useful when you are merging multiple changes to production, and want to push them all at once.
- This action will start whenever a new release is created in GitHub, using a tag with the naming convention
If
deployis set totruein the request to the production Cribl Stream instance, all new configs will be applied, and Cribl Stream Workers will be restarted to pick up the changes.
Advanced Workflows
It’s common for your repository code to get out of sync with your local version. This is especially true when first setting up a GitOps environment, where changes are being made to .gitignore, and to a README or other non-functional files in your repo. If you attempt to push from your development environment to your remote branch and you see this error:

…this means that your remote repo is ahead of your local. You can re-sync them via the following commands:
<cribl_home>/git fetch origin
<cribl_home>/git reset --hard origin/dev
<cribl_home>/bin/cribl restart(Replace <cribl_home> with your Cribl Stream directory path, and dev with whichever branch your environment is tracking.)
This will resync your local branch with the remote. You will lose any local changes, so before running it, stash those changes or make notes of what you will need to re-create after this reset.
Environment Variables Reference
Cribl Stream provides the following environment variables to facilitate GitOps:
Bootstrap Variables
| Name | Purpose |
|---|---|
| CRIBL_GIT_REMOTE | Location of the remote repo to track. Can contain username and password for HTTPS auth. |
| GIT_SSH / GIT_SSH_COMMAND | See Git’s documentation. |
| CRIBL_GIT_BRANCH | Git ref (branch, tag, commit) to track/check out. |
| CRIBL_GIT_AUTH | One of: none, basic, or ssh. |
| CRIBL_GIT_USER | Used for basic auth. |
| CRIBL_GIT_PASSWORD | Used for basic auth. |
| CRIBL_GIT_OPS | One of: push to enable the GitOps push workflow, or none to disable GitOps. |
For other environment variables available in Cribl Stream, see Distributed Deployment.
To capture the name and version of the branch that GitOps is using when deploying Routes, Pipelines, or Packs, use two Eval Functions as follows:
cribl_git_branch_name = C.logStreamEnv
cribl_git_branch_version = C.confVersion
UI Options
Cribl recommends setting up GitOps using environment variables, as demonstrated above, because these are persistent. However, if you later want to undo your CLI settings, the following options are available in the UI’s Settings > Global Settings > System > Git Settings:
Branch drop-down: Select a single branch to track in your remote repo.
GitOps workflow drop-down provides these options for the branch selected above:
- None: Do not automate Cribl Stream’s configuration management. (This switches off GitOps.)
- Push: Sync with remote repo via POST requests to
/api/v1/version/sync endpoint.
Security
You can maintain unique encryption keys, passwords, and tokens per environment, without sharing them across (e.g.) dev vs. prod environments. Do so by setting unique environment variables per environment.
Going Further
Because you have configured separate environments for development versus production, you can create Routes, Functions, or Pipelines that behave differently in these different environments.
For this purpose, you can use the C.env.CRIBL_GIT_BRANCH environment variable. Its value is the name of the Git branch you’re on. For any Destination, C.env.CRIBL_GIT_BRANCH corresponds to the Advanced Settings > Environment setting.
You can also automate GitOps in various ways. E.g., you could automate your production environment’s syncing with a GitHub repo’s prod branch, using GitHub Actions.
Limitations
For current limitations on using this feature, please search our Known Issues topic for “GitOps”.