


These docs are for Cribl Stream 4.3 and are no longer actively maintained.
See the latest version (4.17).
GitOps/GitHub Tutorial
This tutorial shows one of many possible ways to set up Cribl Stream GitOps, relying on a GitHub repo with SSH authentication.
If you are using GitLab, Bitbucket, or a self-hosted Git server, you can adapt the GitHub examples here, or you can rely on our generic GitOps page.
See also our Managing Stream with GitOps Sandbox.
Prerequisites
To use GitOps, you must have:
- A customer-managed (on-prem), distributed Cribl Stream deployment. (Cribl.Cloud does not currently support GitOps).
- Two Leader instances.
- A Cribl Enterprise license, which can be shared between the two Leaders.
- A GitHub account. (You can create one here.)
Setting Up Your Deployment for GitOps
In your distributed Cribl Stream deployment, set up two separate environments: one for Development and one for Production. This way, you can do your work in the Development environment, validate and test your changes there, and then merge the changes into Production. For safety, the Production environment will be read-only.
In both environments:
- On the Leader, install
gitusing the command:sudo yum install git -y - Cribl strongly recommends that you use systemd, as we do throughout this tutorial. (If not using systemd, use environment variables instead of
systemctlcommands.) - Cribl strongly recommends that you use SSH authentication, as we do throughout this tutorial.
In the Production environment:
- On the Leader, install
jqusing the command:sudo yum install jq -y
Creating SSH Public and Private Keys
Starting on the command line:
- Generate public and private SSH keys, specifying Ed25519 as the key type:
ssh-keygen -t ed25519 -C "your_email@example.com" - Validate that the
/root/.ssh/directory contains both of the newly generated keys:- The private key that Cribl Stream will use:
id_ed25519. - The public key that GitHub will use:
id_ed25519.pub.
- The private key that Cribl Stream will use:
- Copy the public SSH key to your clipboard.
Next, sign in to your GitHub account, and on the SSH and GPG keys page, enter the public SSH key:
- Click New SSH key.
- Paste the key in the Key field.
- Click Add SSH key.
Prevent Push and Pull Errors
Before you proceed to the next section: See our general warnings to first locally back up your
$CRIBL_HOMEdirectory, and to create any new remote as a completely empty repo with no README.
Creating a Private GitHub Repo
On your GitHub profile page:
- Click Go to your personal profile.
- On the resulting page, click the Repositories tab.
- Click New to create a new repository.
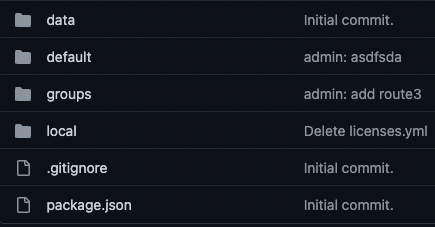
Name the repo cribl, and change its default Public setting to Private. The repo’s default branch will be named main, and we’ll assume that name in this tutorial. (Older repos’ default branch might instead be named master.)
A representative repo would have this basic structure:
Configuring Your Production Leader
You can optionally create a new user with the
gitopsRole. This Role’s only permission is toPOSTto thesyncendpoint. If you choose to do this, the Remote URL that you enter below should include this username.
In Cribl Stream, in the Production Leader’s, select Settings > Global Settings > Git Settings. Then apply the following settings.
General Tab
Leave Branch set to main (the only branch created thus far), and GitOps Workflow set to None.
Remote Tab
- In Remote URL, enter the URL for your private Git repo, e.g.:
git@github.com:<your_Git_username>/cribl.git. - From the Authentication type drop-down, select
SSH. - In SSH private key, copy and paste the private key (
/root/.ssh/id_ed25519). - Toggle SSH strict host key checking to
No.
Click Save, then Commit and Git Push. You should now see your commit in the main branch of your private GitHub repo.
In a terminal on the Production Leader, run as root:
sudo su -Add systemctl overrides to set environment variables that will make the Production Leader read-only on startup, and set the branch to prod:
- Use
systemctlto open thecribl.servicefile in an editor:
systemctl edit cribl.service - When prompted, add the following overrides:
    [Service]
    Environment=CRIBL_GIT_OPS=push
Environment=CRIBL_GIT_BRANCH=prod- Restart:
systemctl daemon-reload && systemctl restart criblOnce the system has restarted, the
CRIBL_GIT_OPS=pushoverride will be in effect, meaning that your Production environment will be in read-only mode.
Setting Up the GitHub Branches
In your GitHub repo:
- Click the branches tab (if there’s only a
mainbranch in your repo, the tab will be labeled 1 branch).

- On the
mainbranch’s row, click the pencil button at far right. - Rename
maintoprod. - From the branches drop-down (which should now say
prod), create a new branch nameddev.
Before you proceed to the next section: Switching to a branch whose remote has not been hydrated with your valid Cribl Stream configuration can delete your local Stream config. This risk exists whether you switch branches using Stream’s UI, or using environment variables. This is why, above, we emphasize first creating backups.
Pointing Your Development Leader to Its Branch
On Cribl Stream’s Development Leader, select Settings > Global Settings > Git Settings. Then apply the following settings.
Remote Tab
- In Remote URL, enter the URL for your private Git repo, e.g.:
git@github.com:<your_Git_username>/cribl.git. - From the Authentication type drop-down, select
SSH. - In SSH private key, copy and paste the private key (
/root/.ssh/id_ed25519). - Toggle SSH strict host key checking to
No. - Click Save.
In Cribl Stream 4.1 and later, Cribl encrypts TLS certificates in configuration files for enhanced security. If you upgrade to v.4.1.0 or later and add new private keys, you won’t be able to downgrade to previous versions unless you back up your existing unencrypted keys.
General Tab
- Set Branch to
dev. - Set GitOps Workflow to
None.
Click Save, then restart the Development Leader, which will now be able to write to GitHub.
Working in the Development Environment
Your goal is to make changes in the Development environment, and later propagate them to Production. To demonstrate this, try adding a Route, as a minimal unit of work.
On Cribl Stream’s Development Leader, navigate to Routing > Data Routes.
Click Add Route.
Configure the new Route as follows:
Name Filter Pipeline/Output test-gitopstruedevnull:devnullClick Commit/Deploy.
Click Commit and Git Push.
This will send the configurations to your dev branch on GitHub.
Merging Changes from dev to prod
On your GitHub dev branch, you should see the new route.yml appearing within a subdirectory of the local directory.
- Click Compare & pull request. Be sure that the
comparedrop-down saysdev, and thebasedrop-down saysprod:

dev to prod- Add some comments.
- Click Create pull request. The UI should propose to
merge 1 commit into prod from dev. - Assuming that GitHub does not detect any conflicts, click Merge pull request, then Confirm merge.
If the merge is successful, GitHub will display a confirmation message. You should now see the new route.yml in both the dev and prod branches.
Syncing Your Production Leader to GitHub
Now, to make your Production environment pick up the changes from the prod branch, you’ll send an HTTP request from the Production Leader to the Cribl API.
Adapt the following request, substituting your Production Leader’s IP address and admin password for the placeholders.
    curl -X POST "http://<Production_Leader_IP>:9000/api/v1/version/sync" \
    -H "accept: application/json" \
    -H "Authorization: Bearer $(curl http://<Production_Leader_IP>:9000/api/v1/auth/login \
    -H 'Content-Type: application/json' \
    -d "{\"username\":\"admin\",\"password\":\"<Production_Leader_password>\"}" 2>/dev/null | jq -r .token)" \
-d "ref=prod&deploy=true"Nested within the request to
/version/syncis another request to/auth/login. The nested request obtains the Bearer token required by the parent request. For more about Bearer tokens, see this section.
You should now see the changes you made in your Development environment (in this example, the new Route) in the Production environment, too.
There’s much more you can do with GitOps. To learn about C.env.CRIBL_GIT_BRANCH and GitHub Actions, see Going Further.