These docs are for Cribl Stream 4.7 and are no longer actively maintained.
See the latest version (4.17).
Using Datagens
Data generators for testing and troubleshooting
Cribl Stream’s datagens feature enables you to generate sample data for the purposes of troubleshooting Routes, Pipelines, Functions, and general connectivity.
Several datagen template files ship with the product, out of the box. You can create others from sample files or live captures.
As outlined in the following tutorial: Once you’ve created a template, you can configure a Datagen Source to use the template to generate real-time data at a given EPS (events per second) rate.
Enabling a Datagen
To see how datagens work, start by enabling a pair of Cribl Stream’s out-of-the-box generators:
Navigate to Sources > Datagens and click New Destination.
Select a Data Generator File (e.g., apache_common.log) and set it at 4 EPS/worker process. Select another Data Generator File (e.g., syslog.log) and set it at 8 EPS/worker process. Hit Save.
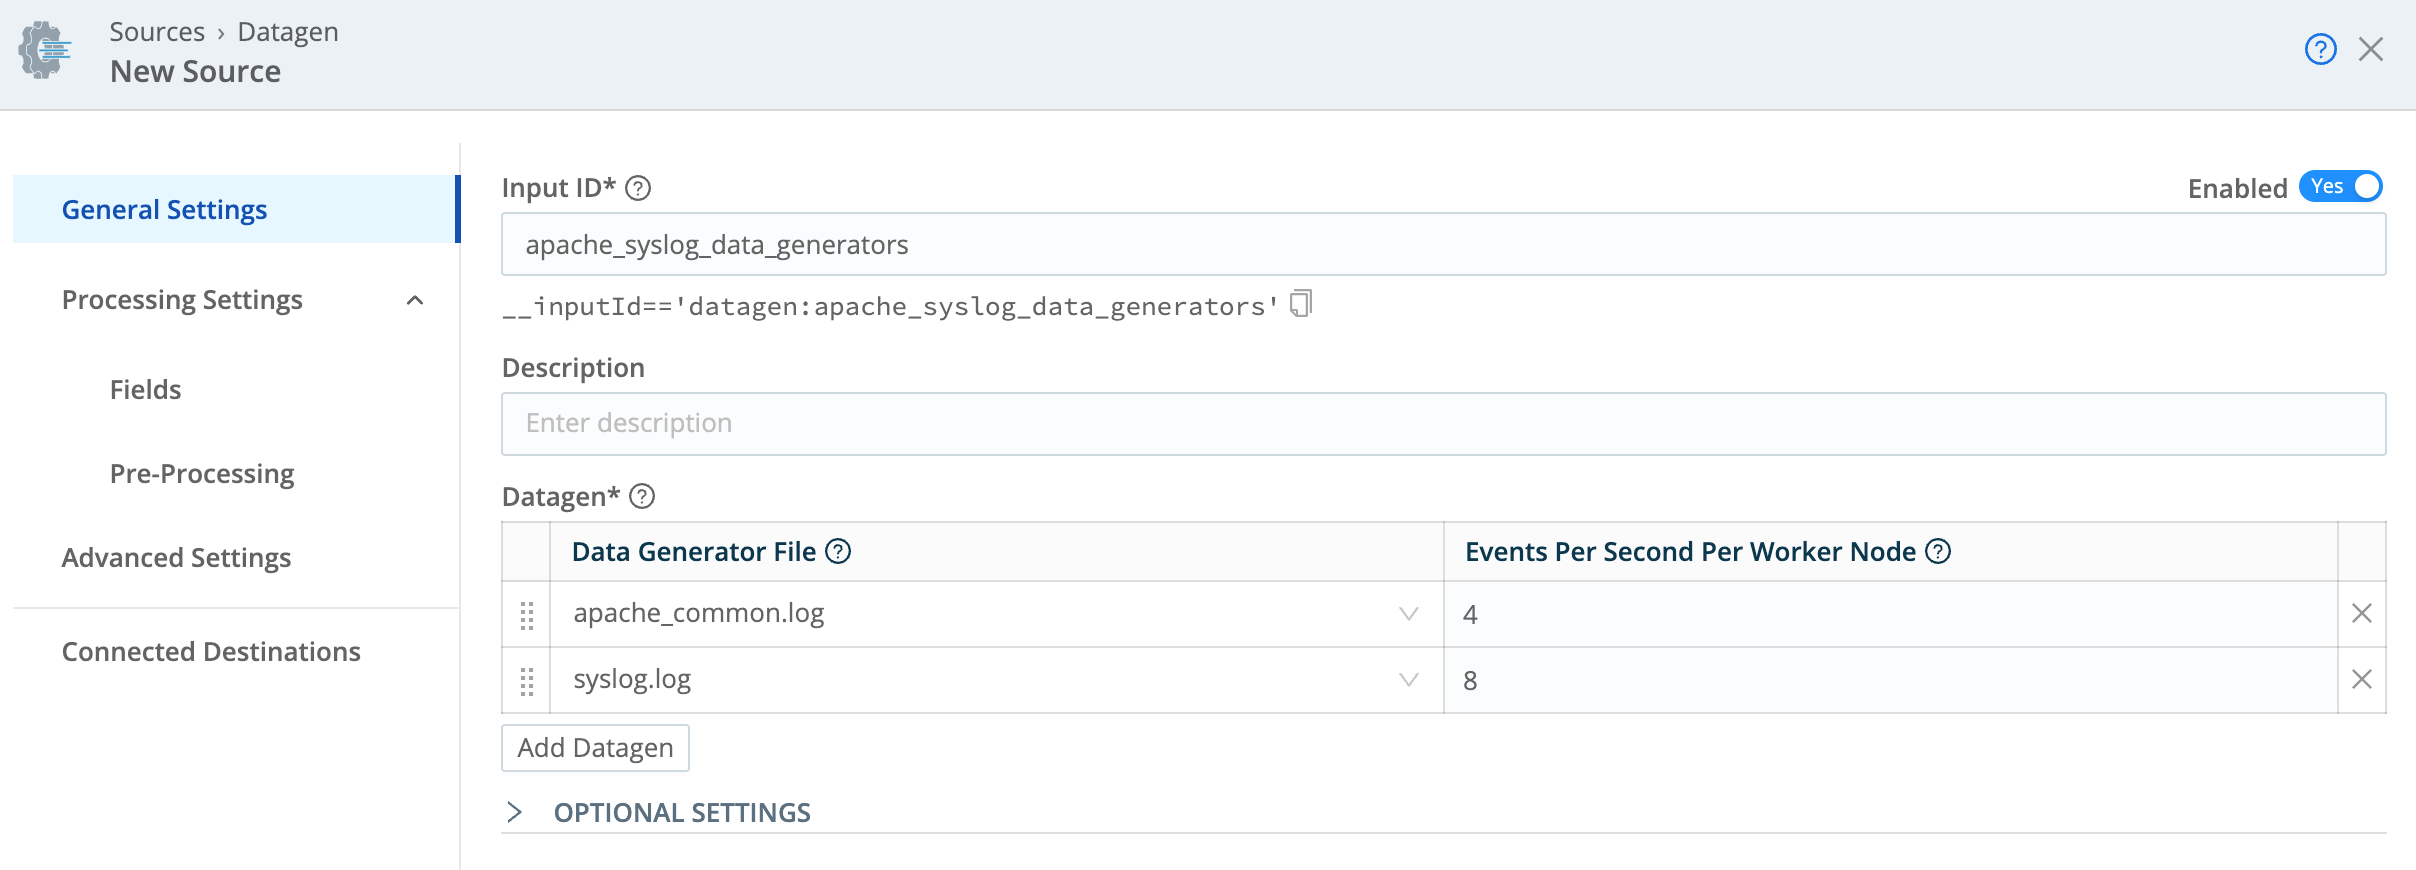
On the Monitoring page, under Sources, search for datagen and confirm that the Source is generating data.

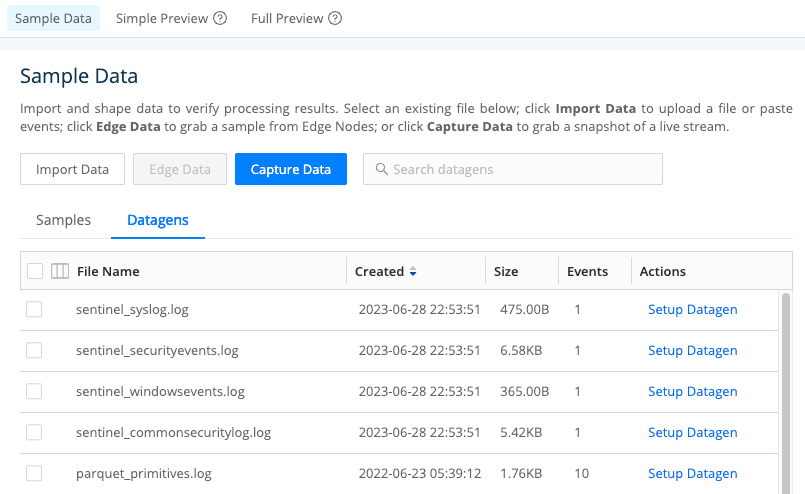
Creating a Datagen Template from a Sample File
To convert a sample into a template:
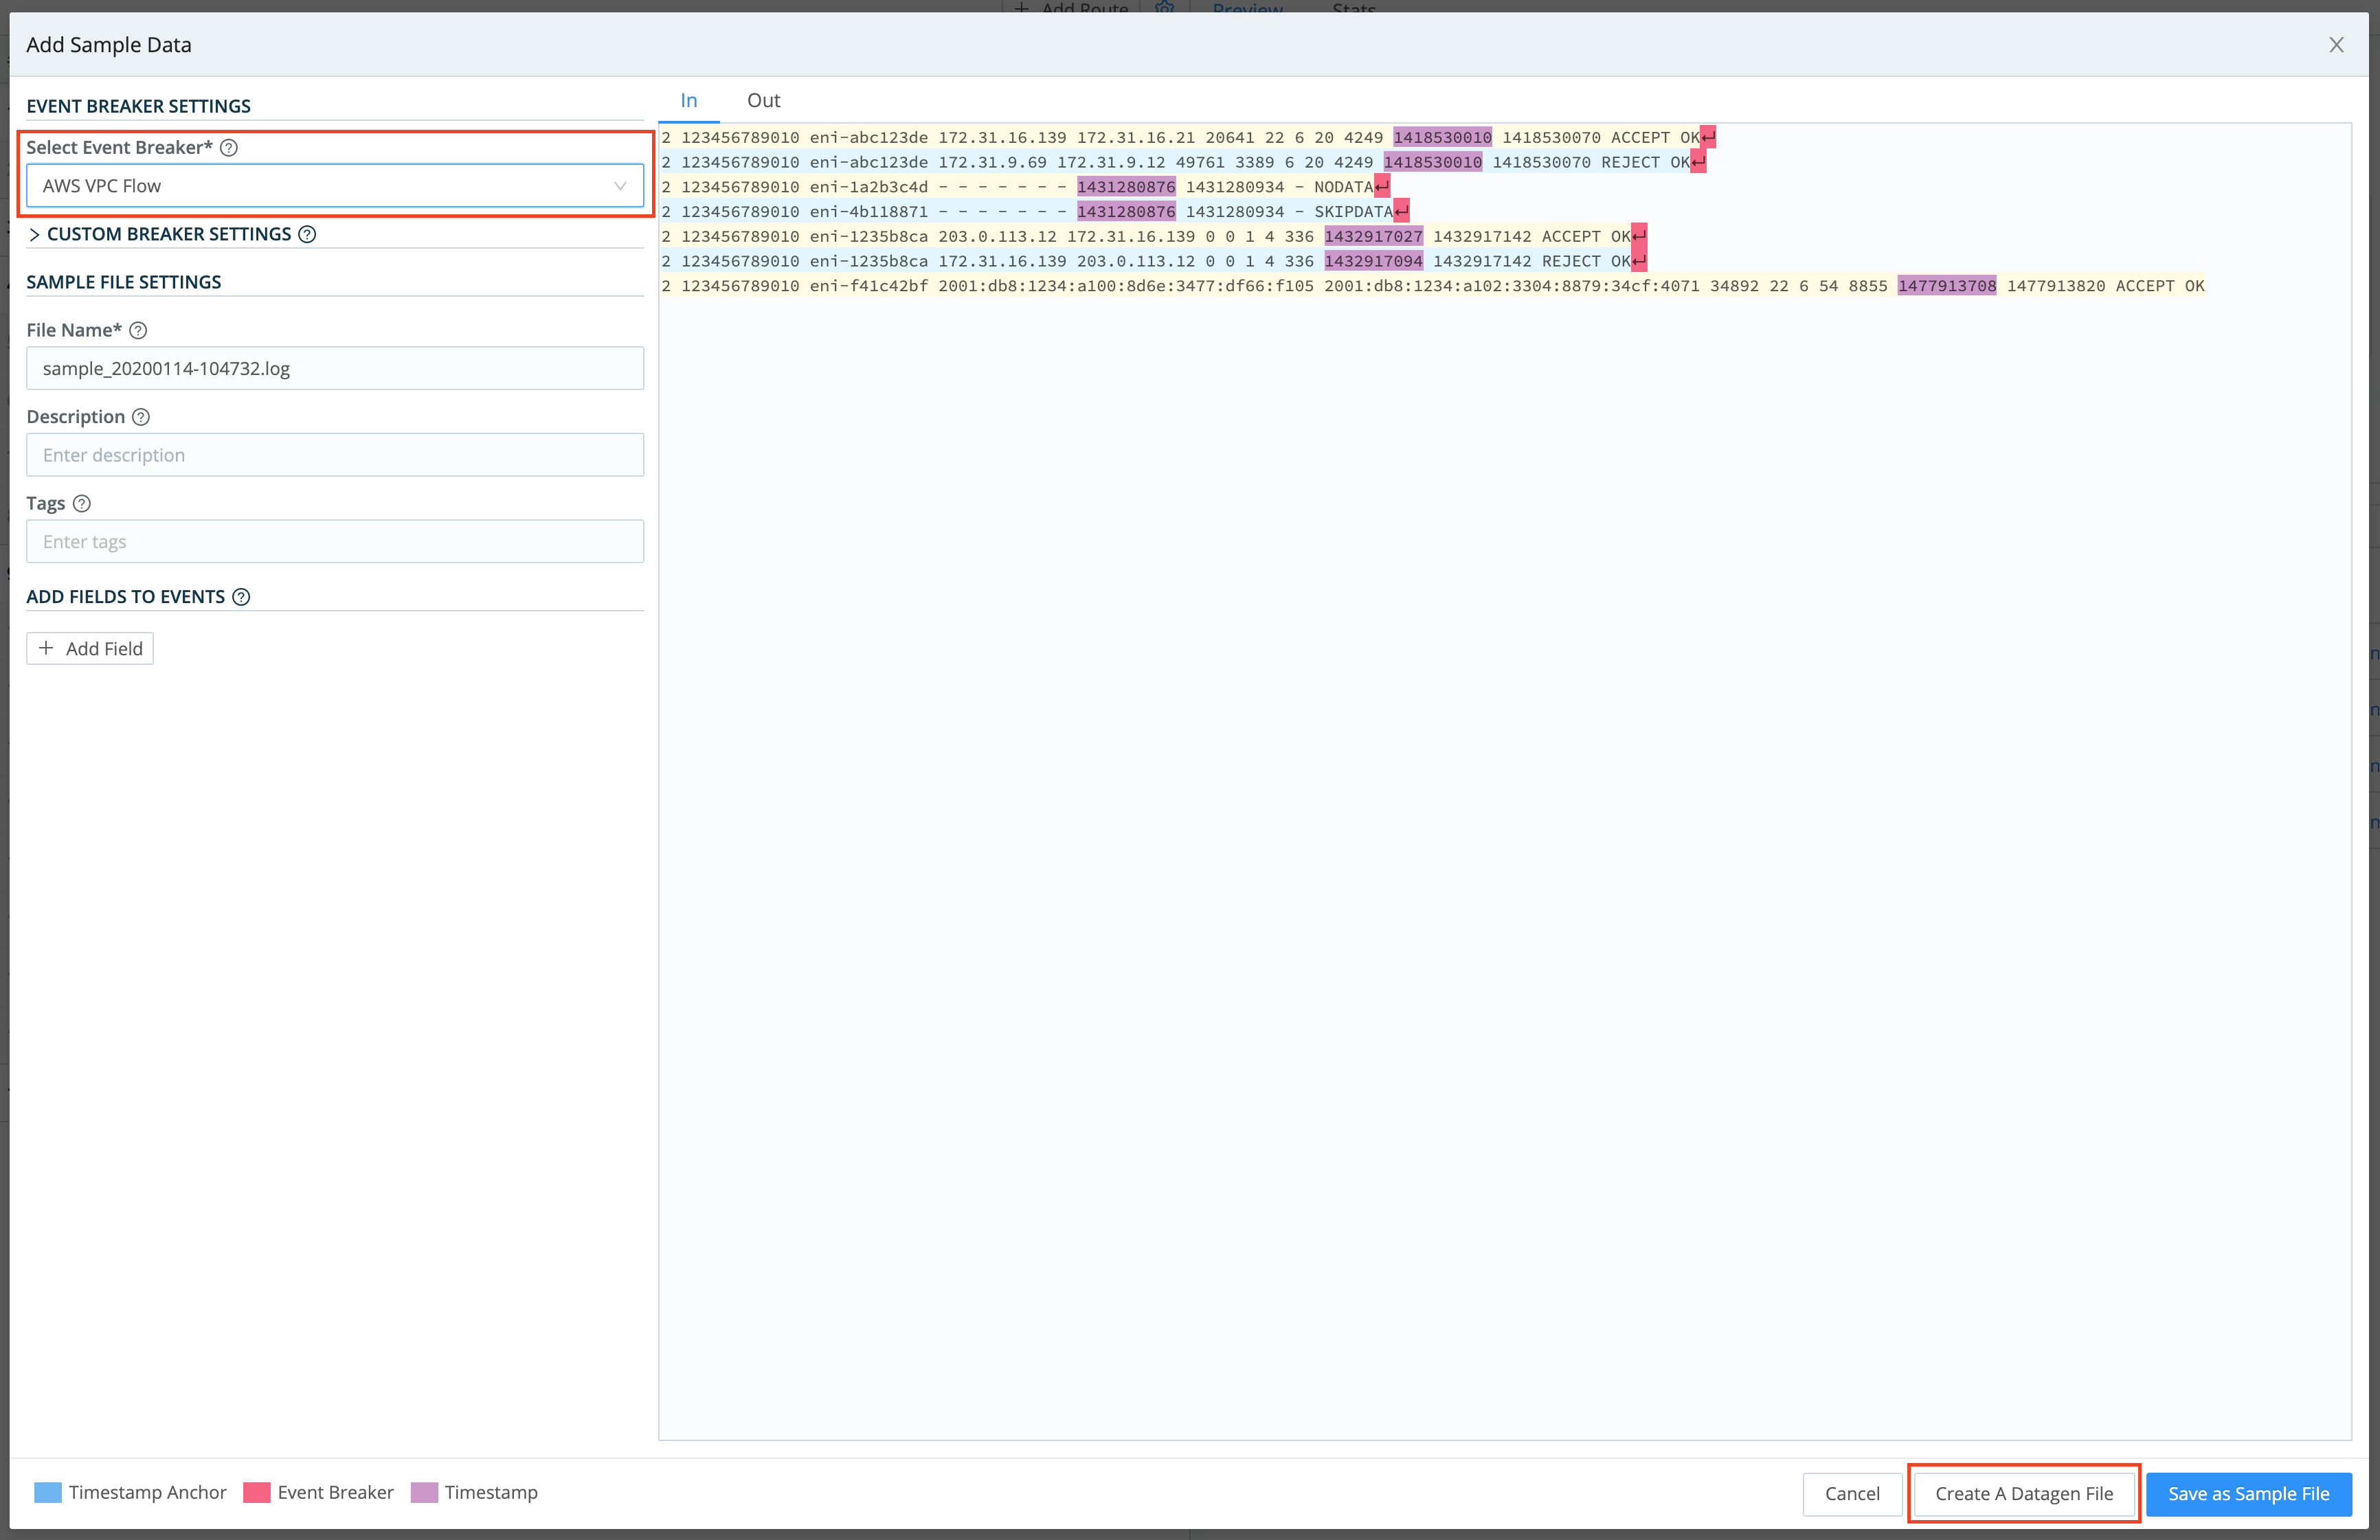
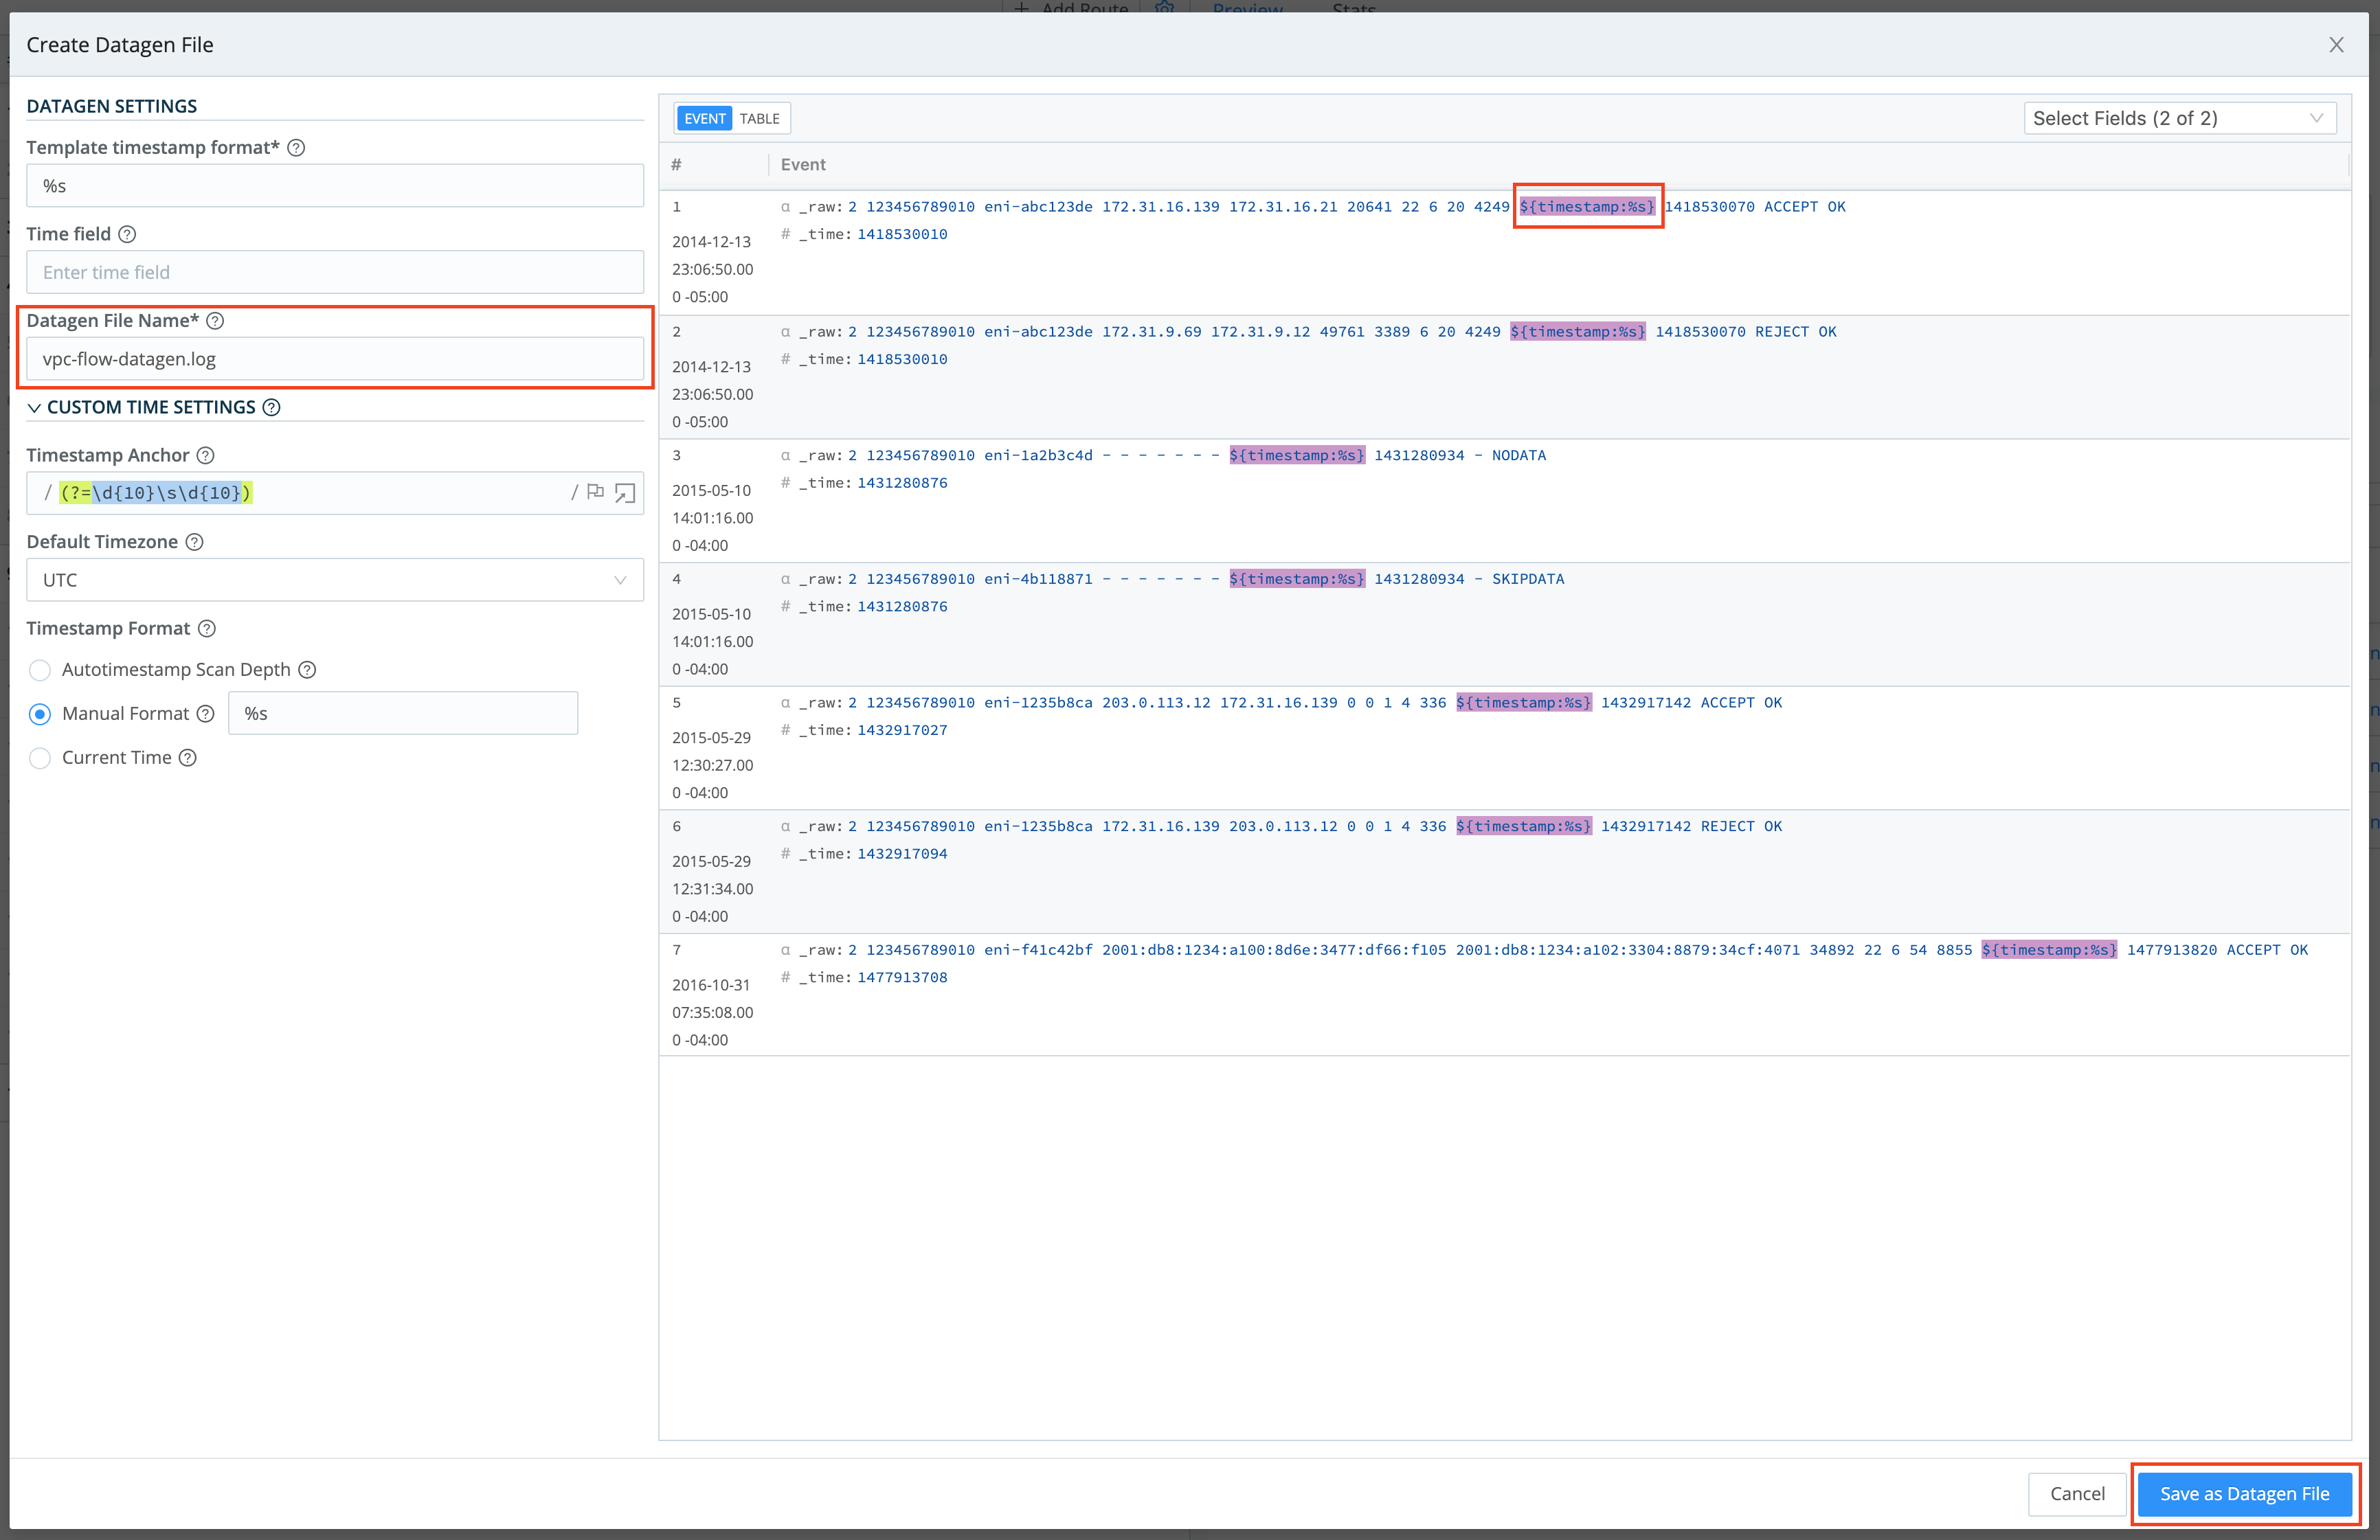
Go to Preview > Paste a Sample, and add a sample like the AWS VPC Flow logs below:
2 123456789010 eni-abc123de 172.31.16.139 172.31.16.21 20641 22 6 20 4249 1418530010 1418530070 ACCEPT OK
2 123456789010 eni-abc123de 172.31.9.69 172.31.9.12 49761 3389 6 20 4249 1418530010 1418530070 REJECT OK
2 123456789010 eni-1a2b3c4d - - - - - - - 1431280876 1431280934 - NODATA
2 123456789010 eni-4b118871 - - - - - - - 1431280876 1431280934 - SKIPDATA
2 123456789010 eni-1235b8ca 203.0.113.12 172.31.16.139 0 0 1 4 336 1432917027 1432917142 ACCEPT OK
2 123456789010 eni-1235b8ca 172.31.16.139 203.0.113.12 0 0 1 4 336 1432917094 1432917142 REJECT OK
2 123456789010 eni-f41c42bf 2001:db8:1234:a100:8d6e:3477:df66:f105 2001:db8:1234:a102:3304:8879:34cf:4071 34892 22 6 54 8855 1477913708 1477913820 ACCEPT OKFrom the Event Breaker drop-down, select AWS VPC Flow to ensure that:
The pasted text gets broken properly into individual events (notice the Event Breaker on newlines).
Timestamps are extracted correctly (text highlighted purple below).
Once you’ve verified these results, click Create a Datagen File.
On the resulting Create Datagen File screen:
Enter a file name, e.g.:
vpc-flow-datagen.logEnsure that the timestamp template format is correct:
${timestamp: %s}${timestamp: <format>}is a template that the datagen engine uses to insert the current time - in each newly generated event - using the given format. In this case,%sis the desiredstrftimeformat for the timestamp (i.e., the epoch).
Once you’ve verified these results, click Save as Datagen File.
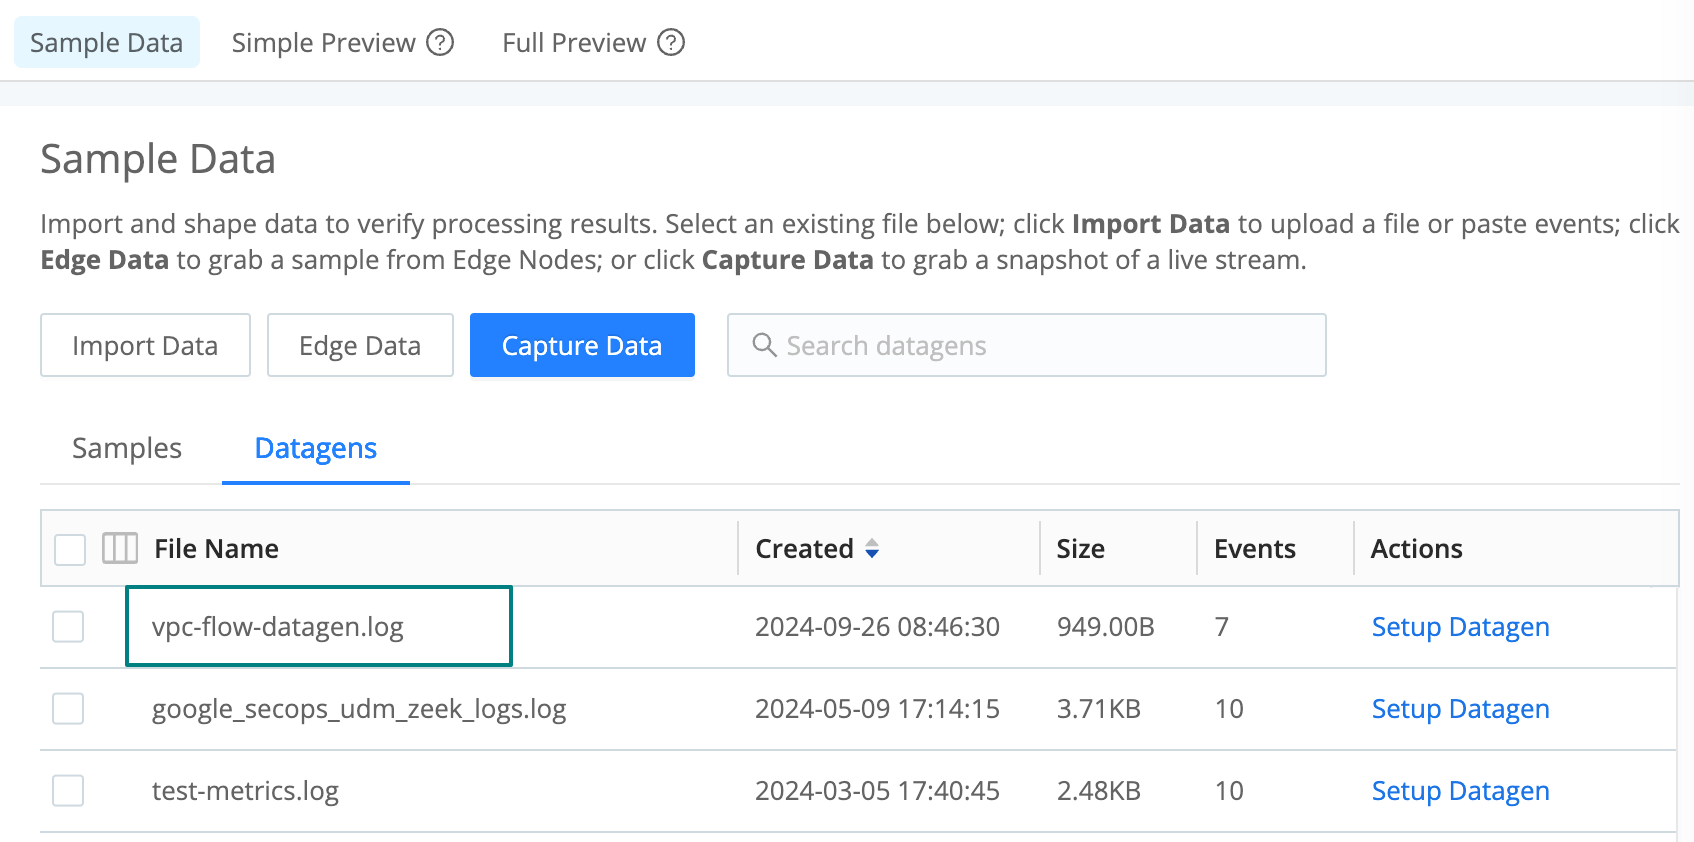
To confirm that the datagen file has been created, check Preview > Datagens.
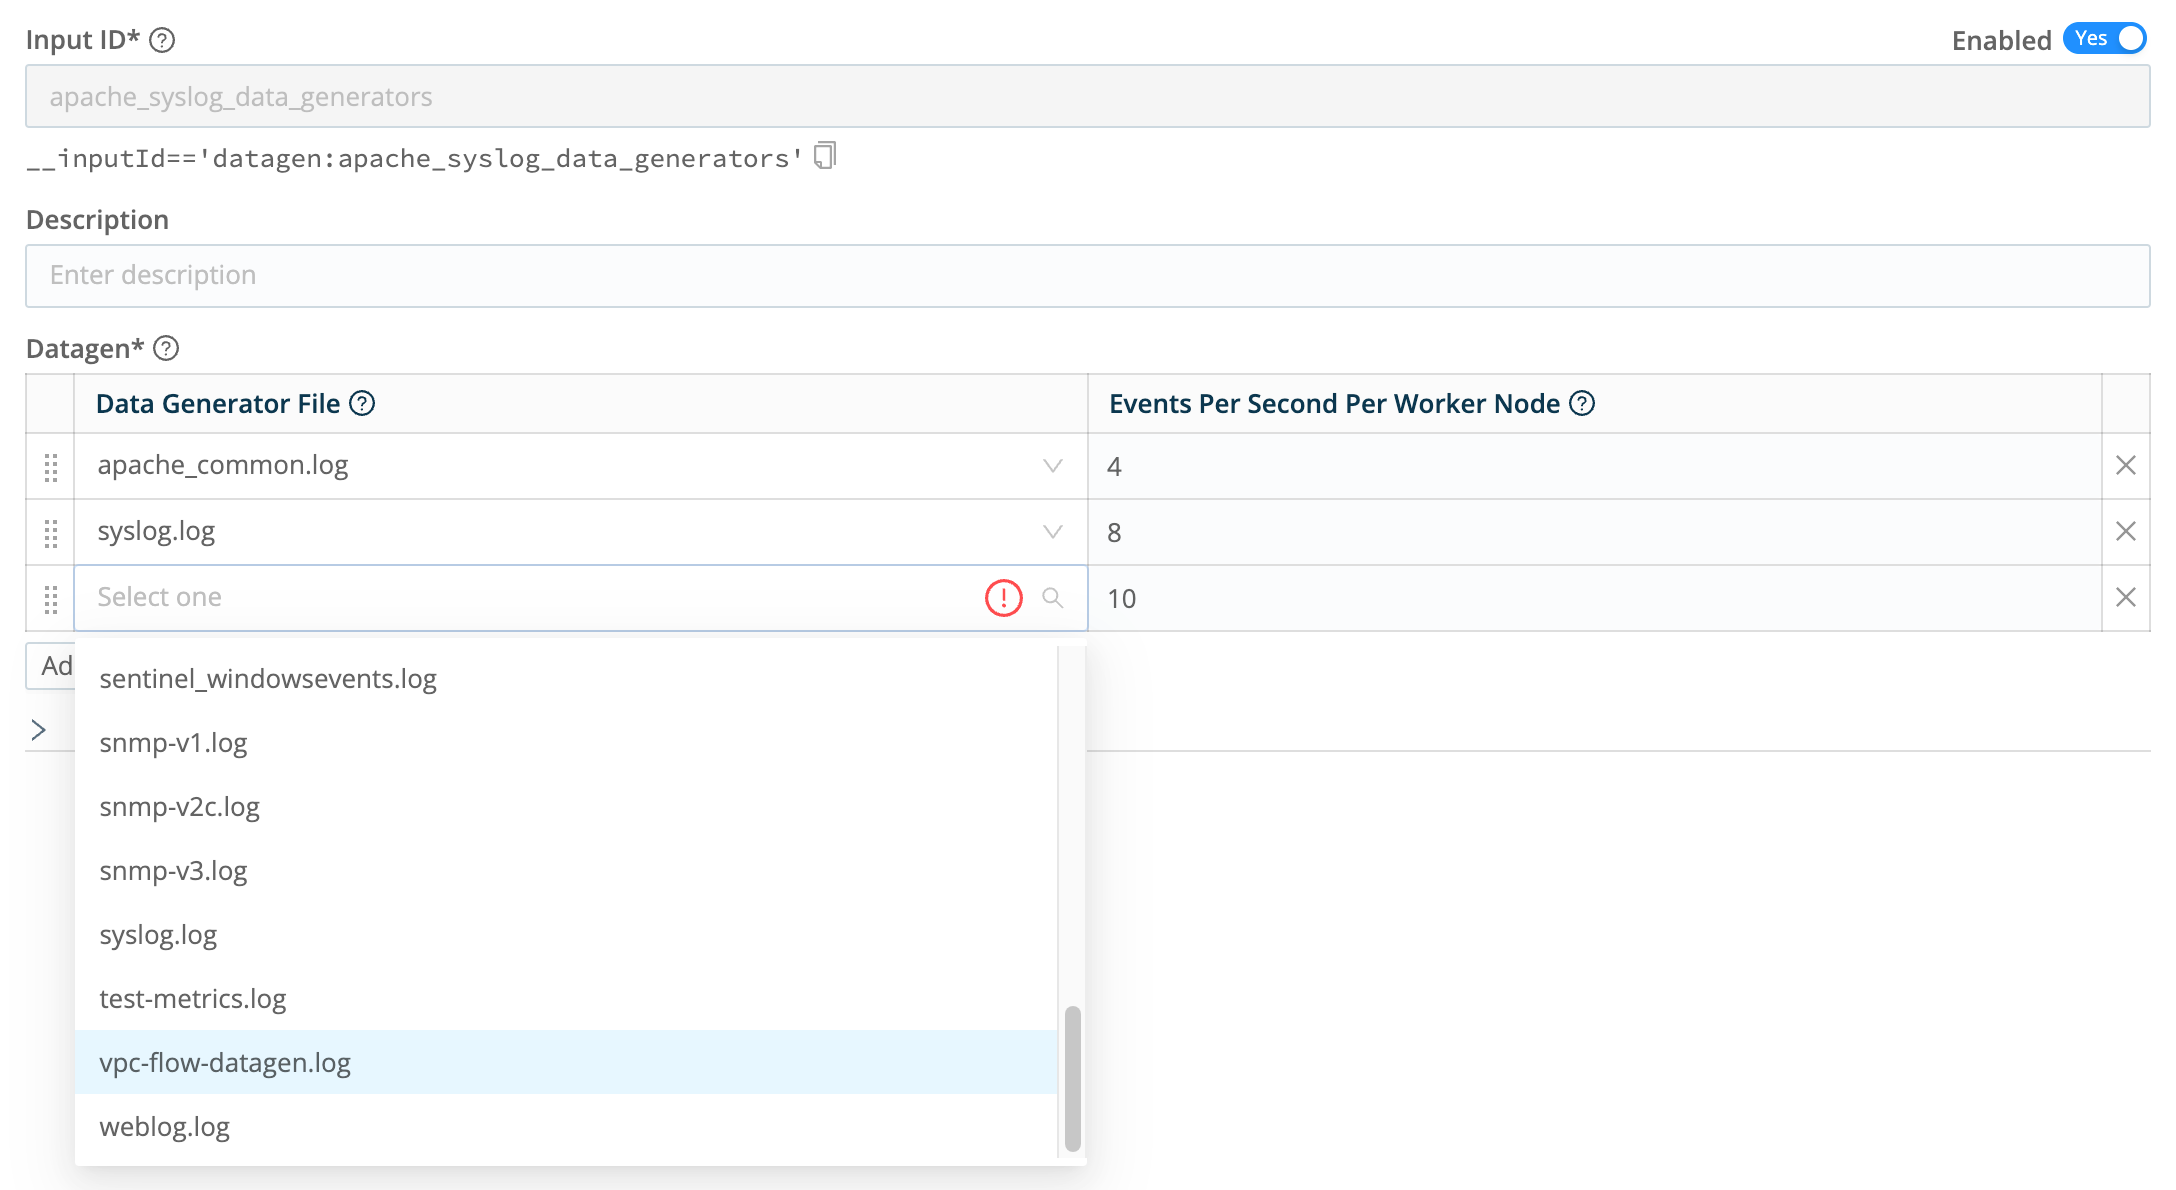
Now, to start using your newly created datagen file, go back to Sources > Datagens. Add it using the drop-down shown below.
Modifying a Datagen
- In the right Preview pane, select the Datagens tab.
- Hover over the file name you want to modify. This displays an edit (pencil) button to its left.
- Click that button to open the modal shown below. It provides options to edit the datagen, clone it, delete it, or modify its metadata (File name, Description, Expiration time, and Tags).
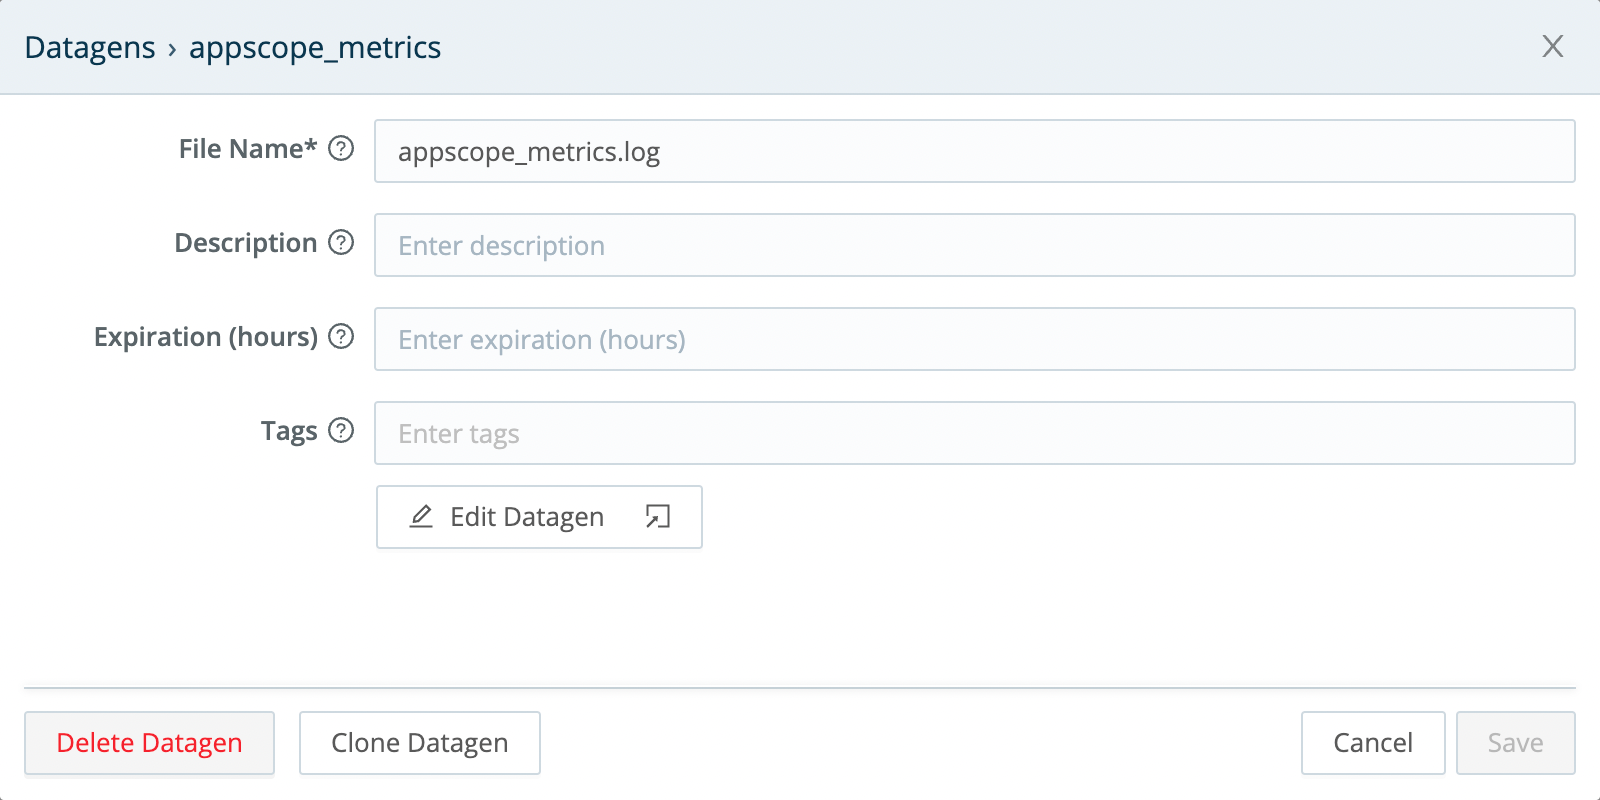
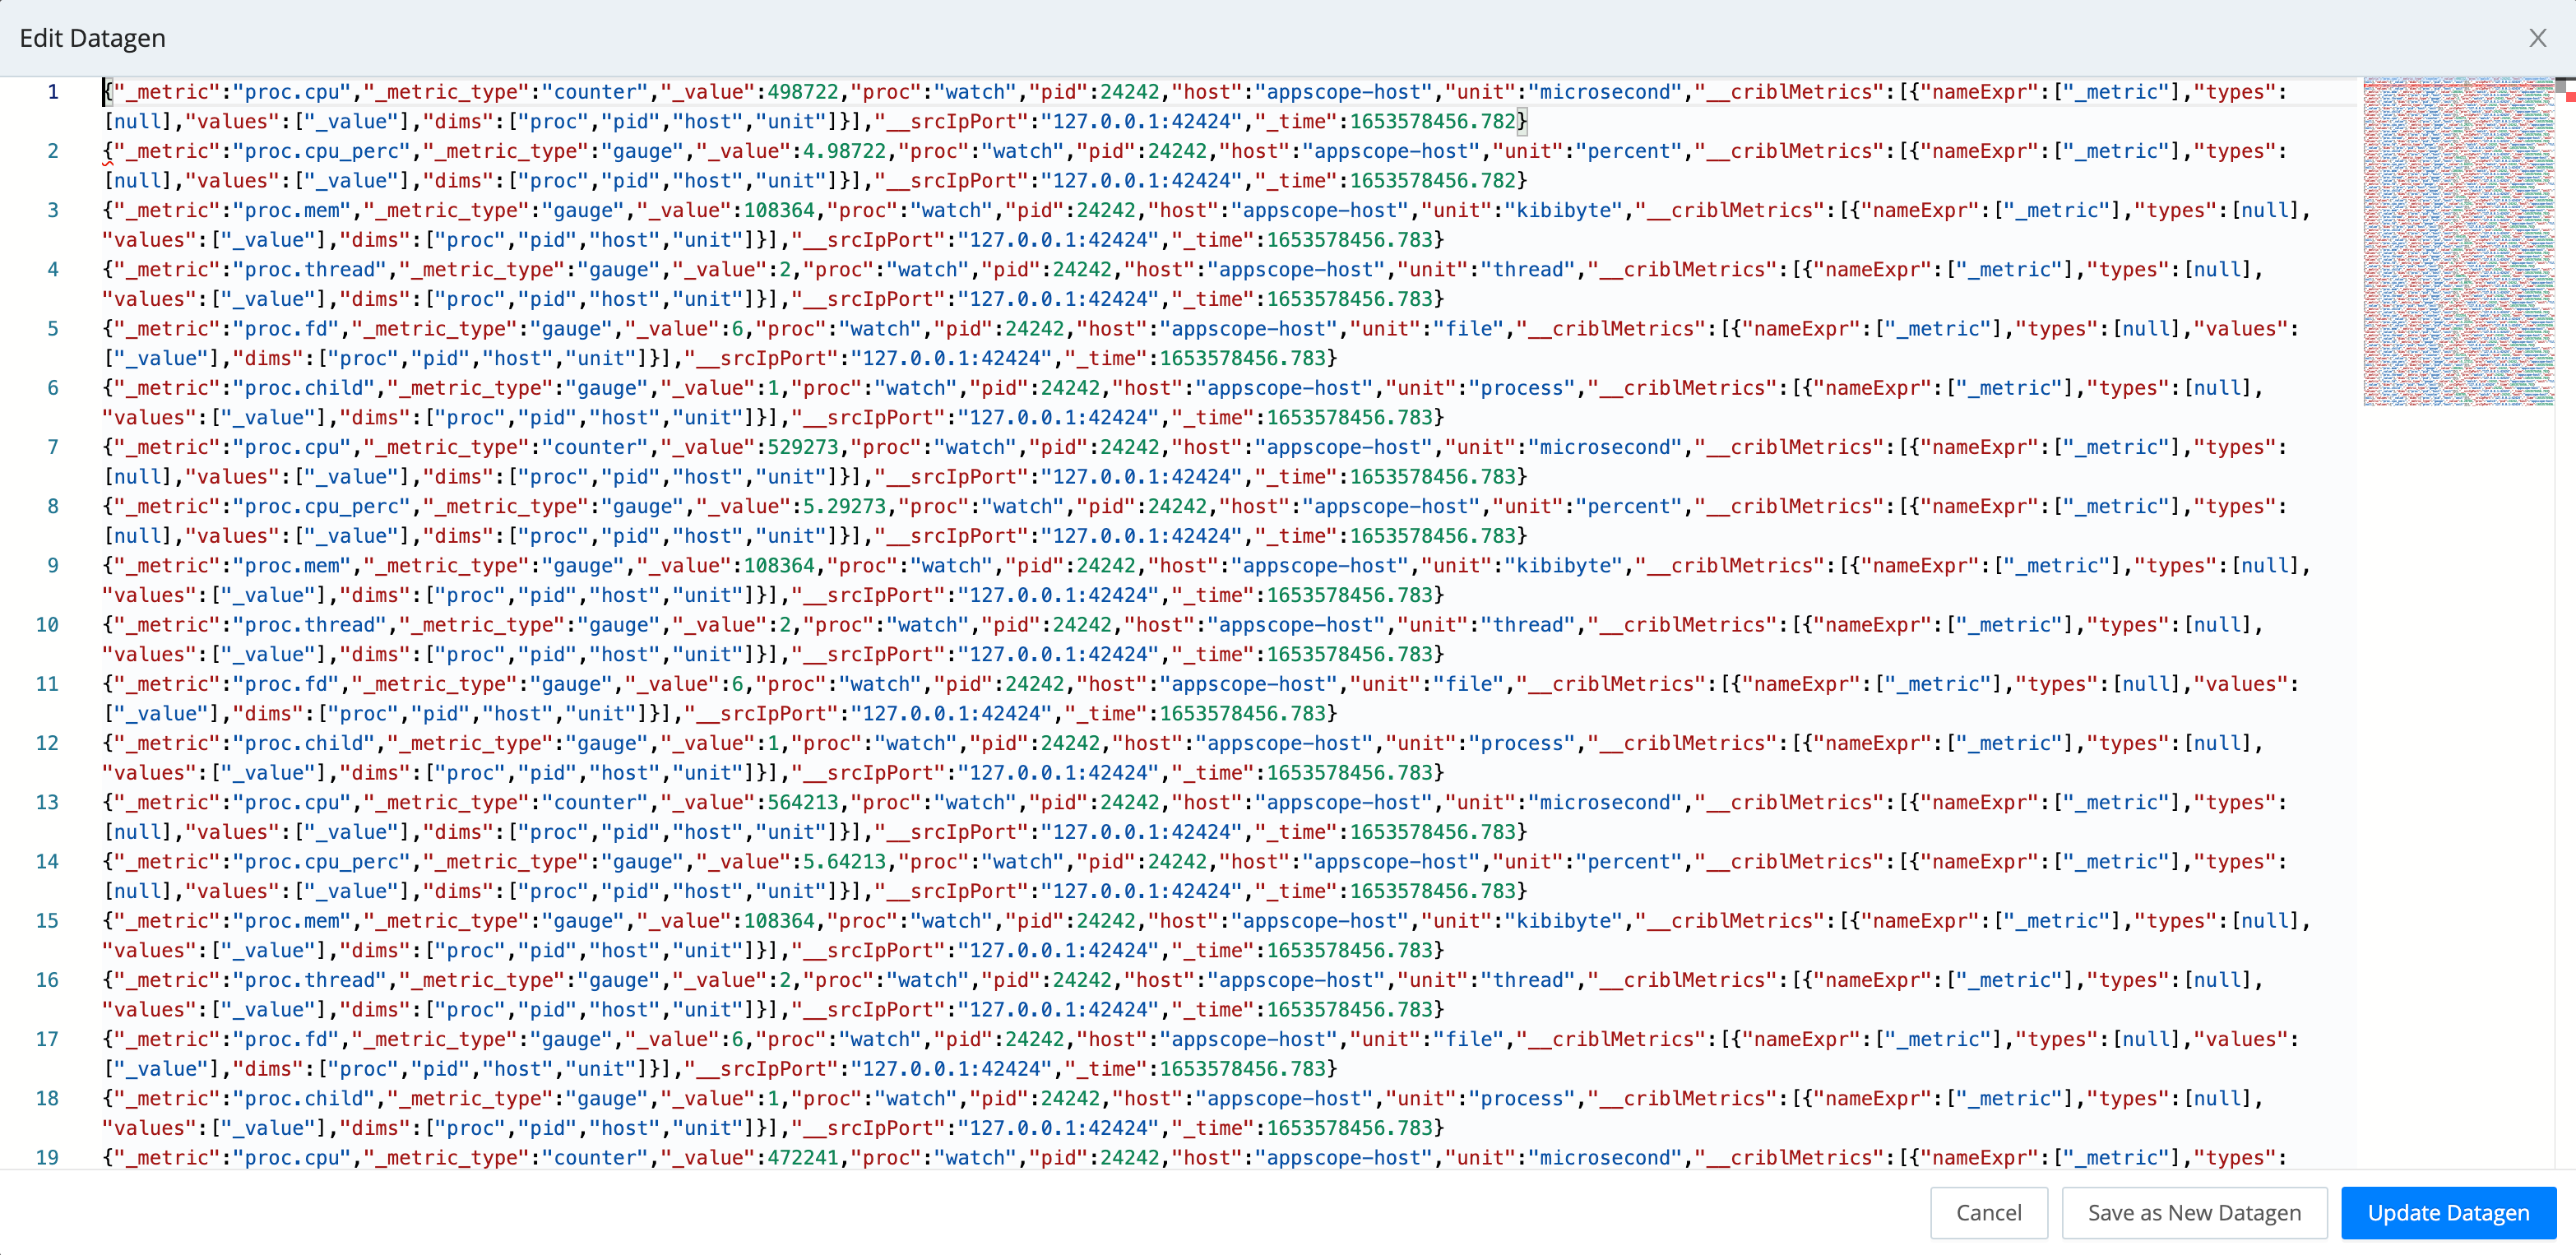
- To make changes to the datagen, click the modal’s Edit Datagen button. This opens the Edit Datagen modal shown below, exposing the raw data that this datagen uses to generate events.
- Edit the raw data as desired.
- Click Update Datagen to resave the modified datagen, or click Save as New Datagen to give the modified version a new name.