


These docs are for Cribl Stream 4.7 and are no longer actively maintained.
See the latest version (4.17).
Tanium to Cribl Stream
Tanium is a security platform that provides rapid searches across multiple endpoints. Tanium integrates with a finite number of tools using its Tanium Connect module, but this can still leave gaps in conforming Tanium output to the specific data formats required by unsupported tools and destinations.
Cribl Stream can help collect, reduce, enrich, transform, and route data from Tanium to any destination. This includes SIEM (Security Information and Event Management) tools, logging tools, or other analytics platforms. In this guide, we’ll explain how to configure Tanium Connect to send Tanium-captured data to Cribl Stream. For further details, see Tanium’s Configuring SIEM Destinations topic.
Configure Tanium Connect
A Tanium Connection is essentially a scheduled search/collection of data linked to a destination. Tanium translates queries into Questions. It formats the Questions into the Tanium Search Language for a search, providing near real-time results.
The first step in configuring Tanium Connect is to set up a Question. A Question can be a Saved Search, Question Log, Client Status, or an Event.
To configure a new connection, go to the Tanium Module page and click Tanium Connect. On the Connect Overview page, scroll to the Connections section, and click Create Connection.
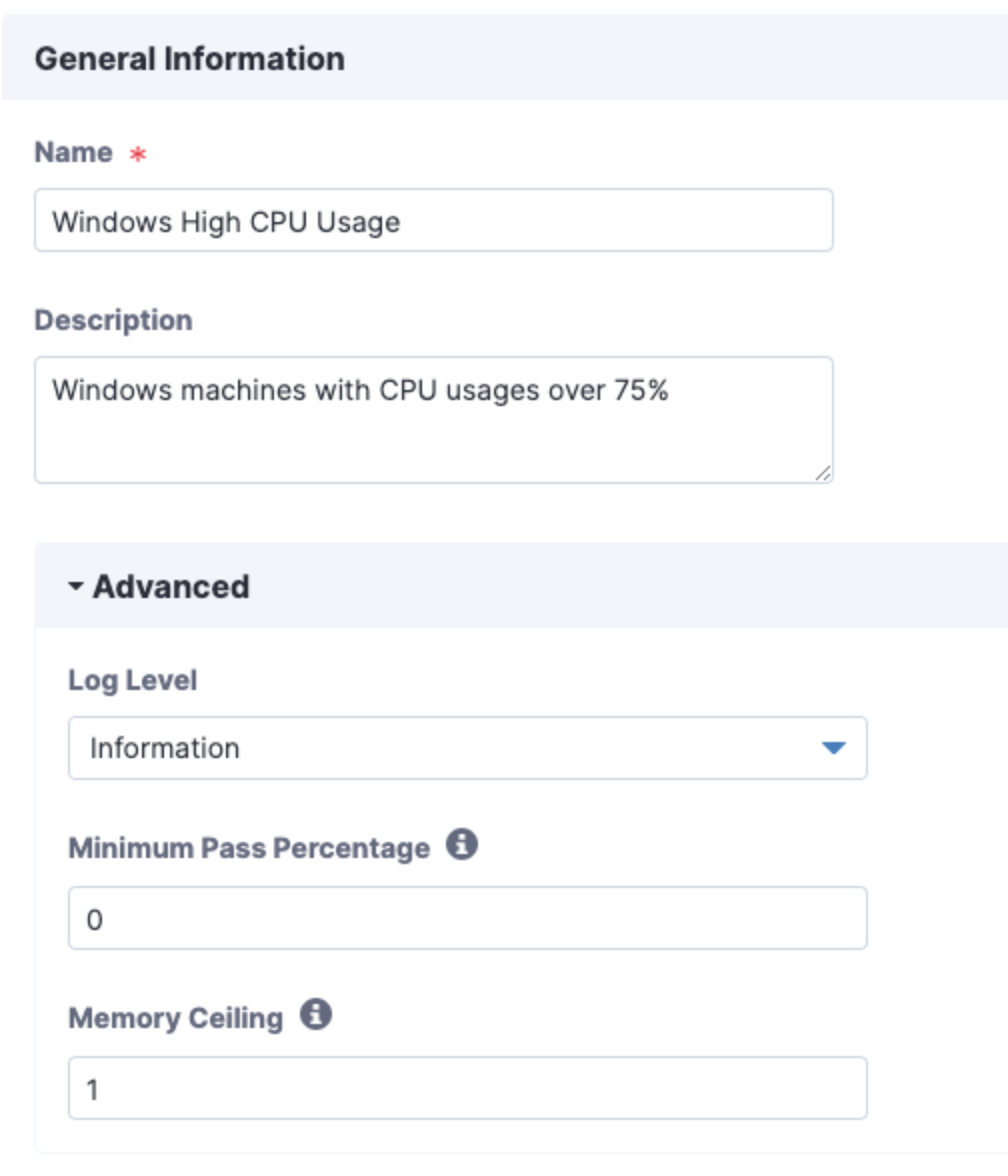
Specify General Connection Information
Name: A unique name for your connection.
Description: An optional description for this connection.
Advanced Settings: Optionally, configure the following fields:
- Log Level: Defaults to Information. Change the Log Level to Trace or Debug if plan to debug the connection. Alternatively, set the Log Level to Warning, Error, or Fatal to reduce the amount of logging.
- Minimum Pass Percentage: Minimum percentage of the expected rows to process for the connection to succeed.
- Memory Ceiling (GB): Maximum memory for the node process to run the connection.
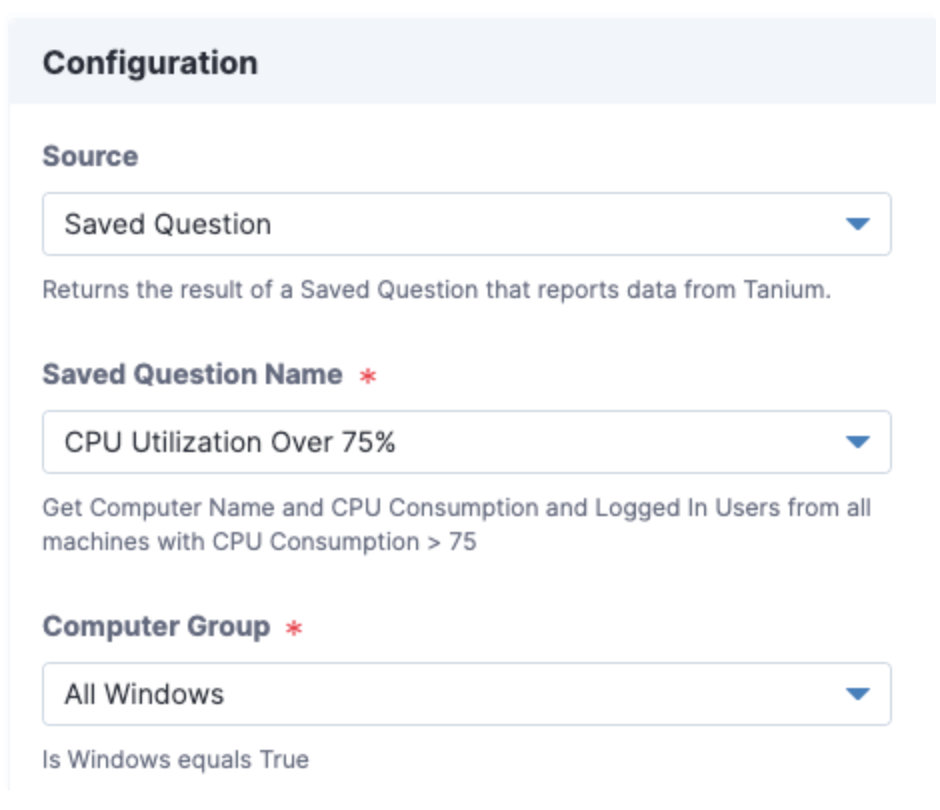
Configure the Connection Source
This section enables you to specify the type of data you are sending to your destination. The data is usually information from Tanium, such as a Saved Question, Question Log, Client Status, or Event. The settings vary depending on the Source.
When sending logs to Cribl Stream, you must create a network egress rule in Tanium for port 10060. See Tanium’s Configure a new network egress rule topic.
Configure Your Destination
In this section, we’ll configure Cribl Stream as the destination, using the following fields.
Destination: Select the destination type. For our example, we’ll configure it as a Socket Receiver.
New: Configure a new destination.
Name: Specify a unique name for your new destination. (This field is displayed only when configuring a new destination.)
Existing: Update the settings on an existing destination. (Note that this will affect all the connections that use this destination.)
Destination Name: Drop-down list where you can specify a preconfigured destination. Displayed only when updating an existing destination.
Copy Settings: Copy settings from a preconfigured destination.
Host: Specify the destination’server host.
Network Protocol: Specify how to connect to the server (e.g., TCP).
Port: Enter the port number to listen on.
Secure: Select this option to use TLS encryption.
Trust on First Use: Select this option to accept the certificate presented from the server, and to trust only that certificate for future connection runs.
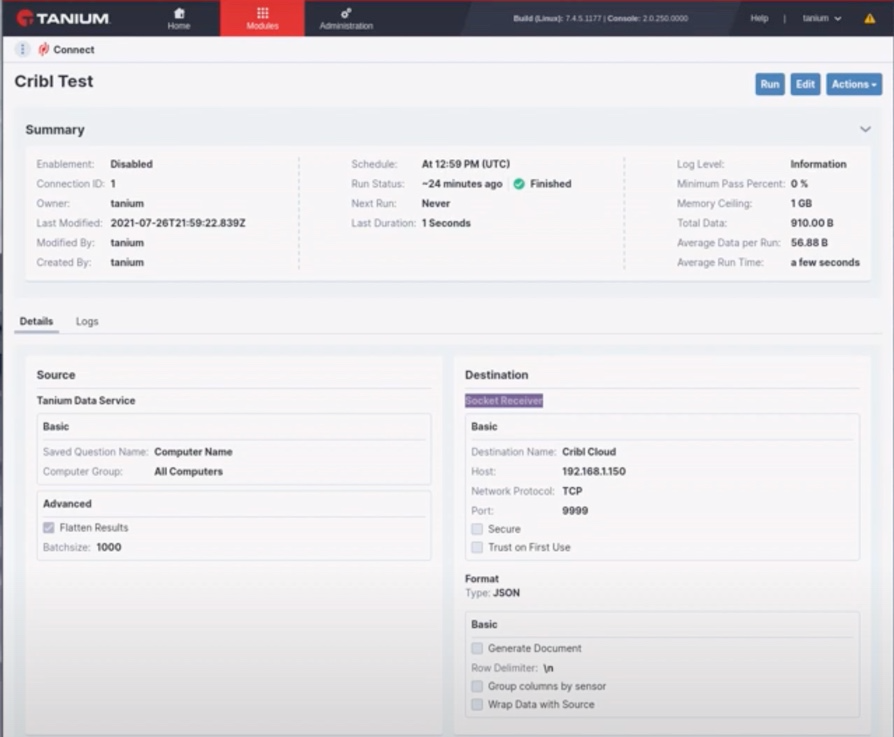
Format the Data
When you select a destination, the expected data format is displayed by default. For example, if you select Splunk, the Syslog RFC 5424 automatically pre-populates the Format Type field. However, you can customize the format as needed. (For details, see Tanium’s Format Types topic.)
Format Type: When sending to Cribl Stream, select the JSON data format for best results.
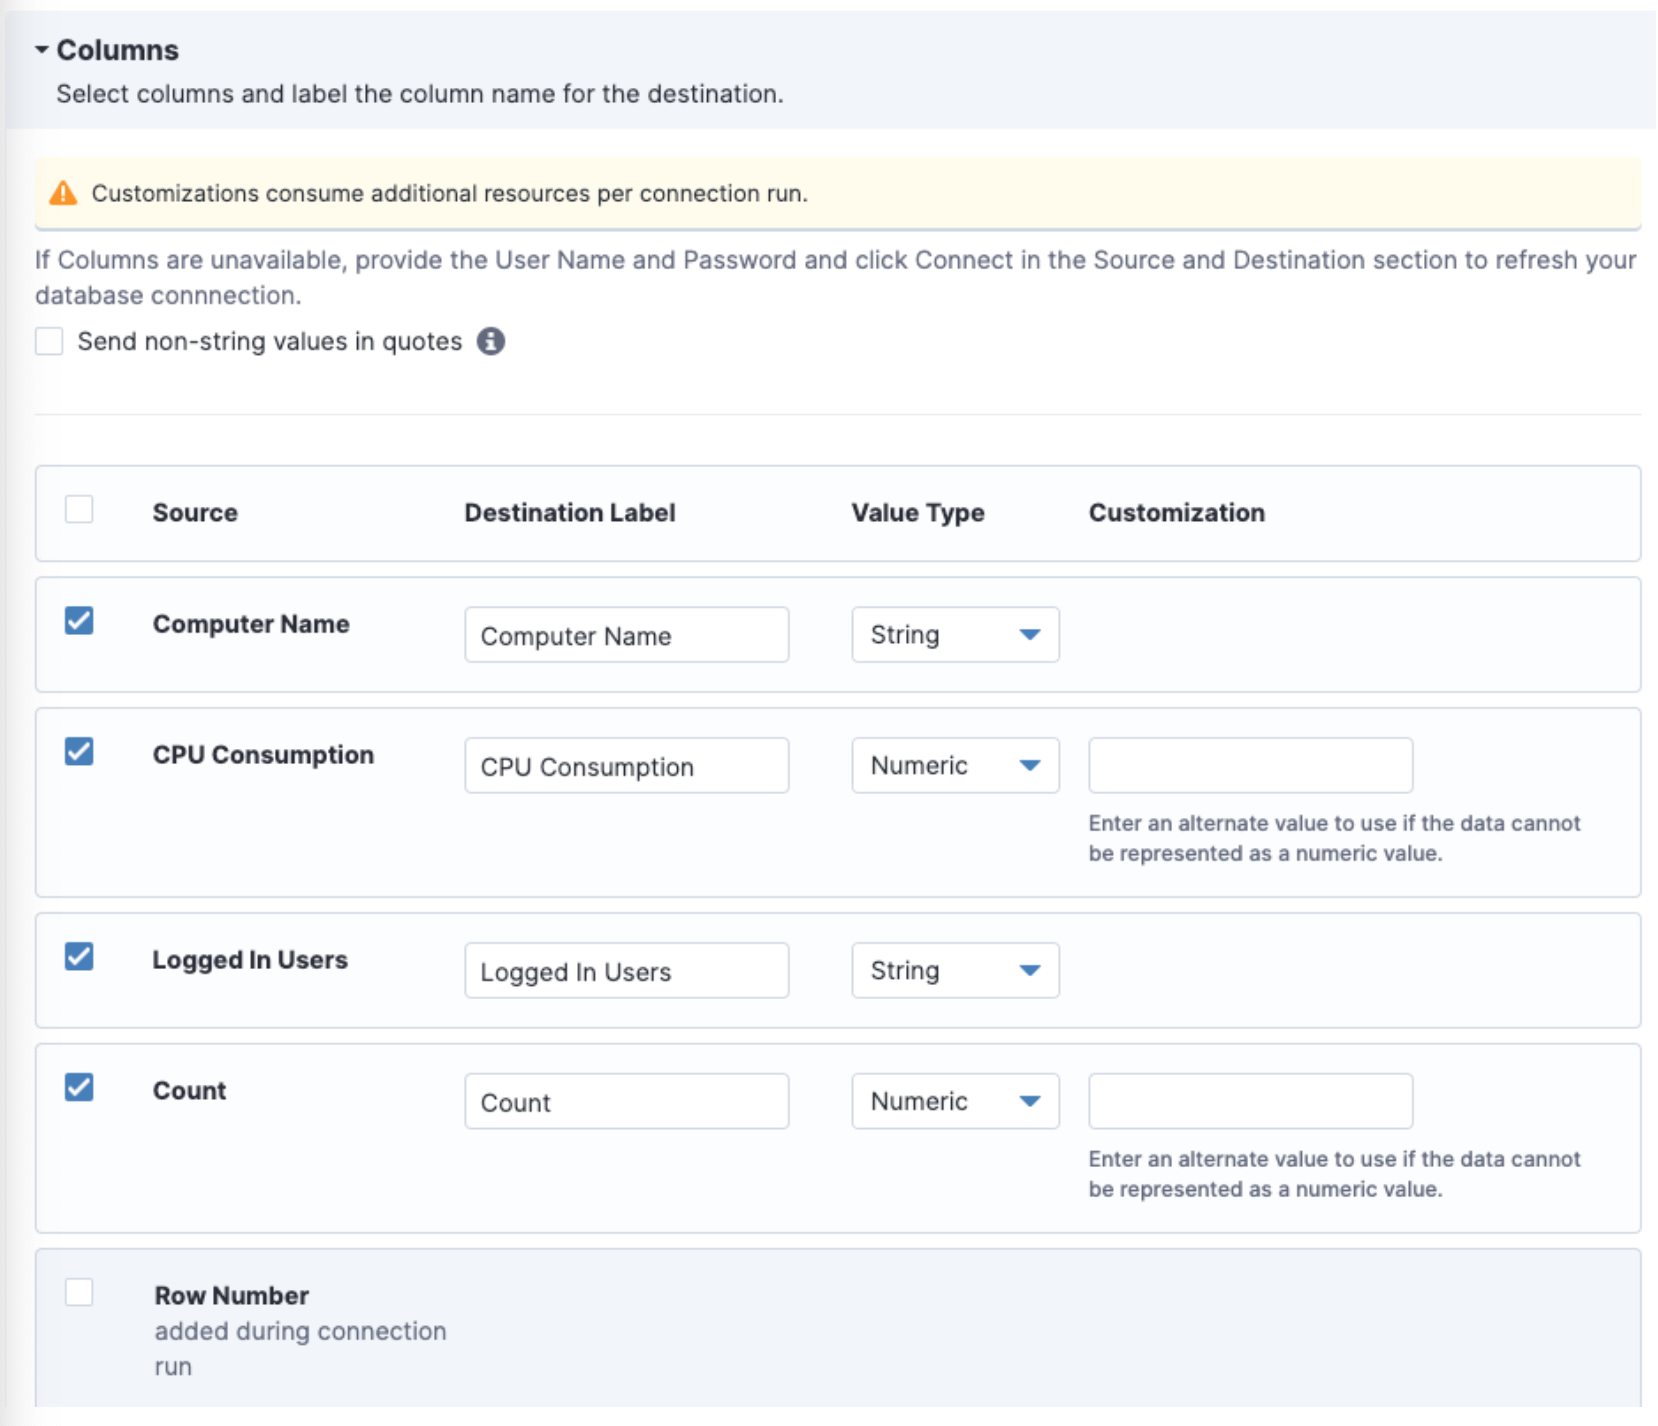
In the Columns section, configure the columns that you want to pass on to your Destination. (For details, see Tanium’s Column Customizations topic.)
- Source: Check the box next to each Source to include the columns in your Destination.
- Destination Labels: You can optionally assign a new column heading. Defaults to the Source name.
- Value Types: You can change the data type to
String,Numeric, orData/Timevalue.- If you select a
Numericvalue, you must specify a default value. It can be any integer. - If you select a
Data/Timevalue, specify the format to apply for the column. R(For details, see Tanium’s Time Stamp Variables topic.)
- If you select a
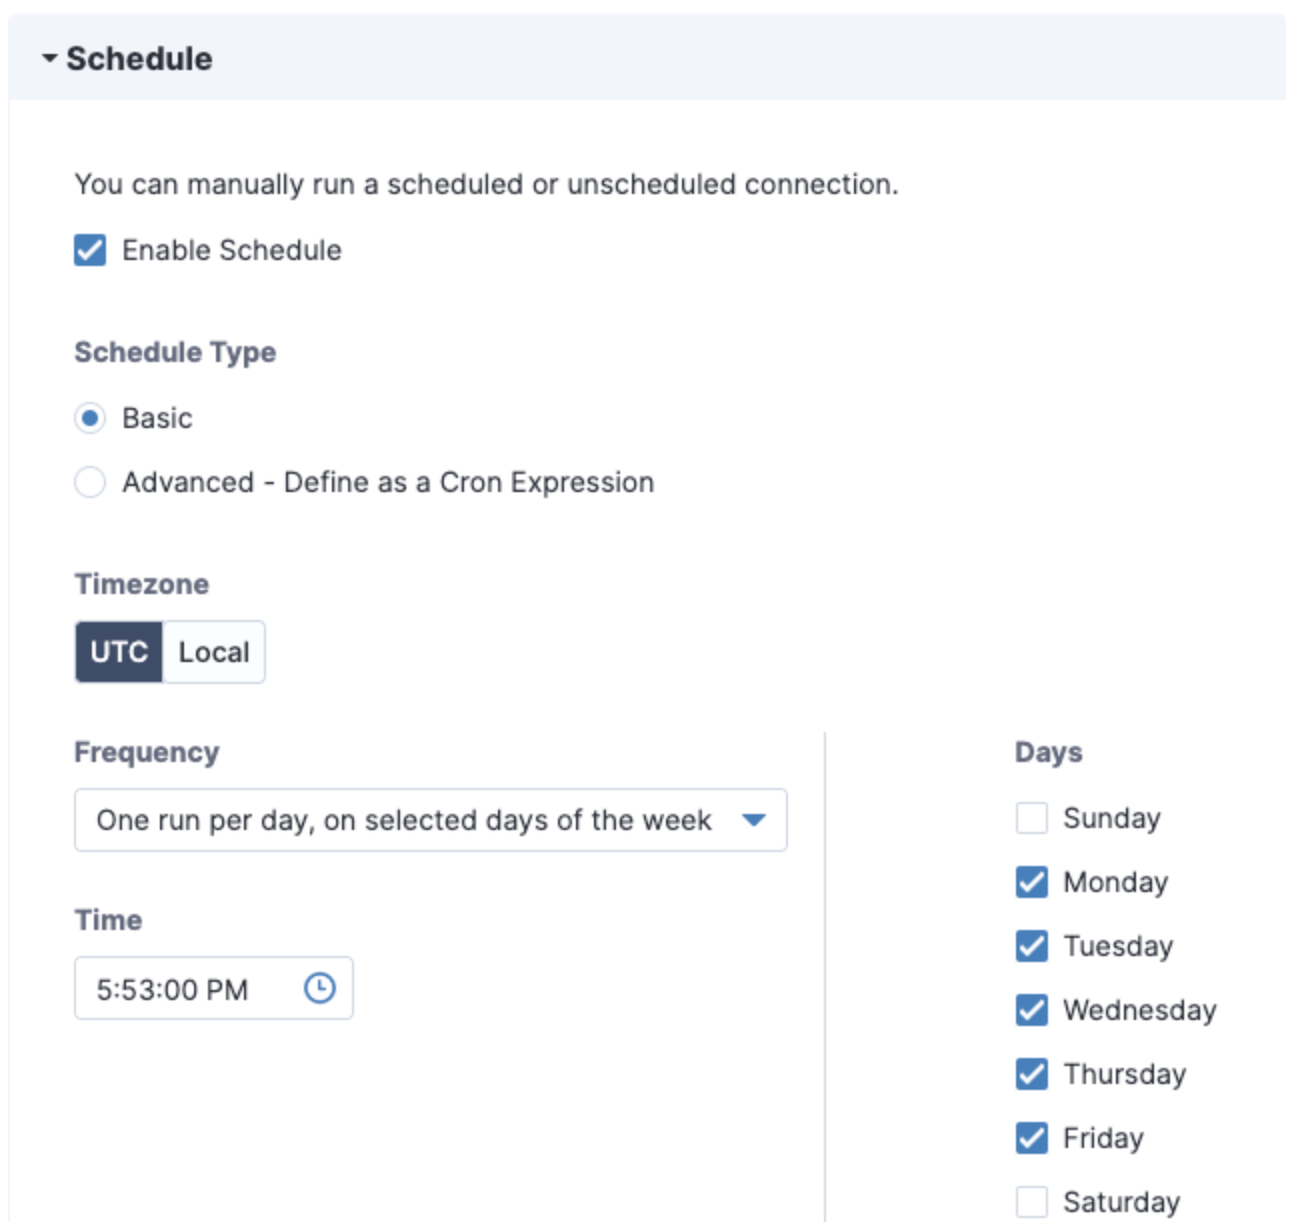
Schedule the Connection
Connections can run at a highly configurable time interval - anywhere from multiple times per hour, to daily, weekly, or monthly intervals. The Schedule section allows you to enable and configure the scheduler.
Enable Schedule: If you do not enable the scheduler here, the connection will run only when you explicitly run it.
Schedule Type: Select Basic to build a schedule with the provided controls.
Advanced - Define as a Cron Expression: Select this field to view or edit the cron expression directly.
If the user who owns a connection is deactivated, future instances of a scheduled connection will not run. For details, see Tanium’s Deleted User Troubleshooting topic.
Save and Verify the Connection
When you are done configuring your connection, click Save.
To view details when the connection runs, select the Logs tab. To inspect an individual run log, expand the row table.
For help on resolving errors, see Taniuum’s Troubleshooting topic.
You can also click Run and Save to save and immediately run the connection. Connection details will be displayed for successful connections.
Configure Cribl Source
On your Cribl Stream instance, configure a TCP Source to receive the data from your configured Tanium connection. For a video demo of this step, see this Tanium blog post.