These docs are for Cribl Stream 4.8 and are no longer actively maintained.
See the latest version (4.17).
SSO with Okta and SAML (Cribl.Cloud)
This page presents a walkthrough of setting up a SAML SSO, using Okta as the example.
This page is a guide for configuring SSO for a Cribl.Cloud deployment. For information about an on-prem installation, see SSO with Okta and SAML (on-prem).
Set Up Fallback Access
Before you start configuring SSO, set up fallback access, so you are not locked out if issues with SSO occur.
In your Cribl.Cloud Organization, ensure that at least one Owner creates a local account, using an email domain that’s separate from the corporate domain on which you’re configuring SSO.
Bypass SSO with Multiple Organizations
If you have SSO configured and you want to sign up for an additional Cribl.Cloud Organization, you need to bypass SSO. Otherwise, you will be forced to log into your existing Organization, because SSO does Home Realm Discovery and recognizes your email address.
In that case, edit your login URL and delete the word identifier. For example:
- Original URL:
https://login.cribl.cloud/u/login/identifier?state=<long_string_of_characters> - Edited URL:
https://login.cribl.cloud/u/login/?state=<long_string_of_characters>
When you use this URL, instead of forcing you through SSO, Cribl.Cloud will ask for a username and password.
Create SAML 2.0 App Integration
To create your app integration:
- In Okta, navigate to the Applications section of your Okta environment and select Create App Integration.
- Create the app integration with Sign-in method:
SAML 2.0. - Provide a name for your app and proceed with Next.
Configure SAML Settings
In the Configure SAML tab, in the SAML Settings section, you will use information you get from your Cribl.Cloud Organization. Configure the following options:
Single sign-on URL is the first of two URLs that your Cribl Organization’s SSO > SAML tab lists under Single Sign on URL. For example:
https://login.cribl.cloud/login/callback?connection=<$organizationID>Audience URI (SP Entity ID) is located in your SSO > SAML tab under th same label. For example:
urn:auth0:cribl-cloud-prod:<$organizationID>Application username:
EmailThe
nameidentifierassertion in SAML responses must be the user’sEmail.
Select Show Advanced Settings. Navigate down and configure a single row of Other Requestable SSO URLs, as follows:
- URL is required to test your connection. Get it from your Cribl.Cloud Organization’s SSO > SAML tab, where it is the second Single sign-on URL. It will be in this format:
https://manage.cribl.cloud/api/assert - Index: Set this to
0.
- URL is required to test your connection. Get it from your Cribl.Cloud Organization’s SSO > SAML tab, where it is the second Single sign-on URL. It will be in this format:
Configure Attribute Statements
Configure Attribute Statements for these attributes, as shown below:
Name Value emailuser.emailgiven_nameuser.firstNamefamily_nameuser.lastNameNext, configure Group Attribute Statements to include
groups. The filter depends on the type of groups you are using.If you are using static groups, use
Cribl.*as the filter:Name Filter groupsMatches regex: Cribl.*If you are using dynamic groups with Teams, you can use
.*as the filter:Name Filter groupsMatches regex: .*In this case, we strongly recommend using a more specific regex that will match only the necessary groups.
Save your app integration.
Submit Your App Info to Cribl
After you’ve created the SAML app integration in your IDP, provide Cribl with the essential metadata about your application to implement SSO setup on the Cribl side.
On your Cribl.Cloud portal’s Organization page, select the SSO tab, then the SAML lower tab.
The Web Application Settings will be prefilled for you, and Cribl will also prefill the SAML Assertion Mappings based on the information you’ve registered with Cribl. So you only need to fill in the SAML configuration section with details from your IDP client configuration.
Return to your Okta environment to the Sign On tab and in the right pane, select View SAML setup instructions. Use the provided fields to fill in the information in Cribl.Cloud:
Cribl.Cloud field Okta field IDP Login/Logout URL Identity Provider Single Sign-On URL IDP issuer Identity Provider Issuer X.509 certificate (base64-encoded) X.509 Certificate
SAML/Okta Chiclet Setup (Optional)
If you want to initiate login from your Okta instance with SAML authentication configured, an Okta admin can configure an app integration as follows:
- From Okta’s left nav, select the Applications page.
- Select Browse App Catalog.
- From the resulting catalog, use the search bar to find and select the
Bookmark Appapplication. - From that application’s page, select Add Integration.
- On the General settings page, enter an Application label that will identify this app as supporting Cribl.Cloud login. (
Cribl.Cloudis a good choice, but the label is arbitrary.) - In the URL field, enter
https://manage.cribl.cloud/login?connection=<organizationID>(where<organizationID>is your Cribl.Cloud Organization’s ID). - Confirm with Done.
- Select Assign and assign all of the Cribl.Cloud groups to the application.
- The Cribl.Cloud chiclet should now be available for all users in the Cribl groups you’ve assigned.
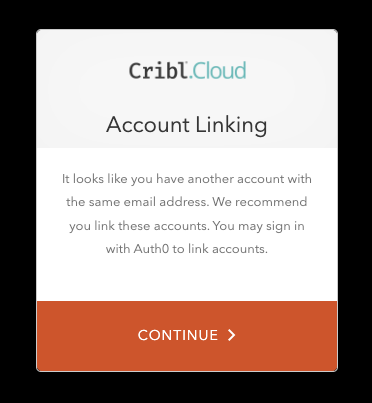
Link Existing Users
If your Cribl.Cloud Organization has existing users who had been using a username and password to log in, upon first login with SSO, these users will see a prompt to link their identities. They should accept this prompt to ensure that their existing profile is linked with their SSO profile.