


Collaborate on Developing Packs
By storing your Pack in a Git repository, you can take advantage of version control while developing and collaborating. Multiple collaborators can pull changes into their own branches, improve the Pack, and then push their work to be merged into the original repository.
Create a Pack
To start setting up Pack collaboration, create a new Pack. Add any required elements (such as Sources, Destinations, Pipelines, Routes, Event Breakers, or Knowledge Objects) to the Pack.
See Share Configuration with Packs to learn how to create a new Pack and, optionally, copy existing resources to it.
Create Git Repository
You can use a private repository in any common Git hosting service to store your Pack. This guide uses GitHub as an example.
Create an empty private repository. To do this in GitHub, select Create New > New Repository on the top bar. Give your repository a name, an optional description, and set it to Private.
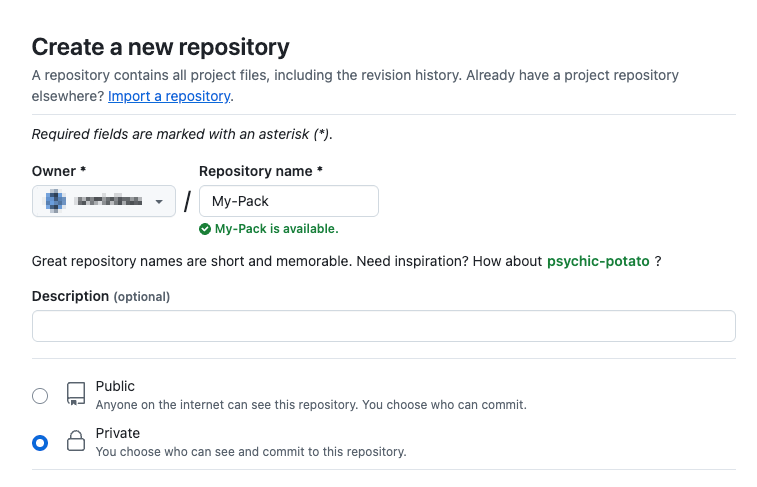
Creating a private GitHub repository Clone the new repository locally to your system.
In Cribl Stream, navigate to the Packs page and open the Options ••• menu on the row of your Pack.
Select Export and choose the Merge export mode.
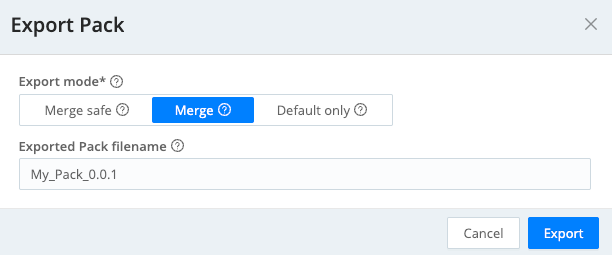
Exporting a Pack in Merge mode Confirm with Export and save the file locally.
Extract the
.crblfile into the repository directory.Because they are gzipped, you can extract
.crblfiles using thetarutility. For example:tar -xvzf WebdataStorage_0.0.1.crbl.Add, commit, and push the Pack content to your remote repository.
Prepare Repository for Collaboration
To make sure your collaborators can import and edit the Pack, invite them to the repository with proper permissions.
Cribl recommends that every collaborator use their own branch to avoid conflicts and smoothly merge work. In your Git hosting service, create dedicated branches for all planned collaborators.
You can also use separate Git branches to represent different environments, for example test and production.
Import Pack to Another Environment
To import a Pack from Git with the intent of collaboration, you need a personal access token for your Git hosting service.
Create a personal access token.
Using GitHub as an example, create a personal access token with the
reposcope.In Cribl Stream, select a Worker Group and navigate to the Packs page.
Select Add Pack at the upper right and select Import from Git.
Enter the repository’s URL. Provide your username and the token in the format:
https://<username>:<token>@<repo-address>.In Branch or tag, provide the name of your branch in the remote repository.
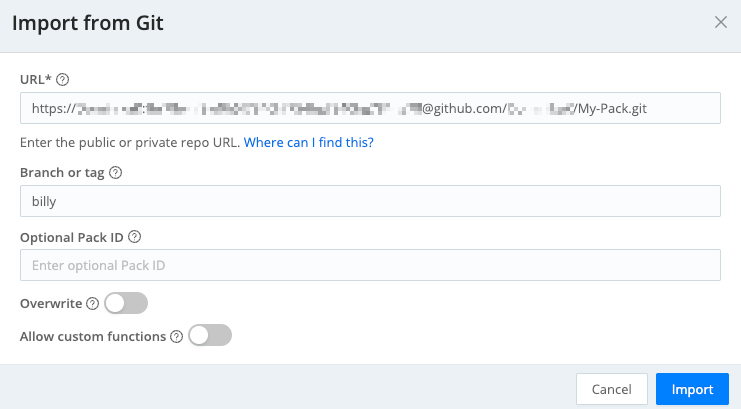
Importing a Pack from a Git repository Select Import to confirm.
If the Pack you are importing binds variables to any fields, you will see a Configure Variables button in the notification about successful import. Select it to go to the Variables page, where you can configure the values for the variables for your deployment.
Verify the Pack
Check that the Pack is working correctly with your current environment: verify data flow between Sources and Destinations both inside and outside the Pack.
Modify the Pack
Now you can customize the Pack: add or modify Sources, Destinations, Routes, Pipelines, Event Breakers, or Knowledge Objects.
Push Changes to Git
Once your work is complete, you are ready to publish your changes to the remote repository.
Navigate to the Packs page and open the Options ••• menu on the row of your Pack.
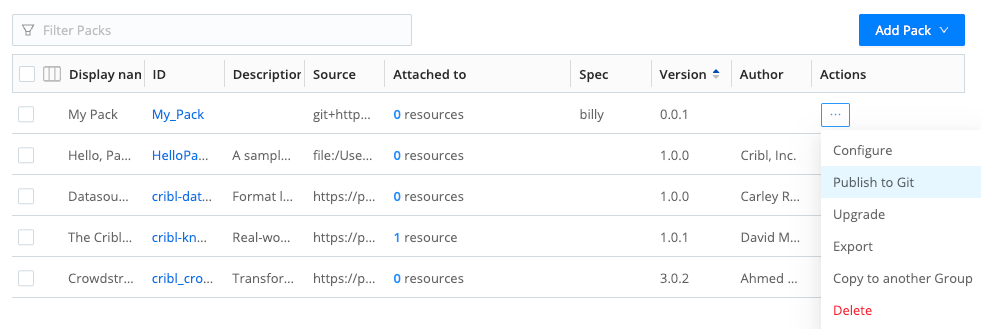
Publishing a Pack to Git Select Publish to Git, and in the modal window, confirm with Publish to Git again.
Your branch in the remote repository will be updated with your changes. The repository maintainer can now synchronize the main branch with your branch in their preferred way (for example, by creating a pull request).
Pushing changes with Publish to Git removes any files from the repository outside Cribl configurations. The only exception are hidden files and directories in the repository root.
If you need to retain files in the repository (for example, GitHub workflows), make sure that they are hidden, that is that their name starts with
.(period).