


Prepare the Azure Workspace for Cribl Integrations
This guide walks you through configuring Azure to receive data from Cribl Stream. Currently, Cribl Stream supports sending data to custom tables and some native tables in Azure Log Analytics workspaces. For more information, see Azure’s Supported Tables topic.
Before You Begin
To send data to custom tables, you need to configure a Data Collection Rule (DCR) with Stream definitions. We provide example DCR templates in our Cribl-Microsoft GitHub repository to simplify this process, and recommend using the Syslog template as the starting point. Note that the Syslog template is provided under the DataCollectionRules path and is intended for the DCR kind:direct approach.
Choose Your Data Collection Method
Decide which method best suits your deployment:
Method 1: DCR kind:direct (Recommended): This is the simplest approach. The
logIngestionURL is embedded directly in the DCR, so a separate Data Collection Endpoint (DCE) is not needed. This is ideal if you don’t require Private Link connectivity or complex network routing.Method 2: Data Collection Endpoint (DCE): Use this method if you need Private Link connectivity for network isolation, specific data routing, or a single ingestion endpoint for multiple DCRs.
For most deployments, DCR
kind:directis the recommended approach due to its simplicity. Only use a DCE if you have specific networking requirements such as Private Link connectivity, network isolation, or centralized endpoint management across multiple regions.
Deployment Approaches
This guide covers manual configuration using the Azure portal. For automation and templates, refer to the Cribl-Microsoft GitHub repository. The GitHub repository contains various resources and approaches that can simplify and automate the deployment process, which is particularly useful for production environments or repeated deployments.
The following sections walk through manual Azure portal configuration for those who prefer or need to understand the step-by-step process.
Prepare the Azure Workspace
First, you must prepare the Azure Workspace to receive data from Cribl Stream by registering Cribl Stream as an authorized application with the Microsoft Identity Platform.
Use Copy buttons, where available, to copy complete values for later use without truncation.
Common Setup Steps
Regardless of which configuration path you choose, you’ll need to complete these initial steps.
Create Credentials for a New Azure Application
Register Cribl Stream as an authorized application with the Microsoft Identity Platform.
- Log into the Azure portal as an
Administrator. - Navigate to the portal’s App registration section.
- Click New registration to register an application.
- Register a new application with the name
Cribl Stream.
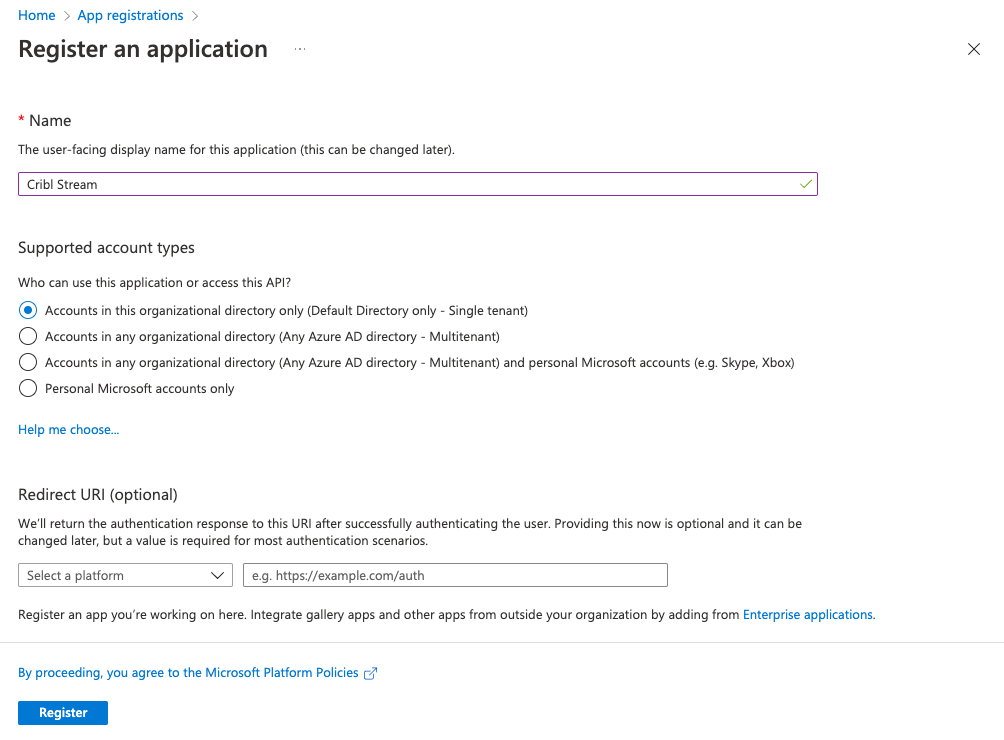
- Click Register.
- Store the Application (client) ID and Directory (tenant) ID for later steps.
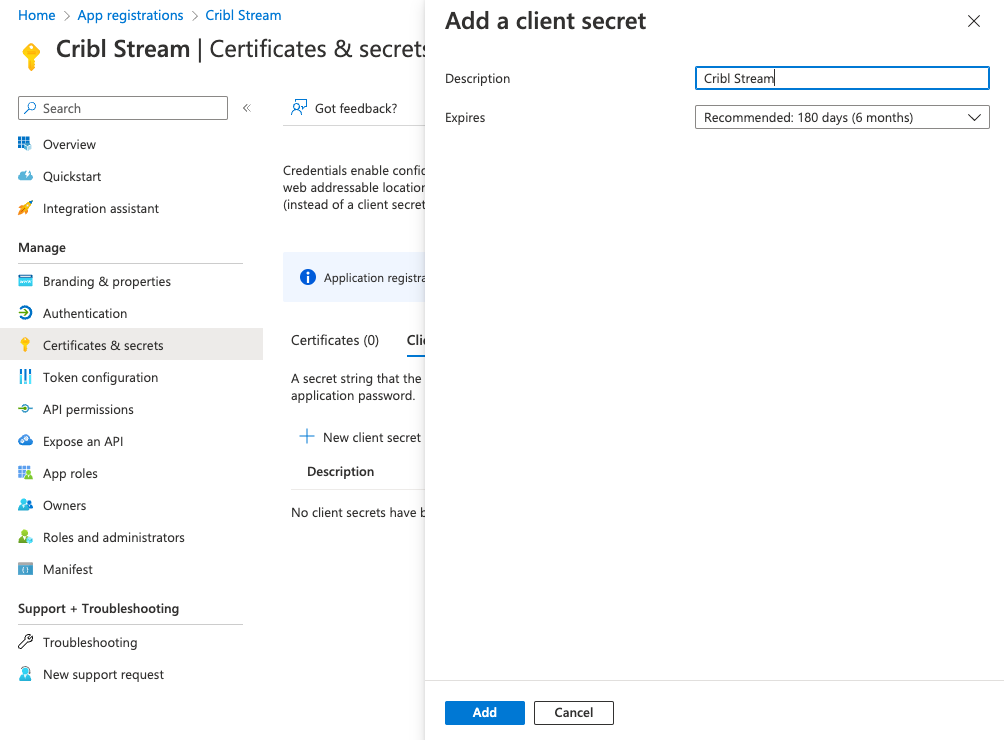
- In your newly registered application, select the Certificates & secrets tab.
- Create a New client secret.
- Store the secret Value for later steps.
Find the Log Analytics Workspace Resource ID
- Navigate to the Azure portal’s Log Analytics workspaces service.
- Select the workspace that will receive data.
- From the Overview page, select JSON view, and store the value of the Resource ID (gray box at the top) for later use.
Configure Data Collection (Choose Your Path)
Path A: Using DCR kind:direct (Recommended)
If you chose the DCR kind:direct method, you can skip directly to Create and Configure the Data Creation Rule. The logIngestion URL will be embedded automatically.
Path B: Using a DCE
If you need a DCE, create it first.
- Navigate to the Azure portal’s Monitor service.
- Under Settings, select Data Collection Endpoints.
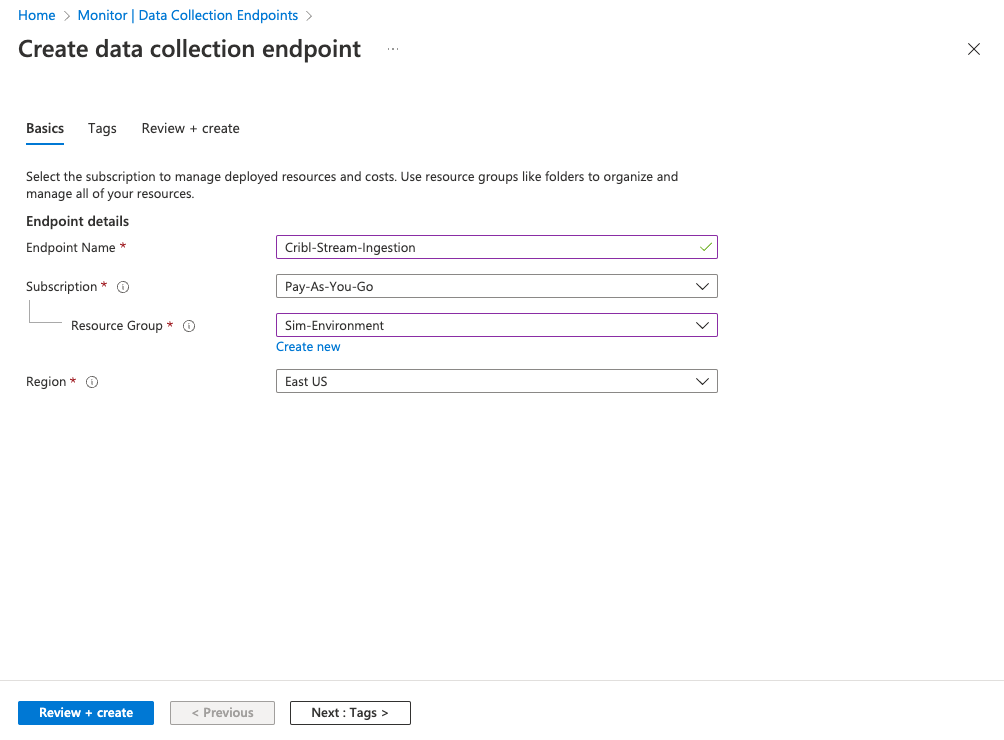
- Select Create and name the endpoint
Cribl-Stream-Ingestion. - Select the appropriate Subscription and Resource Group used by your organization.
- Select Review + create, review your changes, then select Create.
- In the list of Data Collection Endpoints, open the newly created endpoint. (You might need to refresh the page to see it.)
- Navigate to the Overview page, and copy and store the Logs Ingestion URL.
- Select JSON view, and store the value of the Resource ID (gray box at the top) for later use.
After creating the DCE, proceed to Create and Configure the Data Collection Rule.
Create and Configure the Data Collection Rule
Both configuration paths require a DCR, but they use different templates:
- DCR
kind:direct: Creates a DCR withkind:directthat includes an embeddedlogIngestion URL. - DCE method: Creates a standard DCR that references the DCE.
Both templates are available in the Cribl-Microsoft GitHub repository. Browse to the appropriate template for your use case.
Deploy the DCR Template
- Navigate to Deploy a custom template.
- Select Build your own template in the editor, then Load file to upload the appropriate DCR Template from the Cribl-Microsoft repository.
- Click Save.
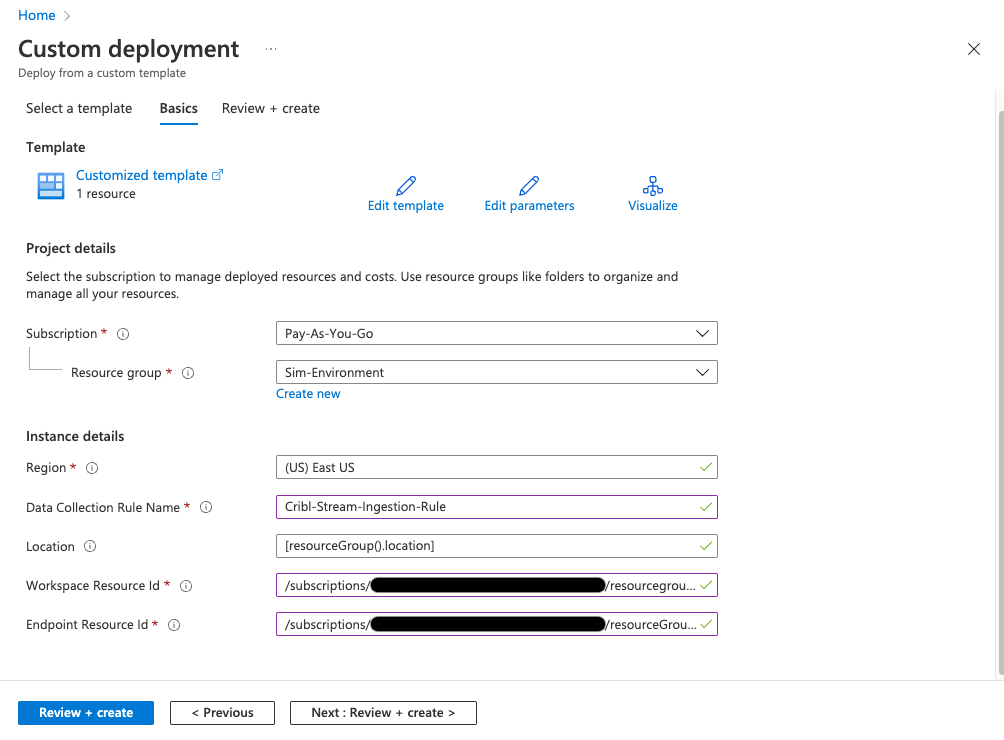
- Select the appropriate Subscription and Resource Group used by your organization.
- Name the rule
Cribl-Stream-Ingestion-Rule. - Enter the required parameters based on your configuration path:
- For DCR kind:direct configuration: Enter only the Log Analytics Workspace Resource ID.
- For DCE configuration: Enter the Log Analytics Workspace Resource ID, and the Endpoint Resource ID.
- To create the Data Collection Rule, select Review + create, followed by Create.
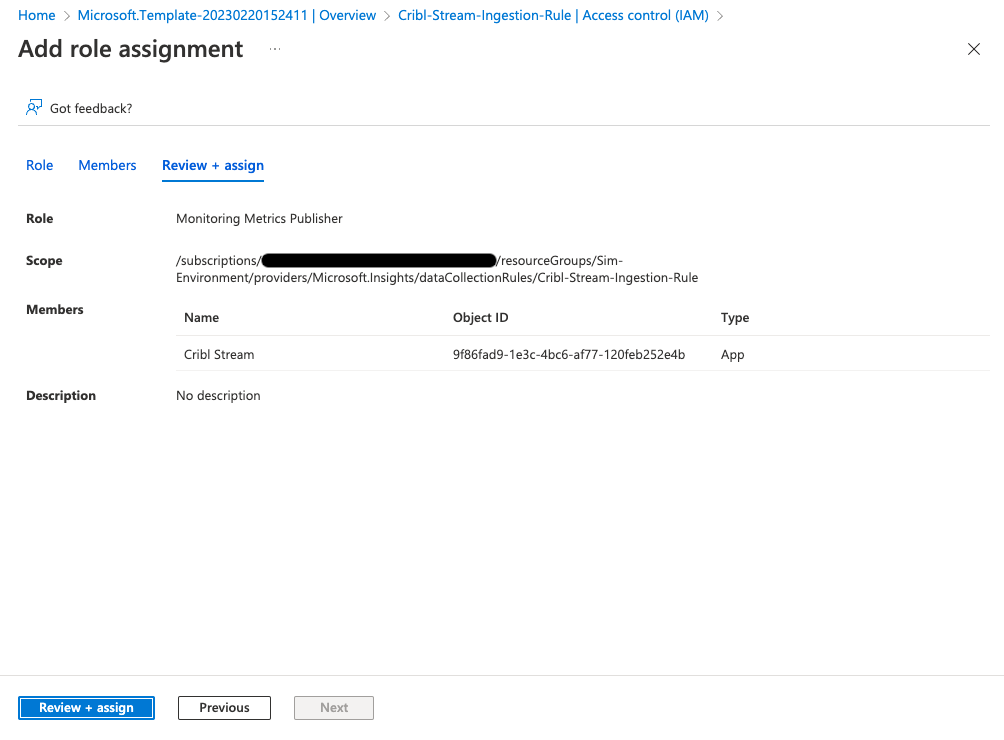
Configure Permissions: Add Role Assignment
- Once the template has been deployed, select Go to resource.
- From the Overview page, select the JSON view, and store the immutableId from the JSON body (without quotes) for later use.
- Click the Data Collection Rule’s Access control (IAM).
- Click Add role assignment.
- Select the Monitoring Metrics Publisher role, then select Next.
- Click + Select members.
- Search for and select
Cribl Stream(the app you created earlier), then select Select to confirm the selection. - Click Review + assign to review changes.
- Click Review + assign again to implement the permissions update.
Required Fields for Cribl Stream Configuration
After completing this setup, configure your Cribl Stream Azure Destination using the values in the following fields:
Application (client) IDDirectory (tenant) IDClient secret valueLog Analytics Workspace Resource IDData Collection Rule immutableId
Additional fields for DCE configurations:
Data Collection Endpoint Resource IDLogs Ingestion URL
Next Steps
- Configure your Cribl Stream Azure Destination using the collected credentials.
- Test the Pipeline.
- Monitor data flow in your Log Analytics workspace.
Additional Resources
- Cribl-Microsoft GitHub Repository - DCR templates and integration artifacts
- Azure Monitor data collection
- Data Collection Rules overview